How to Replace the Cable on the Endgame Gear XM1 Mouse
ID: 157650
Description: If your Endgame Gear XM1 mouse is...
Steps:
- Use the plastic spudger to peel off the four rubber feet on the underside of the mouse.
- Use the Phillips #1 screwdriver to unscrew the four 8.0 mm screws on the underside of the mouse.
- Use your hands to carefully separate the top and bottom shells from each other.
- The top and bottom shells should very easily separate without any force used to pull them apart.
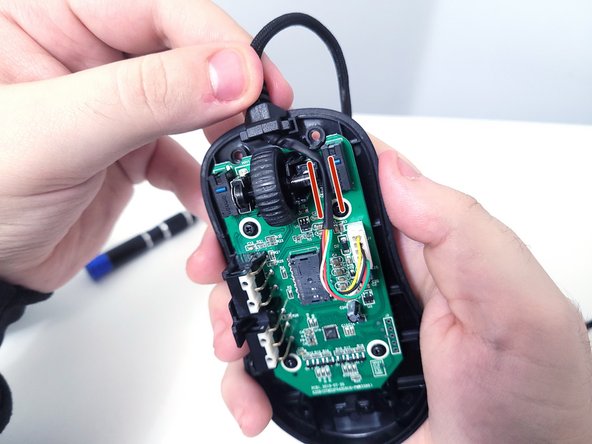
- Remove the stress relief from the base of the bottom shell.
- Using your fingers, pull the cable away from the connector in the same direction that the individual wires are running.
- Pull evenly on the full width of the cable so that no individual wires are overly strained. Avoid forcefully pulling or yanking the cable.
- Insert the replacement cable in the socket by lining up the pins on the socket to the holes on the cable connector, then push it in.
- Make sure that the two lines on the cable connector are facing the inside of the mouse.
- Route the cable between the scroll wheel and the Omron sensor.
- Place the stress relief in the designated opening at the base of the bottom shell.
- Be sure to push the cable down so that it is firmly secured between the mouse wheel and the right mouse switch.
- Line up the top and bottom shell, press them together, and make sure they click.
- Place the 8.0 mm screws in their designated holes, and screw them in using the Phillips #1 screwdriver.
- Install new mouse feet by lining them up with the grooves at each corner of the mouse, and apply pressure to assure that they stay in place.