Lenovo Thinkcentre M83 SFF Fan Replacement
ID: 157678
Description: Use this guide to replace a fan inside of a...
Steps:
- Disconnect all of the cables connected to the computer.
- Lay the computer on its side.
- Unscrew the 14.0 mm screw with your hands to remove the side panel.
- To remove the side panel press the release button and slide the cover to the rear of the computer.
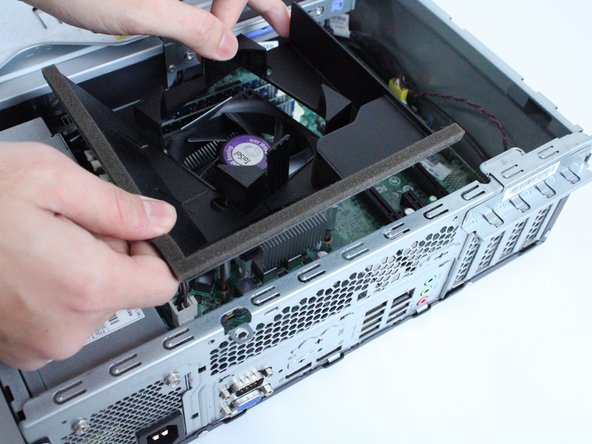
- Remove the fan cover by pushing the two tabs out slightly with your hands, and lifting the cover up gently.
- Use a Phillips #0 screwdriver to remove four 12.0 mm screws securing the fan to the heat sink.
- Pull the bundled fan cable away from the connector in the same direction as the individual wires are running to detach the fan from the motherboard.
- Pull evenly on the full width of the cable so that no individual wires are overly strained.
- Lift the fan out from the motherboard.
- Place the new fan on top of the heat sink and position it so that it aligns with the screw holes.
- Use a Phillips #0 screwdriver to replace the four 12 mm screws that secure the fan.
- Do not over tighten the screws.
- Clip the new fan's cable connector into the motherboard socket by aligning the pins together and pushing down.
- Don't jam the connector down as the pins can be damaged if they are not lined up properly.
- Place the fan cover back on.
- Slide the computers cover panel into place.
- Screw the 14 mm screw back in with your hands.