Beats Solo 3 Left Hinge Replacement
ID: 157723
Description: This guide explains how to replace the left hin...
Steps:
- Use a spudger or opening tool to peel the earpad away from the left earcup.
- Remove the tape around the earcup.
- Make sure to do this step gently to avoid damage to the headphones.
- Using a plastic or nylon prying tool is recommended to avoid damaging the device.
- Use a Phillips #00 screwdriver to remove the three screws from the left earcup.
- Gently remove the speaker.
- The speaker is connected to the motherboard by soldered wires so don't pull or yank the speaker off the earcup.
- Use a Phillips #00 screwdriver to remove two 0.4 mm screws that are holding down the audio jack's circuit board.
- Use a set of tweezers to gently pull out the audio jack board.
- Use a soldering iron to desolder the seven wires attached to the audio jack board from the the left ear cup.
- The two wires coming directly from the speaker to the audio jack do not need to be desoldered.
- Use a prying tool to separate the headphone cover.
- Gently pry up and around the cover to ensure it comes off without breaking.
- A plastic or nylon prying tool should be used rather than a screwdriver or metal spudger.
- Now that the outer and inner panels are separated, pull the desoldered wires through the back of the inner panel.
- To disconnect the three bundled connectors from the circuit board of the outer panel, pull the cables away from the socket in the same direction as the individual wires.
- Pull evenly on the full width of the cable so that no individual wires are overly strained.
- Gently pull the wires glued to the headband up.
- You may use a small pry tool to wedge under the wires.
- Pull back the rubber surrounding the left hinge.
- Use a Phillips #00 to remove two 0.3 mm screws from the left hinge.
- Pull the hinge out from the headband.
- If the hinge is severely broken, it may come out in several parts.
- Fold the hinge and expose the metal pins holding it in place.
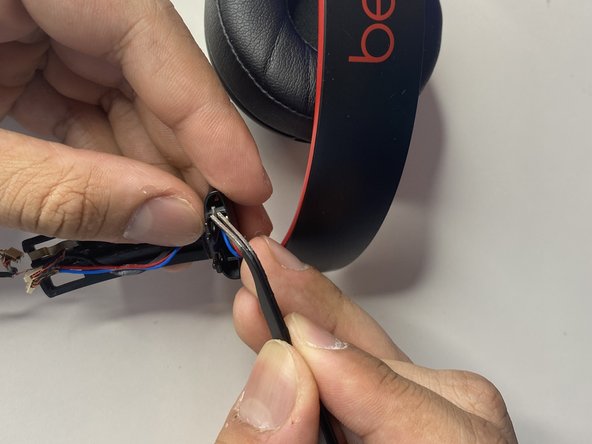
- Use a set of tweezers to remove one of the metal pins.
- Keep it for later use.
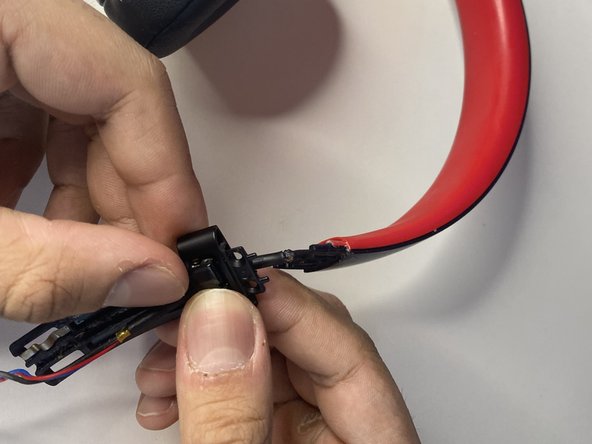
- Separate the hinge from the bracket and remove them from the wires.
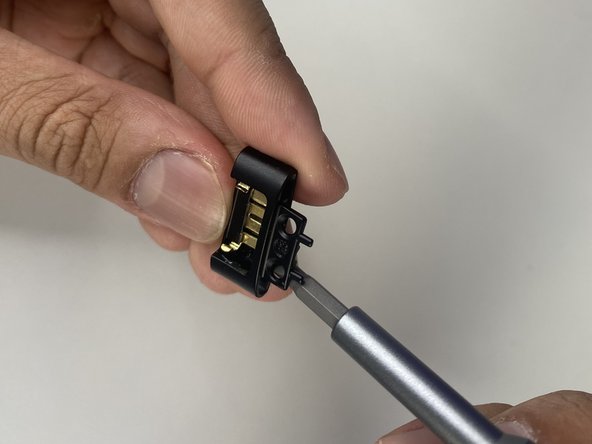
- Take your replacement hinge in hand and use tweezers to insert the copper plate it comes with.
- Push the plate down into the hinge's inner groove.
- This may require some force.
- Feed the wires through the new hinge and bracket.
- Clip the hinge and bracket together.
- Fold the hinge and carefully insert its metal pin.
- Insert the hinge into the headband.
- Pull back the rubber surrounding the hinge.
- Use a Phillips #00 screwdriver to replace the two 0.3 mm screws that fasten the hinge to the headband.
- Congratulations you have replaced the hinge! You may cycle back through the steps to complete reassembling.