JBL Charge 5 Battery Replacement
ID: 158215
Description: Use this guide to replace a worn-out or dead...
Steps:
- Before starting repairs, turn off your device and unplug any cables.
- Depending on the model, some fabric covers are secured only by plastic clips, while others use both plastic clips and screws.
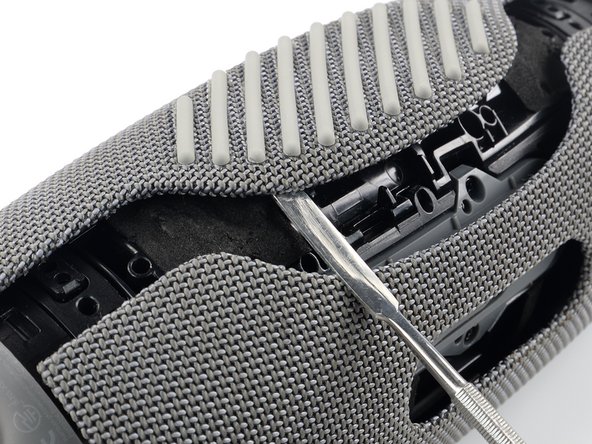
- Begin prying only on the edge shown in the photos. Otherwise, you run the risk of damaging the fabric cover's clips if your model's cover is also secured with screws.
- Insert the flat end of a metal spudger into the seam between the two halves of the fabric cover.
- Push the spudger underneath the edge of the fabric cover without the textured rubber and pry upwards to release its plastic clips.
- Repeat the previous step, using your spudger to work your way along the entire seam to release the remaining plastic clips.
- Use a Phillips screwdriver to remove the two 10.6 mm-long screws securing the fabric cover.
- Don't try to fully remove the fabric cover just yet, as it‘s still held in place by more plastic clips.
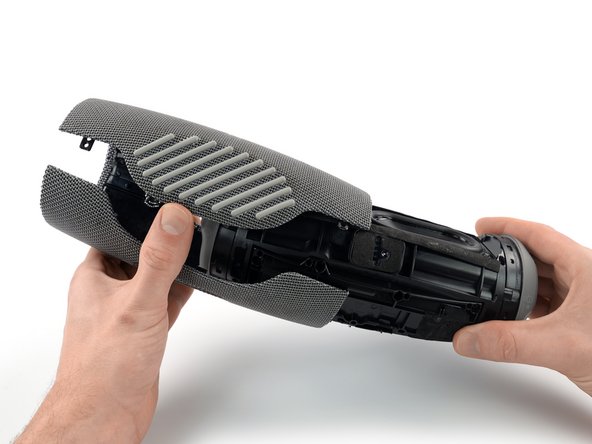
- Use your metal spudger to pry up the other edge of the fabric cover—the side with the textured rubber—to release the remaining plastic clips.
- Use one hand to spread the edges of the fabric cover apart and your other hand to pull the speaker assembly away from the cover.
- Remove the fabric cover.
- Use a Phillips screwdriver to remove the eight 10.6 mm-long screws securing the battery cover.
- Remove the battery cover.
- Depending on your model, the battery cable can vary in length. If your battery cable is short, be extra careful not to strain it during the following steps to avoid damaging the connector.
- Lift the battery up and shift it out of the way to gain access to the battery connector. Don't try to completely remove it just yet—it's still connected to the device.
- During reassembly, this is a good point to power on your device and test your repair before reinstalling the fabric cover.
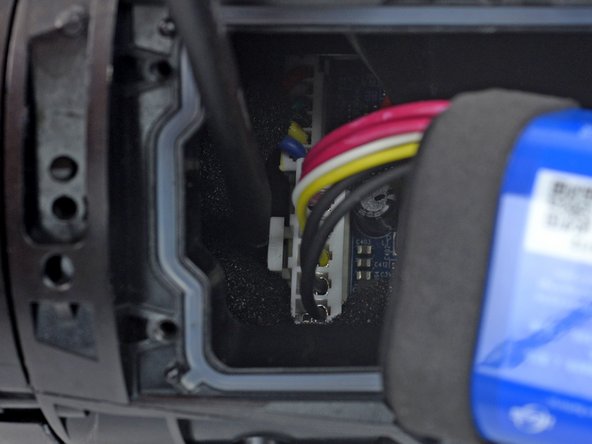
- The battery is connected to the motherboard with a power cable connector that has a small tab on the side that locks it in place.
- To release a connector like this you need to squeeze the tab against the connector, and pull the connector straight up from its socket to disconnect the battery.
- Insert a plastic spudger into the battery connector cutout.
- Use your spudger to squeeze the tab against the connector to release it.
- Use your free hand to grab the battery cables just above the connector and pull the connector straight up from its socket wiggling it left and right to loosen the clips securing it.
- Remove the battery.