Midas Pro 2C CMOS Battery Replacement
ID: 158365
Description: If your Midas Pro 2C Console is producing a...
Steps:
- Turn the Midas Pro 2C off and ensure your work area is clear.
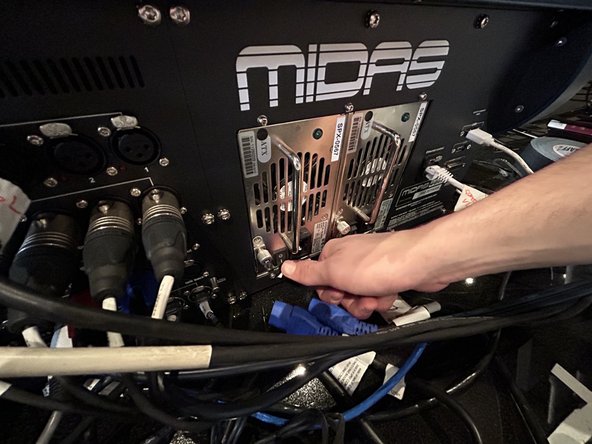
- Flip the switches connected to the two power supply units (PSU) to the off position.
- Carefully remove the cords from both PSU’s.
- Flip both PSU switches back to the on position.
- Leave the PSUs on for 30 seconds to ensure that the power is fully discharged from the units.
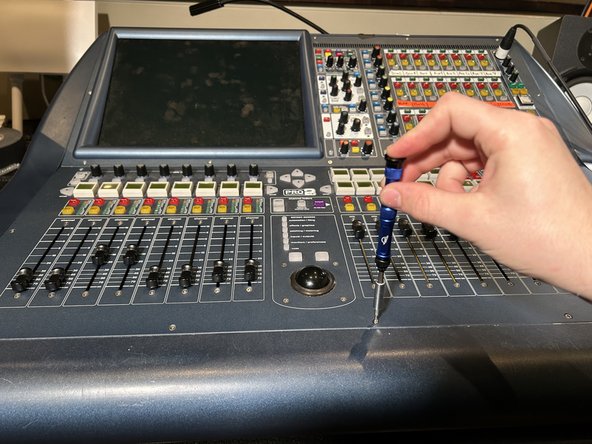
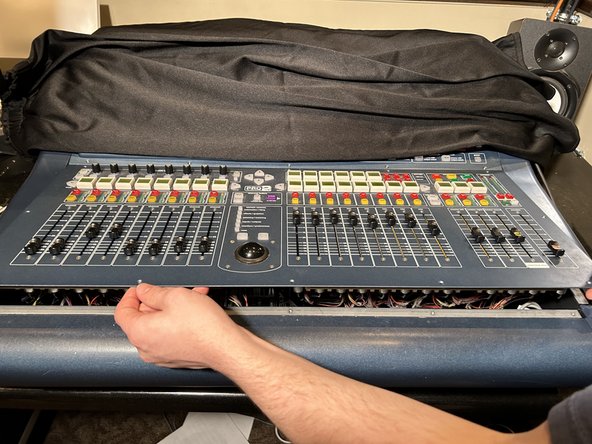
- Remove the twelve 10 mm T10 Torx screws from the cover of the console.
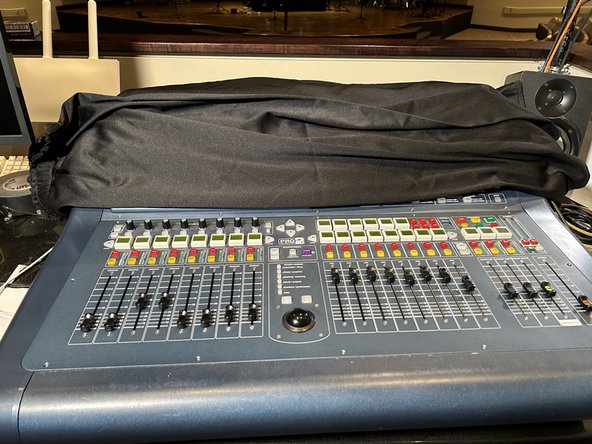
- Set a cloth down over the top half of the console to protect it from damage in the following steps.
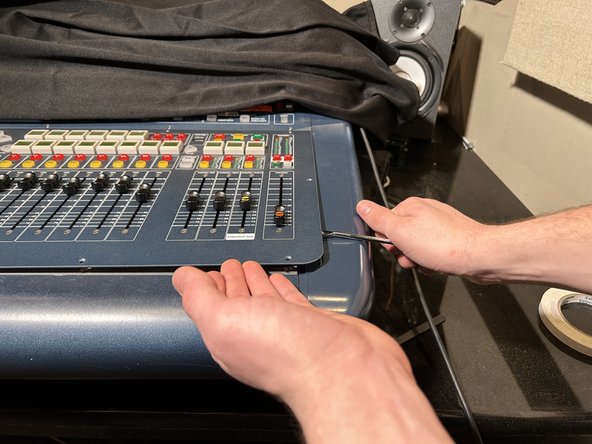
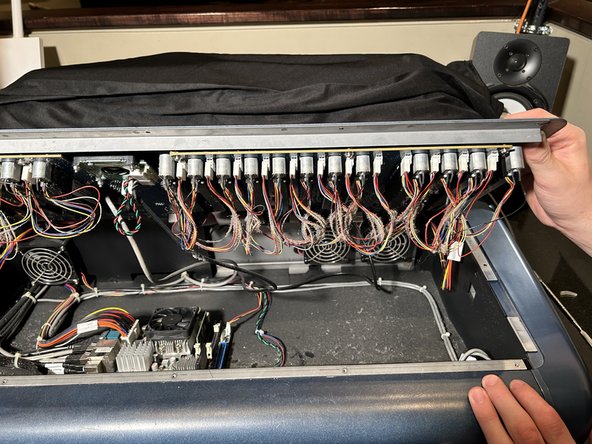
- Use a metal spudger to carefully pry the control panel from the console.
- Work your way around the perimeter with the spudger to undo the clips securing the control panel and remove it from the console.
- Keep your hand in constant contact with the panel, dropping it may damage the unit.
- Lift the panel very slowly and ensure none of the fader's cables get stuck on the inside edge of the console.
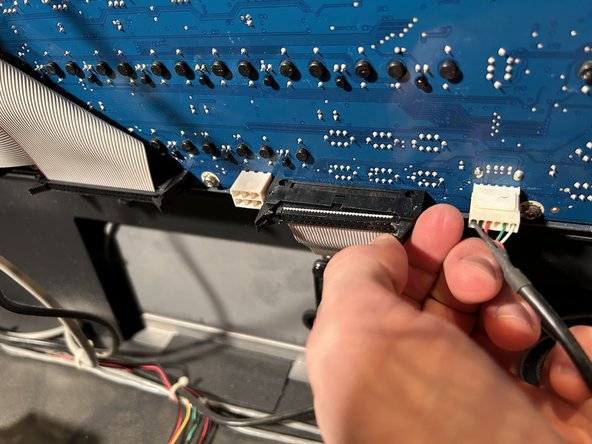
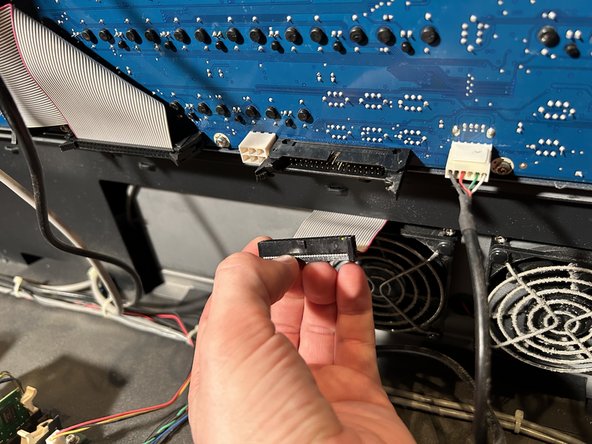
- Disconnect the ribbon cable from the control panel by moving the two black latches outward, away from the cable.
- Pull out the cable.
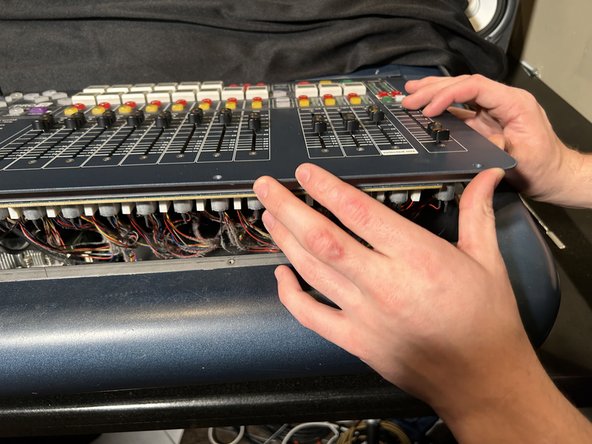
- Lay the panel against the material you used to cover the top section of board but make sure panel doesn't slide or fall.
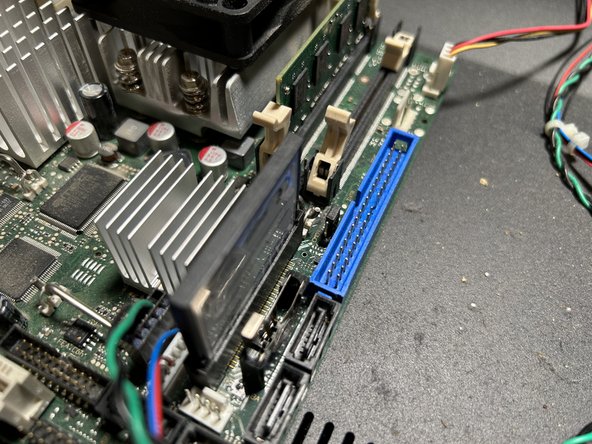
- Identify the CMOS battery to the right of the circuit board.
- To remove the battery, push the metal tab out of the way, and use the tweezers to pull out the old battery.
- Check with your local battery recycling guidelines to discard the old battery.
- To insert the new 2032 battery, push the tab back and slide in the new battery.
- Make sure the new battery is oriented the same way as the old battery.
- Reattach the ribbon cable to the control panel.
- Secure the locking latches by pushing them towards the cable.
- Carefully lower the panel back onto the console, make sure the wires aren’t being pinched as you set the panel back down.
- Replace the screws to attach the control panel to the the console.
- Make sure both PSUs are off, then plug the UPC cables back in.
- Turn both the PSU units on, this should switch the console on.
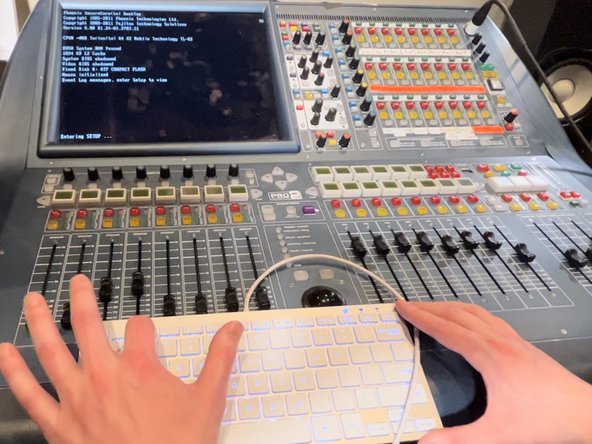
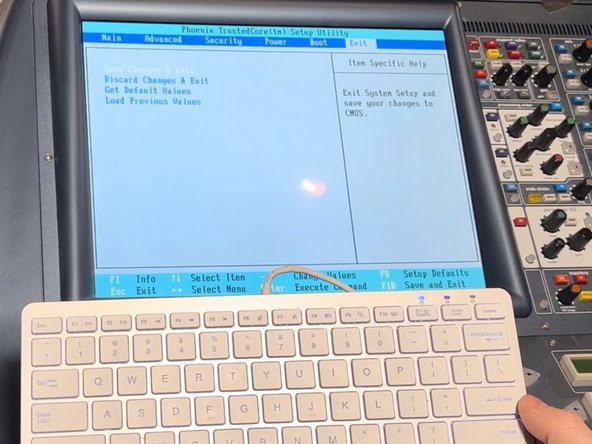
- As the console turns on and boots up, press F2 frequently until the console enters into the set-up menu.
- Read directions on the console to navigate through the set up menu.
- Change the date and time they are correct.
- Click down with arrow key to the "excluded from boot order list".
- Press the X key while “ATP Compact Flash” is highlighted in white.
- This adds the operating system back to the order.
- Navigate to the exit.
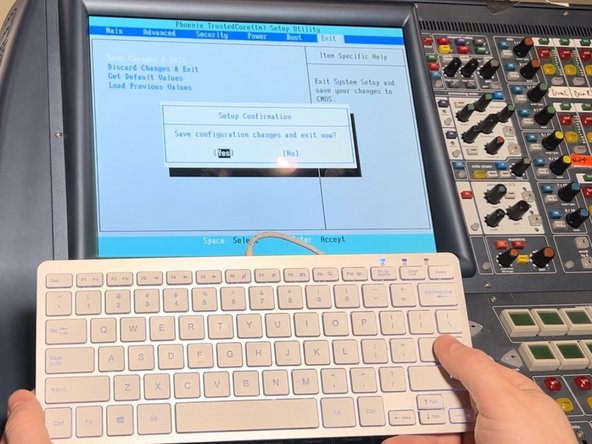
- Arrow key down to save and exit.
- Confirm changes by selecting yes.
- The console should reboot back into the operating system.
- Ensure the console date and time is set correctly and if not repeat steps 12 through 14.