Heyday Wireless Speaker 8125 Charging Port Replacement
ID: 158379
Description: Is your Heyday Wireless Speaker 8126 not...
Steps:
- Orient the speaker so that it is sitting upright.
- Use your nondominant hand to hold the speaker in place while you firmly push the plastic spudger into the seam between the device wall and the grille.
- Push down with the plastic spudger and lift the grill until you feel it separate from the speaker.
- Gently remove it from the top of the device.
- Use tweezers to remove the four black rubber screw covers.
- Use a Phillips screwdriver to remove four 8.9 mm screws underneath the screw covers.
- Once all four screws are out, gently pull the black cover out using your hands or use a spudger to pry it out.
- The cover is attached to the motherboard beneath by the speaker cable. Don't yank the cover from the device. You will need to detach the connector from the socket before removing it entirely.
- Use a Phillips screwdriver to remove four 6.6 mm screws from the motherboard.
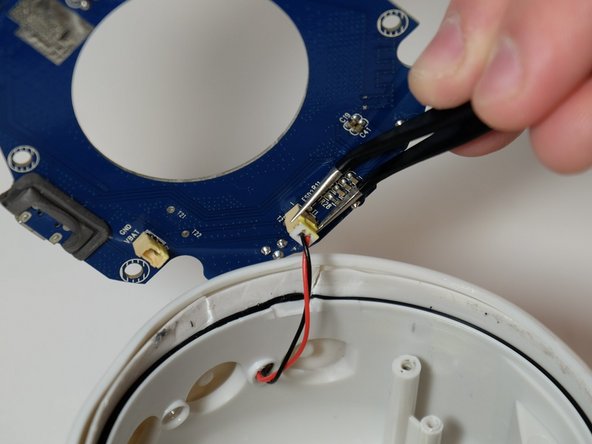
- Lift the motherboard out of the speaker gently.
- It's attached below by a couple of cables, so don't pull it out.
- Pull each cable away from the connector in the same direction that the individual wires are running.
- Pull evenly on the full width of the cable so that no individual wires are overly strained.
- Remove the motherboard from the device.
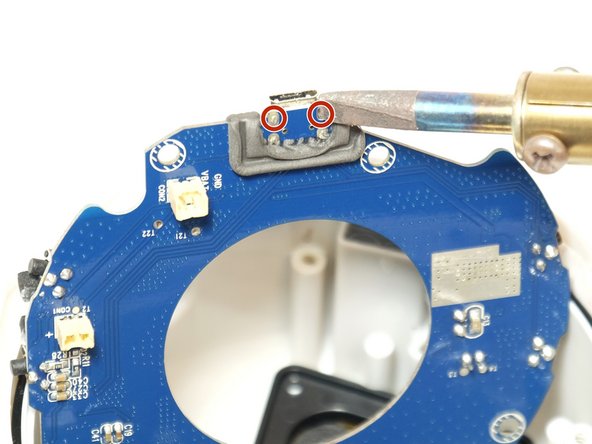
- Flip the board upside down.
- Use a soldering iron to desolder the charging ports' solder joints.
- Please refer to the How To Solder And Desolder Connections guide link for more information on soldering.
- Use caution when soldering. Not only can the soldering tool harm you, but if used incorrectly, it could damage the device's motherboard as well.
- Remove the charging port.