JBL Xtreme 2 Battery Replacement
ID: 158394
Description: Use this guide to replace a worn-out or dead...
Steps:
- Before starting repairs, turn off your device and unplug any cables.
- The fabric cover of the JBL Xtreme 2 is secured by plastic clips and screws. To avoid damaging the cover, begin prying on the edge closest to the ports.
- Insert the flat end of a metal spudger into the seam between the two halves of the fabric cover.
- Push the spudger underneath the edge of the fabric cover and pry upwards to release its plastic clips.
- Insert the flat end of a metal spudger underneath the edge of the fabric cover's center section.
- Push the spudger underneath the edge of the fabric cover and pry upwards to release its plastic clips.
- Insert the flat end of a metal spudger underneath the second short edge of the fabric cover.
- Push the spudger underneath the edge of the fabric cover and pry upwards to release its plastic clips.
- Use a Phillips screwdriver to remove the two 8.6 mm-long screws securing the fabric cover.
- Don't try to remove the fabric cover all the way yet, as it‘s still held in place by more plastic clips.
- Repeat the previous prying procedure, starting with the opposing short edge of the fabric cover.
- Insert the flat end of a metal spudger and pry upwards to release the plastic clips.
- Insert the flat end of a metal spudger underneath the long edge of the fabric cover and pry upwards to release the plastic clips.
- Insert the flat end of a metal spudger underneath the short edge of the fabric cover and pry upwards to release the remaining plastic clip.
- The fabric cover of the JBL Xtreme 2 is equipped with a hinge.
- Place your speaker on your working surface with the Xtreme 2 branding facing upwards.
- Open the hinge of the fabric cover by folding it upwards.
- Lift the speaker assembly up and away from the fabric cover.
- Remove the fabric cover.
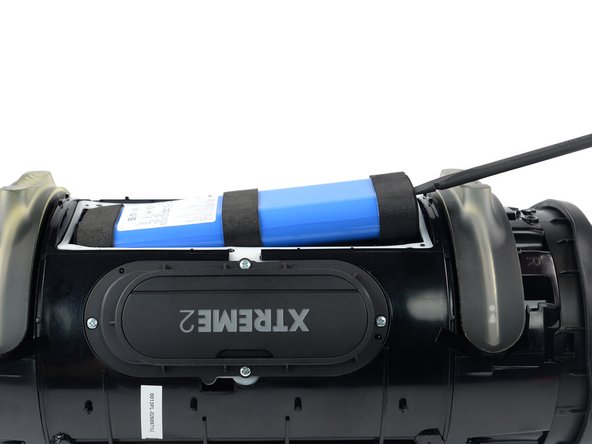
- Use a Phillips screwdriver to remove the six 8.6 mm-long screws securing the battery cover.
- Remove the battery cover.
- Insert a spuder into the gap between the bottom end of the battery and its recess.
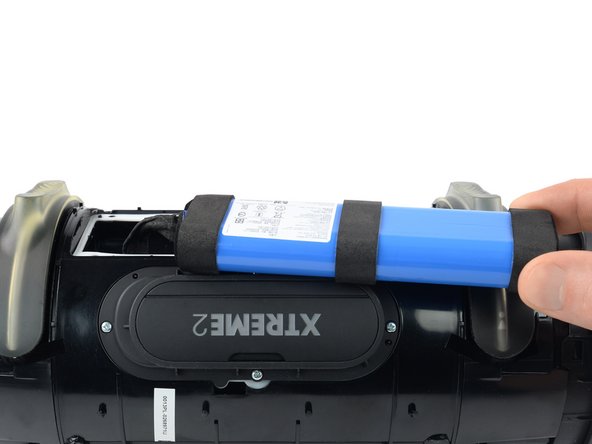
- Pry upwards to lift the battery until you can grip it with your fingers.
- Avoid straining or sharply bending the battery cable during the following step. Move the battery just enough to get access to the battery connector.
- Lift the battery out of its recess and carefully pull it to the side to get free access to the battery connector.
- During reassembly, this is a good point to power on your device and test your repair before reinstalling the fabric cover.
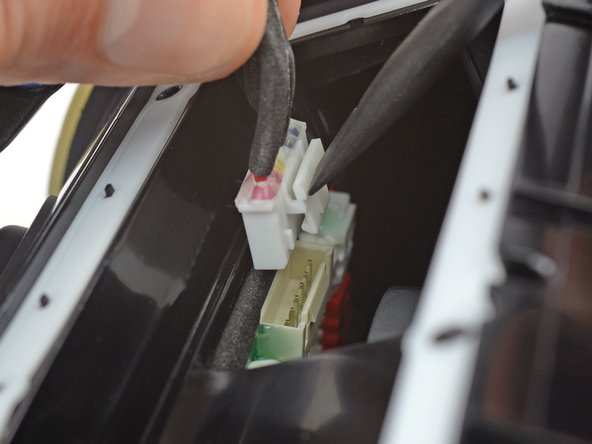
- The battery is connected to the motherboard with a power cable connector that has a small tab on the side that locks it in place.
- Insert a spudger into the cut-out in the battery recess where the battery connector is located.
- Use your spudger to squeeze the tab against the connector to release it.
- Use your free hand to grab the battery cable just above the connector. Pull the connector straight up from its socket, wiggling it back and forth to loosen the clips securing it.
- Remove the battery.