SCUF Reflex Joystick Replacement
ID: 158459
Description: Follow this guide to replace the joystick...
Steps:
- Insert an opening pick underneath the middle trim at the bottom-right corner of the controller to release the clips.
- Loosen the rest of the clips and take the middle trim out.
- Use a tool to pop the R1 and L1 buttons off of the controller.
- Unscrew and remove the screw from the bottom of each grip.
- Unscrew the screws behind the L1 and R1 buttons.
- Pull the joysticks off of the controller.
- Pull the scuff buttons off the back of the controller by sliding them down.
- Slide the prying tool down the edge of the rear casing of the controller to remove the rear case.
- Be sure to deal with all the clips!
- Slide the battery out of the controller. It's grey and held in by a couple of wires, so be careful not to damage them.
- Unplug the battery to finish removing the battery from the controller.
- Unscrew the screw on the back of the controller to remove the battery bracket.
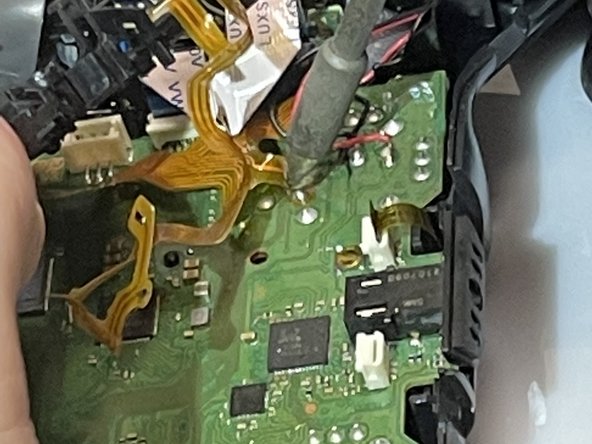
- Use a soldering iron to desolder the ribbon cables on the motherboard.
- Unplug these four cables from the motherboard.
- Use the soldering iron to desolder the black and red wires off of the motherboard.
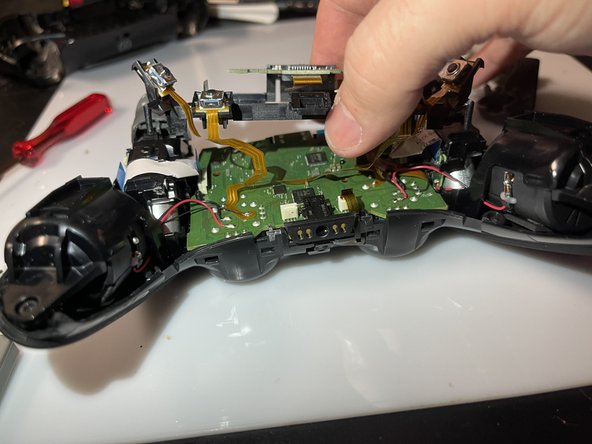
- Remove the motherboard and the battery bracket from the controller to expose the joystick component.
- Use the soldering iron and the desoldering pump to desolder the 14 connections for the component.
- Remove the component from the motherboard.
- Put the new component on the motherboard.
- Use the soldering iron to connect the new component to the motherboard.