Disassembly Fujitsu Primergy
ID: 158523
Description: This server was developed for quick and easy...
Steps:
- Pull the green tab on the side and pull back the panel.
- Remove the panel and store it somewhere.
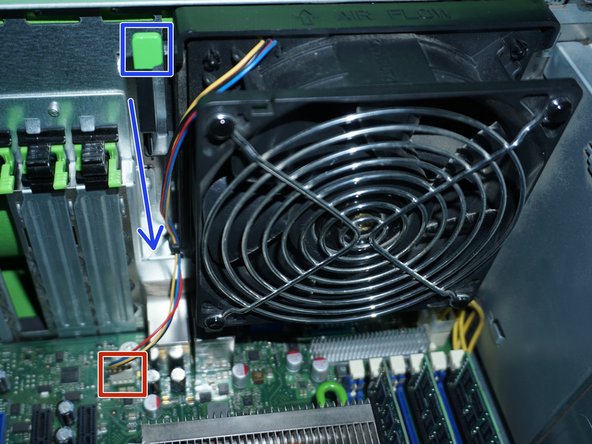
- Press the two green tabs and pull up the fan on the CPUs.
- Be careful to take it easy, the fan cable is short (red arrow).
- To remove the second fan you have to pull the green tab and pull the fan up.
- Pay close attention to the socket, it may get damaged.
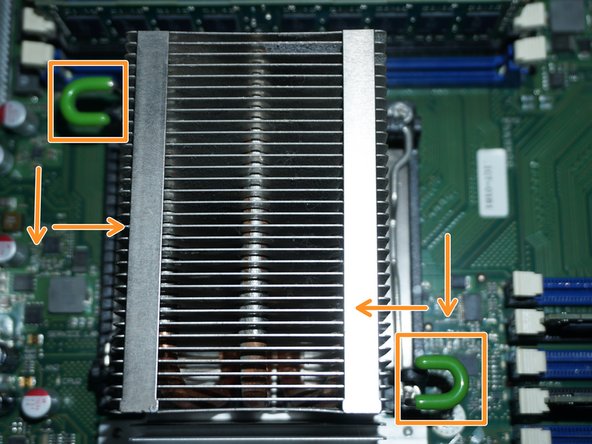
- Press down and at the same time move the two green tabs in (in orange).
- Lift the heat sink.
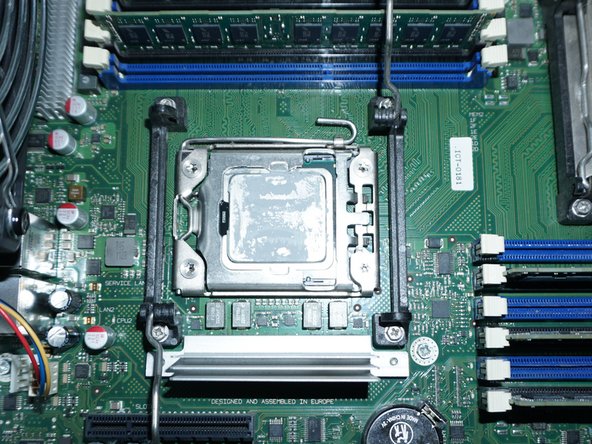
- Repeat the procedure to open the socket.
- Repeat the procedure to open the socket.
- Clean the thermal paste and apply new ones.
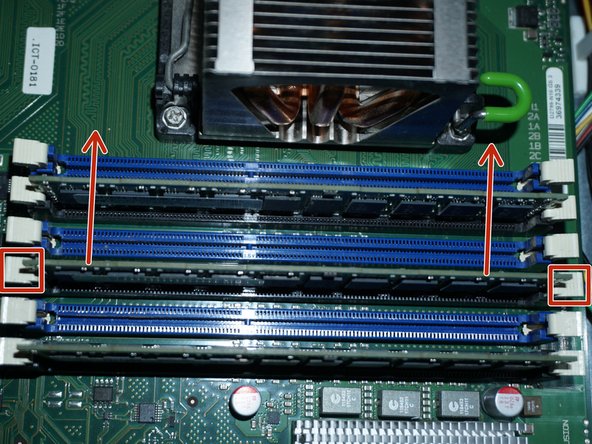
- To remove a RAM bank you have to press hard on the white clips.
- Repeat the procedure for all desks.
- Replacement RAM is present on Amazon.
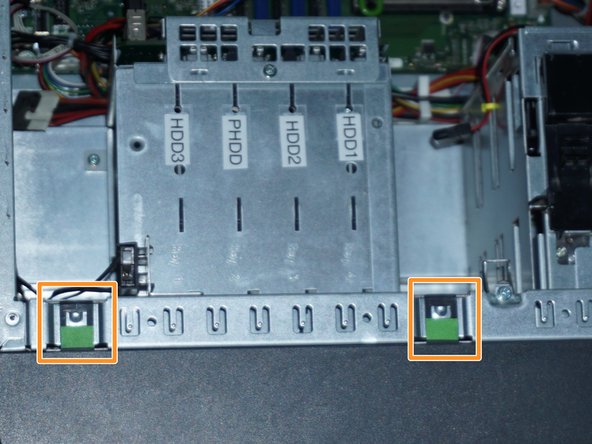
- Pull out the 3 green tabs (in orange) and open slowly as if it were a door.
- The tabs are very fragile.
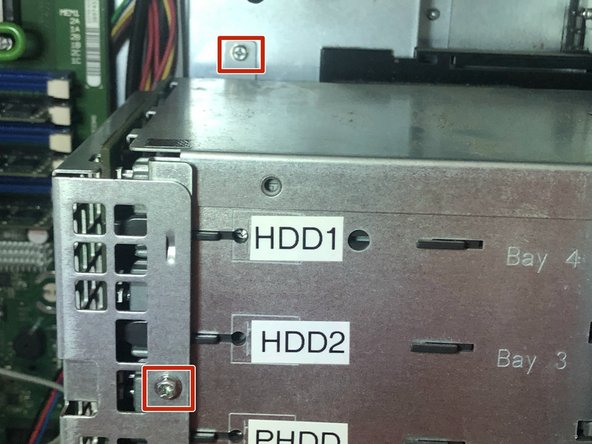
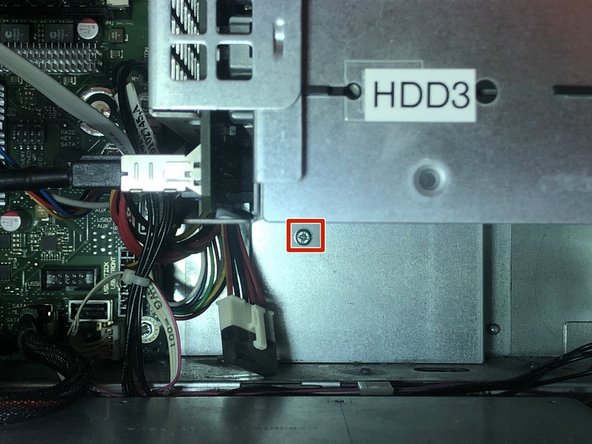
- To remove the HDD caddy (Bay 3.5") you need to unscrew hidden screws.
- Unscrew the three screws as shown in the photo.
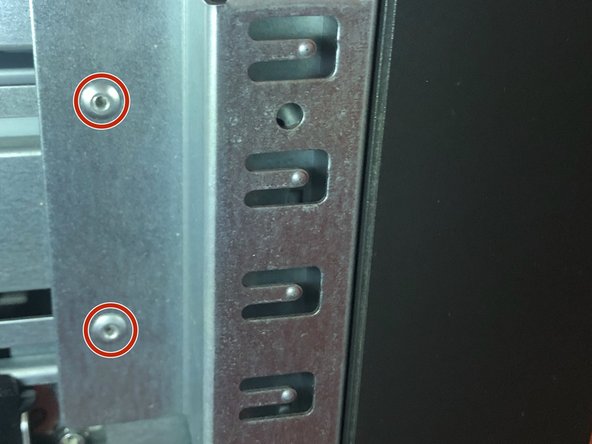
- Disconnect and the cables and pull out the front of the caddy.
- The CD player caddy (Bay 5.25") is NOT removable because it is sold to the case.
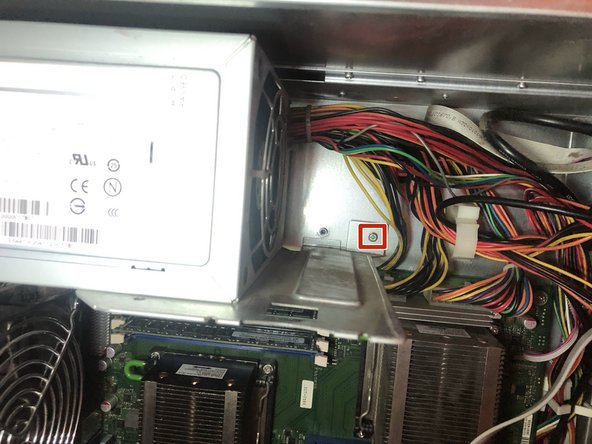
- Attention, the power supply can still be charged even when turned off. Handle with care.
- Disconnect all cables from the motherboard (4x8Pin + 24Pin), peripherals (SATAPower) and caddy.
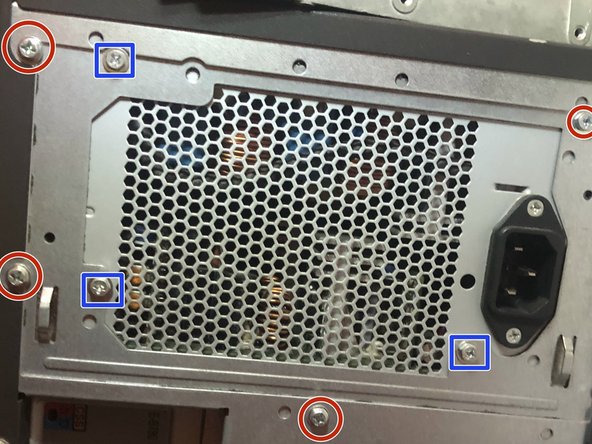
- Unscrew the screw inside the case and the screws placed on the outside.
- The external screws (in blue) secure the power supply to its caddy and are to be removed once out of the case.
- Slide the power supply inward and pull it out.
- TO BE FINISH