New Nintendo 3DS XL Top and Bottom Outer Casing Replacement
ID: 158770
Description: This guide provides information on how to...
Steps:
- Ensure that the system is turned OFF.
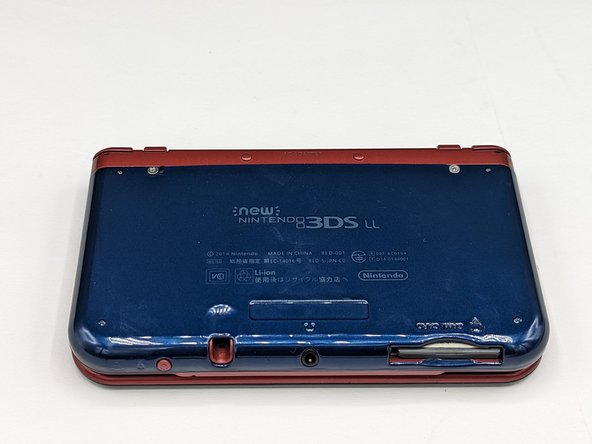
- Place the device on a hard surface with the rear panel facing you.
- Unscrew the two 2.0 mm screws in a counterclockwise motion using a Phillips #00 screwdriver.
- A "click" sound will be made after each successful unscrewing.
- Pry open the wedges of the rear case by using a pick.
- Unhinge the corners with a pick if the case is not coming loose easily.
- Detach the rear case by pulling it away from the device.
- Make sure the battery is in its seated position.
- Place the replacement rear case onto the rear panel of device.
- Snap the new case in place by pressing its wedges onto the rear panels.
- A click sound will indicate successful locking of the wedges.
- Screw in a clockwise motion the 2.0 mm screws using the Phillips #00 screwdriver.
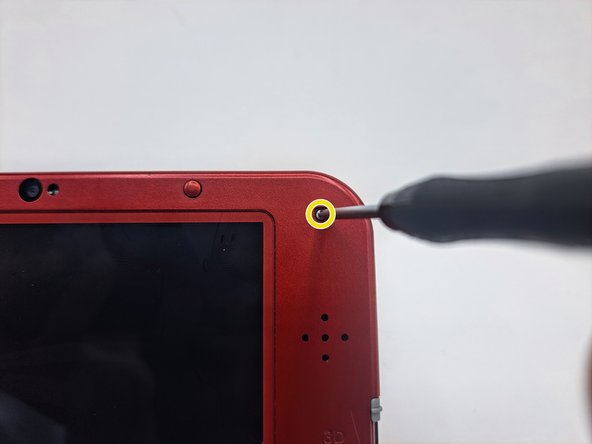
- Flip the device over to its top side and open its lid.
- Be careful when using the tools close to the screen.
- Remove the rubber pieces with the help of tweezers.
- Unscrew the 2.0 mm screws in a counterclockwise motion with a Phillips #00 screwdriver.
- Close the device's lid and position it so that the top panel is facing towards you.
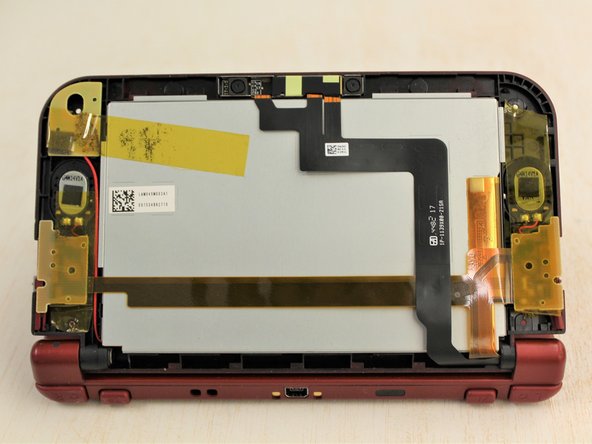
- From the hinge, slide the outer portion of the top shell so that it separates from the inner portion.
- Once the casing is loose, detach the top case by lifting the casing off.
- If your replacement case comes with its own camera lens, this step does not apply to you and you may proceed to the next step.
- Pull the camera lens from the original case with the help of tweezers.
- Slot the camera lens into the new case.
- Repeat the steps above for the second camera lens.
- Reassemble the top case with the replacement piece by following instructions in reverse.