Dell Inspiron 3521 CMOS Battery Replacement
ID: 160162
Description: Access the motherboard to replace the CMOS...
Steps:
- Make sure laptop is turned off and unplugged.
- Turn over the laptop, and push in the clips to take out the battery.
- Remove the screws to take off the surface cover.
- Make sure to keep small screws organized in Step 2 and all subsequent steps to make reassembly easier.
- Remove screws securing the hard drive
- Remove hard drive by pulling on the tab to slide it out.
- Remove the memory card by pressing on the latches on either side.
- Remove the screws securing the optical drive, then slide out the optical drive.
- Remove all remaining screws on the back.
- Turn computer over and open it.
- Carefully pry off keyboard using spudger.
- Be careful not to damage ribbon cable while removing the keyboard.
- Remove the ribbon cable by pulling up on the tab where it is attached, then slide it out.
- Unplug the smaller ribbon cable by pulling up on the tab where it is attached, then slide it out.
- Unplug the motherboard cable by pulling up on the tab where it is attached, then slide it out.
- Remove all screws from palm rest
- Remove palm rest by carefully prying it off with a spudger.
- Unplug the white ribbon cable by pulling up on the tab where it is attached, then slide it out.
- Gently pull out the connecting cable.
- Unplug the black and white cables connected to the Wi-Fi chip.
- Disconnect screen by removing all remaining screws.
- Remove screws securing the Wi-Fi chip, then remove Wi-Fi chip.
- Locate and disconnect connecting cables on motherboard.
- Remove the remaining screws securing the motherboard to remove it.
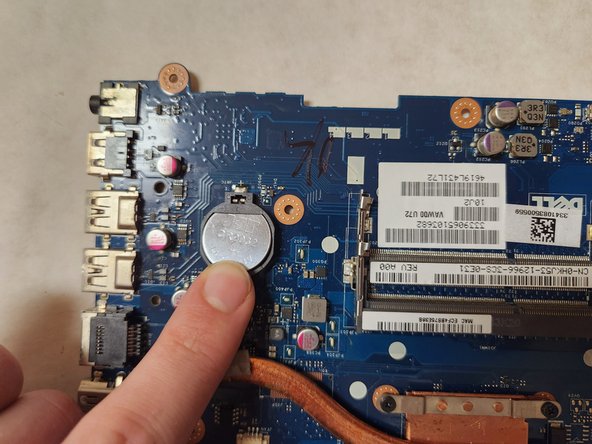
- Flip over motherboard and locate CMOS battery
- Pry off battery with spudger.
- Place new CMOS battery in motherboard.
- Repeat all steps backwards to reassemble computer.