PlayStation 2 Slimline SCPH-900xx Motherboard Replacement
ID: 160176
Description: Follow this guide to replace the motherboard of...
Steps:
- Turn off your PlayStation 2 and remove the disc and Memory Card.
- Turn over the PlayStation 2 and put it on a soft surface (e.g. a towel).
- Locate the six covers.
- Two are located underneath the feet.
- One cover is located underneath the Void sticker.
- Remove the Void sticker with a Spudger and some cleaning alcohol
- Removing the Void sticker will void the warranty of your device!
- Some versions of that console maybe don’t have the sticker or it’s relocated.
- Remove the covers by using either a Spudger, Opening Picks or your fingernail.
- Remove the six Phillips #1 screws with a screwdriver.
- The screws on the right are a bit deeper inside the shell as like the rest but are the same size.
- Separate the clips at the front and the overhanging side from their mounting using a Prying Tool.
- Separate the two halves.
- Remove the Phillips screw from the power supply.
- Remove the power supply connector from the motherboard.
- To separate the connector from its socket, squeeze the tab against the connector, and pull the connector straight up from the socket.
- Lift the power supply straight up and out of the PS2.
- Pull the ribbon cable straight out from the socket.
- To reinstall the cable, hold it near the end and push it straight into the connector, being careful not to kink the cable. If you can, apply the force to the plastic reinforcement rather than the cable itself.
- Lift the phalanx up and out of the PS2.
- Pull the ribbon cable straight out from the socket.
- To reinstall the cable, hold it near the end and push it straight into the connector, being careful not to kink the cable. If you can, apply the force to the plastic reinforcement rather than the cable itself.
- Remove three Phillips #0 screws securing the fan.
- Lift the fan straight up and out of the PS2.
- Pull the two ribbon cables straight out from their sockets.
- To reinstall the cables, hold it near the end and push it straight into the connector, being careful not to kink the cable. If you can, apply the force to the plastic reinforcement rather than the cable itself.
- Turn around the PS2 by 180 degrees.
- Lift the optical drive up from its four mountings.
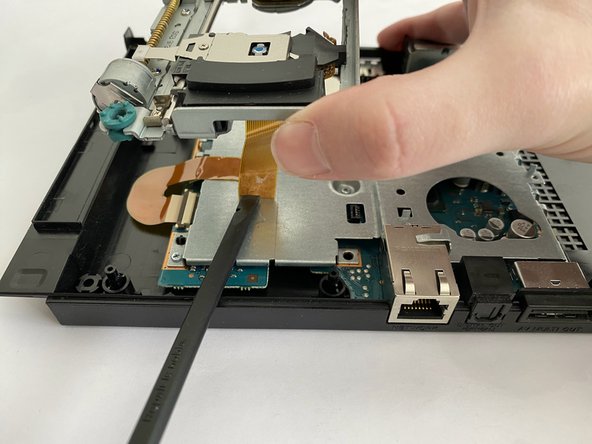
- Remove the glued ribbon cable from the EMI shield using a spudger and some isopropyl alcohol.
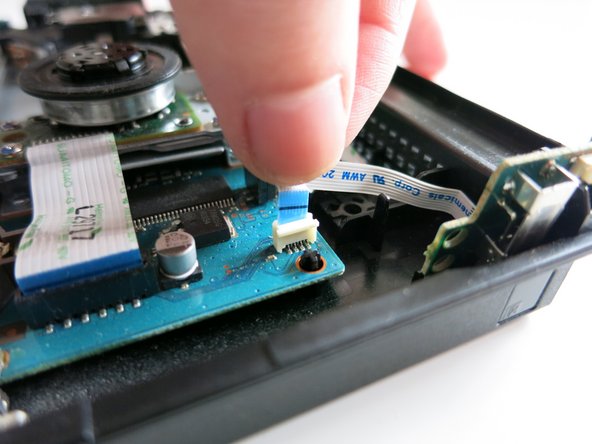
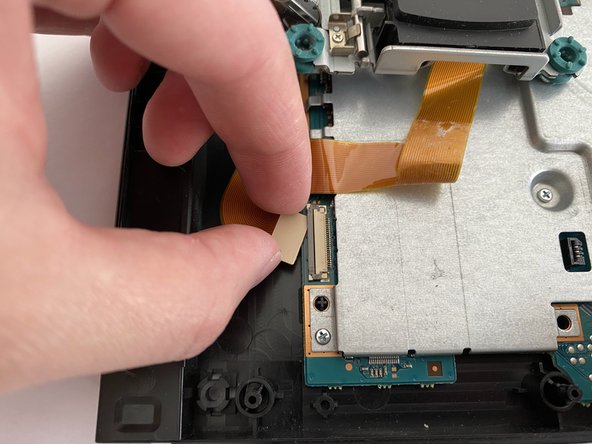
- Pull the ribbon cable straight out from the socket.
- To reinstall the cable, hold it near the end and push it straight into the connector, being careful not to kink the cable. If you can, apply the force to the plastic reinforcement rather than the cable itself.
- Finally remove the optical drive from the PS2.
- Remove seven Phillips #0 screws from the motherboard.
- Lift up both the mainboard and EMI shield from the case by lifting up the rear edge first.
- Remove the EMI shield from the motherboard.
- The EMI shield may be hard to remove due to the old thermal pad. In this case pull a bit stronger. If that's not successful apply some isopropyl alcohol around the thermal pad to free the shield.
- The motherboard is now fully disassembled.
- Before reinstalling the EMI shield applying a new thermal pad is necessary.
- Remove the old thermal pad from the processor using a spudger and some isopropyl alcohol.
- Remove any residues of the old thermal pad from the processor and the EMI shield with some isopropyl alcohol.
- Cut out a piece of thermal pad with 0,5 mm of thickness (20 mil) and the dimensions of 3 cm × 3 cm (1.2 in × 1.2 in).
- Remove the film from one side of the thermal pad.
- Place the thermal pad on the processor and press it down a little to make sure it sticks.
- Remove the remaining film from the thermal pad.
- If the films of the thermal pad are not removed, the pad cannot conduct any heat. As a result your PS2 will overheat.