Olympus Stylus 1030 SW Flash Assembly Replacement
ID: 160262
Description: The device being repaired is the Olympus Stylus...
Steps:
- Remove the three screws in the corner of the front plate using a Phillips #00 screwdriver.
- Lift up on the plate until it comes off the rest of the camera.
- Use the Phillips #00 screwdriver to remove the two screws on both of the side plates of the camera.
- Remove the screw using the Phillips #00 screwdriver from the bottom of the camera.
- Turn the camera so the short side without the av port is facing you.
- Remove both of the screws on this side using the Phillips #00 screwdriver.
- Remove the front case.
- Face the camera so the short side with the AV port facing you. Use your Phillips #00 screwdriver to remove the single screw.
- Turn your camera so the other short side is facing you. Use the Phillips #00 screwdriver to remove the two screws on the silver parts.
- Face the bottom of your camera towards you and remove the single screw using the Phillips #00 screwdriver.
- Open the battery door and use your Phillips #00 screwdriver to remove the screw in the middle of the opening.
- Use the spudger to pry at the rear case until it comes off.
- Flip the camera so the front is facing you.
- Use your Phillips #00 screwdriver to remove the three screws located in the corners on this side.
- Turn the camera so you are looking at the top.
- Use your Phillips #00 screwdriver to remove the single screw.
- Use your spudger to gently pry at the side of the LCD screen and the cover over it.
- Gently take it apart, using caution with the motherboard and battery.
- Use your Phillips #00 screwdriver to remove the three screws.
- Use your Phillips #00 screwdriver to remove the three screws.
- Pull the foam to the side gently and use your Phillips #00 screwdriver to remove the single screw.
- Use your tweezers to gently pull the motherboard out of the camera.
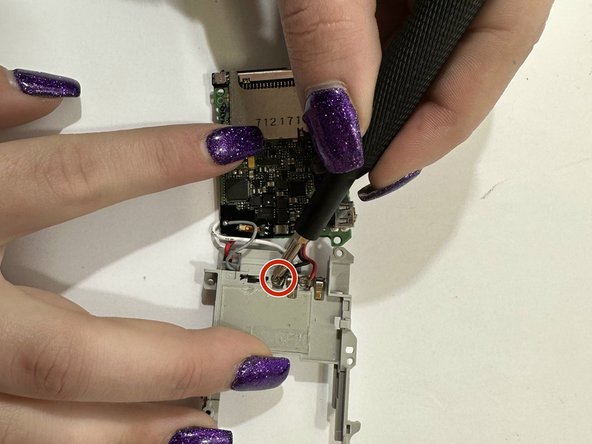
- Use your Phillips #00 screwdriver to remove the two screws holding the wires to the flash assembly.
- Use your tweezers to gently remove the last wires connected to the flash assembly.