Ryobi CSB135L Power Cord Replacement
ID: 160298
Description: This guide will show you how to properly...
Steps:
- Place the saw on a flat surface.
- Make sure the saw is unplugged and unpowered.
- Remove the six M4x16mm Phillips screws and the two M4.5x35mm screws using a Phillips #2 screwdriver.
- Remove the front facing half of the handle assembly exposing the internals of the saw.
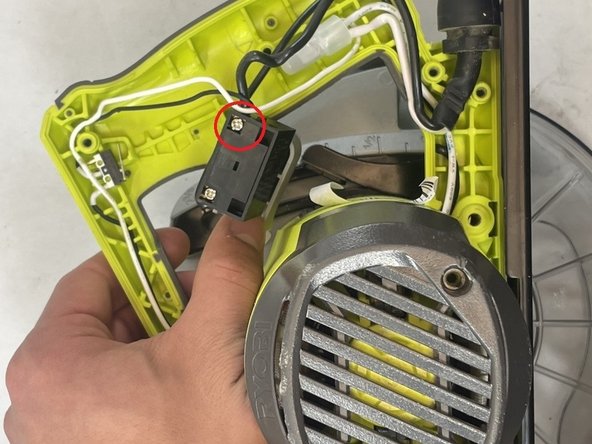
- After removing the handle assembly locate the trigger switch and wire nut in the saw.
- Remove the screw from the black wire of the power cord using a Phillips screwdriver. Then remove the wire.
- Loosen the wire nut and remove the neutral wire from the power cord.
- Remove the power cord from the saw.
- To insert the replacement power cord, insert the black wire of the cord into the trigger switch and tighten the screw. Take the neutral/white wire of the new cord and insert it into the wire nut and tighten the nut.
- Wire strippers may be needed when installing the new power cord to expose the copper wire.