HP 14-dq0060nr Card Reader Board Replacement
ID: 160463
Description: If your HP 14-dq0060nr is unable to properly...
Steps:
- Flip the laptop over so the backside is facing up.
- Make sure the device is shutoff and unplugged from the AC adapter. Be sure to keep track of which grip goes on which side, as one is larger than the other.
- Use a spudger to remove the grips from the back case to reveal screws underneath.
- Be careful when peeling the grips off so they don't tear apart. You need to reuse them them.
- Use a Phillips #1 screwdriver to remove six 6.0 mm screws and two 4.0 mm Phillips #1 screws.
- Slide a plastic opening tool underneath the back case near the screen hinges. Gently pry up on either side.
- You may hear popping sounds as the tabs securing the case release. This is normal. If the case does not move, try prying at a different angle/position.
- Use a Phillips #1 screwdriver to remove the four, 3.00 mm screws.
- Pull the battery cable away from the connector in the same direction that the individual wires are running.
- Pull evenly on the full width of the cable so that no individual wires are overly strained.
- Remove the battery from the laptop frame.
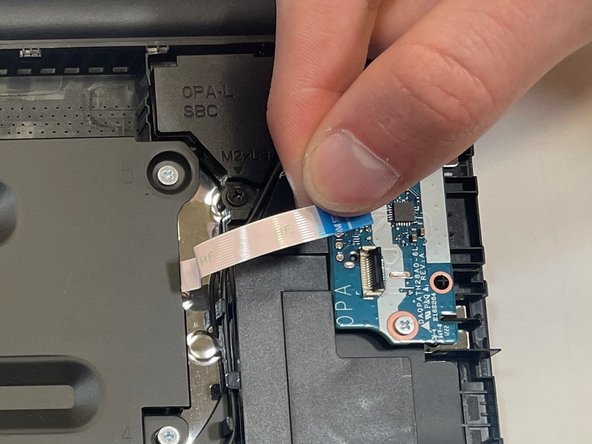
- To disconnect the cable from the card reader board, use the tip of a spudger or your fingernail to flip up the small locking flap of the ZIF connector. Then, you can safely pull the cable out.
- Be sure to pry up on the hinged flap, not the connector socket.
- Use a Phillips #1 screwdriver to remove the two 3.0 mm screws securing the card reader board to the chassis.
- Use tweezers to carefully remove the card reader board.