How to install Windows 11 on unsupported devices
ID: 160527
Description: With the release of Windows 11, Microsoft has...
Steps:
- Launch the windows command line interface.
- Enter
winget install Rufus.Rufusto install Rufus. - Restart the terminal application and launch Rufus by typing
rufus. - If you are running a version of Windows older than Windows 10 1709 (build 16299) or it didn't work for any other reason, you'll need to manually download Rufus from the GitHub.
- Download the Windows 11 ISO file.
- You can download the ISO at the official Windows 11 download page.
- Plug in a USB flash drive with a capacity of at least 8GB.
- Any content on the flash drive will be deleted.
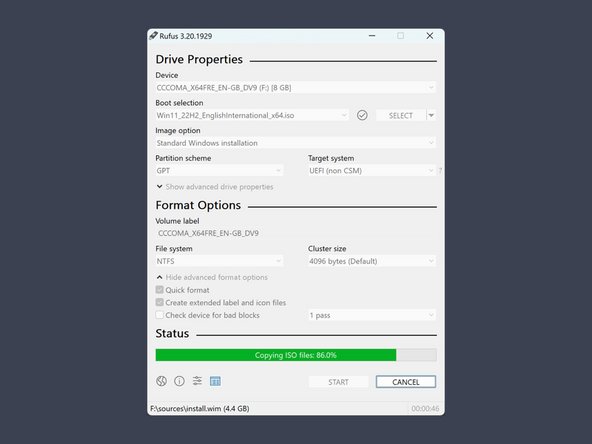
- Select the flash drive you want to use.
- Select the ISO image you downloaded.
- Press START.
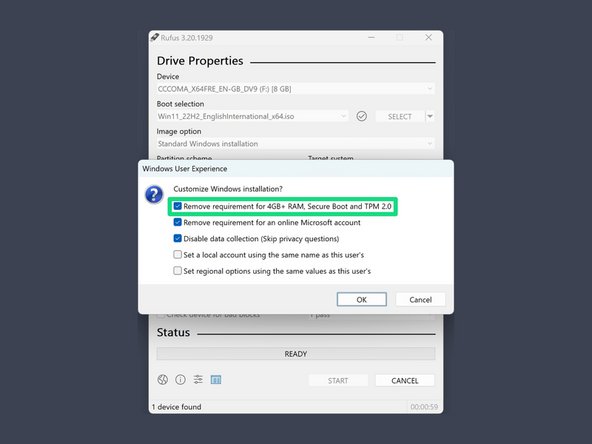
- Select the option Remove requirement for 4gb+ RAM, Secure Boot, and TPM 2.0 and confirm with OK.
- Here you can also set other options, like to automatically opt out of data collection, or remove the requirement for a Microsoft account on setup.
- Boot from the USB flash drive by rebooting your PC while pressing the key that opens the boot-device selection menu.
- This will vary from device to device, but typically Enter, Esc, F10 or F12 are a good starting point.
- Select the option that boots the PC from the USB flash drive.
- This will typically be called something along the lines of USB: Mass Storage.
- Some devices, like the Microsoft Surface tablets, don’t use a menu and just directly boot from USB when p. ex. the Volume-Down button is pressed while turning the device on.
- Follow the instructions to install Windows.
- Remove the USB flash drive.
- Remember to reset your boot priority if you had to change it on step 5.