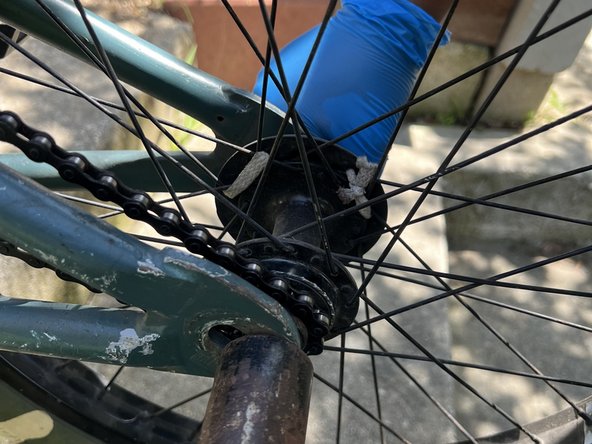
BMX Chain Sprocket Replacement
ID: 160804
Description: This guide will show you how to change a BMX...
Steps:
- Flip the bike upside down in a position where the back wheel can spin freely.
- Gather your tools.
- Get a ratchet, socket, extension and connect the extension to the socket and the ratchet to the extension.
- Insert the socket with the extension in the peg till it hits the end.
- Loosen the nut inside the peg.
- Repeat these steps for the other side.
- Push the wheel forward till it stops, and there is no gap.
- Grab the chain
- Slightly pull the chain to the side, away and back from the wheel
- Make sure that it isn't attached to the wheel driver (spikes that chain sits on normally to make bike wheel move)
- Make sure to keep an eye out for your fingers because you can get your hand caught between the chain and the wheel
- Grab the chain by the sprocket on the bottom of the bike
- Pick it up and slightly pull to the side to remove the chain from the sprocket
- Spin bike cranks to create clearance to move chain away from the sprocket and off the cranks
- Make sure to keep an eye out for your fingers because you can get your hand caught between the chain and the wheel
- Grab the Allen key that fits the compression bold
- Loosen the compression bold
- Completely remove the compression bold from the cranks
- Use the Allen key that fits the smaller bolt to loosen the cranks.
- Loosen the bolt on the cranks.
- Do not remove the bolt.
- Pull crank with the sprocket off the crank spindle.
- Loosen the bolt that is holding sprocket (optional depending if cranks have the bolt).
- Remove the sprocket from crank.
- Place the new sprocket on the cranks with the corresponding hole to hold the sprocket still.
- Tighten the bolt to keep the sprocket in place (optional depending on bike cranks).
- Push the cranks back onto the crank spindle still it stops moving and the other crank isn't pushed out.
- Make sure that the crank is placed well and balanced.
- Thread in the crank compression bolt by hand on the cranks.
- Use the Allen wrench to tighten the compression bolt and compress the crank and the crank spindle together.
- Use the Allen key to tighten the smaller compression bolt and prevent the cranks from spinning.
- Spin the crank with the sprocket to the position where the pedal is close to the peg.
- Grab the chain.
- Hover over the pedal to where you can place the chain back onto the sprocket.
- Make sure that the chain is placed correctly on the sprocket.
- Make sure to keep an eye out for your fingers because you can get your hand caught between the chain and the wheel.
- Place the chain back on the the wheel drive on the back wheel.
- Spin the back wheel backwards so the chain can get rotation and sit correctly on the driver.
- Make sure to keep an eye out for your fingers because you can get your hand caught between the chain and the wheel.
- Pull the back wheel till it stops moving.
- Align the wheel so it wont hit either side of the frame.
- Use the socket with ratchet and the extension to tighten the nut inside the peg slightly, which will allow the wheel to move slightly if needed.
- Do the same thing on the other side.
- Once the wheel is aligned, tighten one side slightly and then tighten the other side slightly as well.
- Keep doing this process until the nuts are tightened enough to they won't move without the use of the ratchet.
- Flip the bike right side up and the bike is ready to go.


