MSI MS-1782 Motherboard Replacement
ID: 161017
Description: This guide will cover the replacement of the...
Steps:
- Remove five 6.6 mm screws from the edges of the bottom cover using a JIS #1 screwdriver.
- Remove one 5.6 mm screw from the center of the bottom cover using a JIS #1 screwdriver.
- Use an iFixit opening pick to unclip the bottom cover.
- It is ok to run the picks along the edges since there is nothing connected to the bottom cover. It is easier to start from the sides and then work your way forward.
- After unclipping the bottom case, pull from the back of the laptop upwards using the lip of the bottom case as a handle.
- Use the flat end of a spudger to detach the two antenna cables from the Wi-Fi card.
- Remove the 5 mm screw holding the Wi-Fi card in place with a JIS #1 screwdriver.
- Remove the Wi-Fi card at its angle.
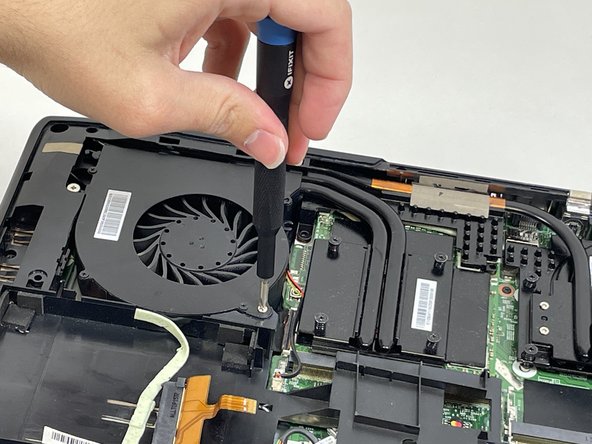
- Loosen the captive screw on the left side of the left fan using a JIS #2 screwdriver.
- Remove the 5.1 mm screw on the right side of the left fan using a JIS #2 screwdriver.
- Gently detach the fan connector.
- Remove the fan by lifting it out of its housing.
- Be sure to handle the wire delicately; if not it will break.
- Loosen the captive screw on the top of the right fan using a JIS #2 screwdriver.
- Remove the 3.6 mm screw on the bottom of the right fan using a JIS #2 screwdriver.
- Gently detach the fan connector.
- Remove the fan by lifting it out of its housing.
- Be sure to handle the wire delicately; if not it will break.
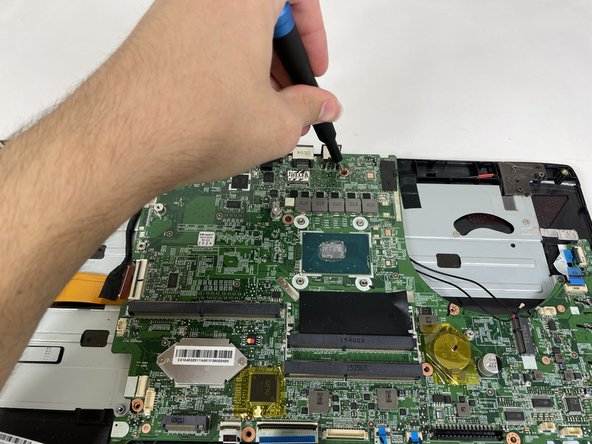
- Loosen the eight captive screws holding the heat sink in place using a JIS #2 screwdriver.
- Be sure to follow the numbers that are next to the screws on the heatsink. This evenly removes pressure on the components when removing the heatsink.
- Gently lift the heat sink and then pull forwards towards you.
- Remove the four 5.5 mm screws holding the battery frame in place using a JIS #1 screwdriver.
- Gently disconnect the cable connecting the M.2 caddy to the motherboard.
- Remove the 3.6 mm screw holding the M.2 caddy in place using a JIS #1 screwdriver.
- Gently disconnect the two blue ribbons.
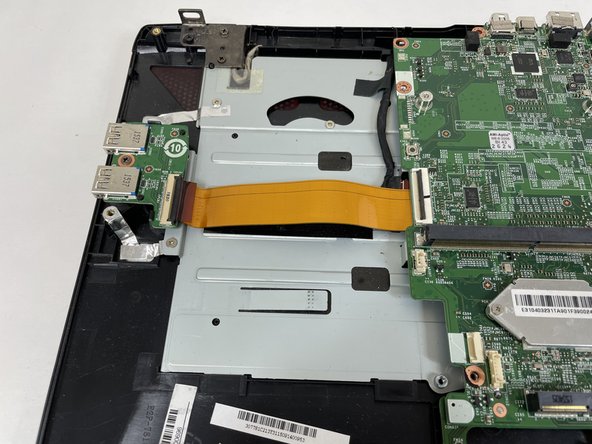
- Remove the 5.1 mm screw holding in the disk reader using a JIS #1 screwdriver.
- Use an iFixit opening tool to push the back of the disk reader to push it out of the laptop's chassis.
- Gently pull the disc reader out of the laptop.
- Lift the plastic cover and disconnect the cable connected next to the speaker.
- Remove the five 5 mm screws holding the frame in place using a JIS #1 screwdriver.
- Pry up on the battery frame with an opening tool and unclip from the main chassis, working your way around the laptop.
- To remove the battery, pry up on it to unstick the adhesive.
- A little Isopropyl alcohol under the battery can help unstick it from the frame.
- Remove the five 5.6 mm screws holding the motherboard in place using a JIS #1 screwdriver.
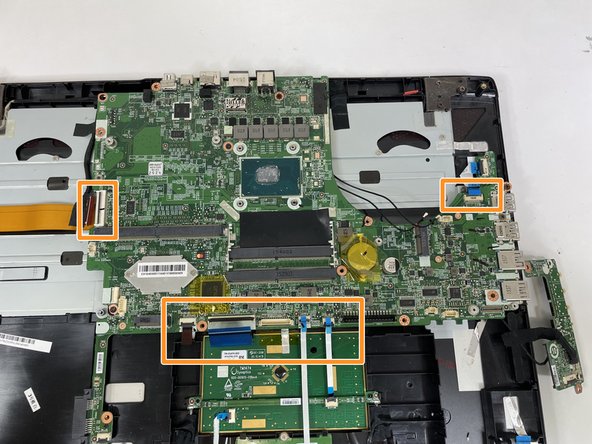
- Disconnect the display, keyboard, trackpad, and USB daughterboard ribbon connectors from the motherboard.
- Before disconnecting the ribbon cables, lift the black tab before pulling the blue tabs on the cables.
- Do not pull the cables out of the connector before lifting the black tab. Damage can occur to connector if not done so.
- Remove the two screws holding the sound daughterboard in place.
- Disconnect the cable attached to the board.
- The daughterboard is still connected to the laptop so just place it to the right.
- Lift the daughterboard and turn it to the back.
- Lift the clear tape and pull the connector straight back to disconnect the daughterboard.
- Disconnect the USB daughterboard from the motherboard.
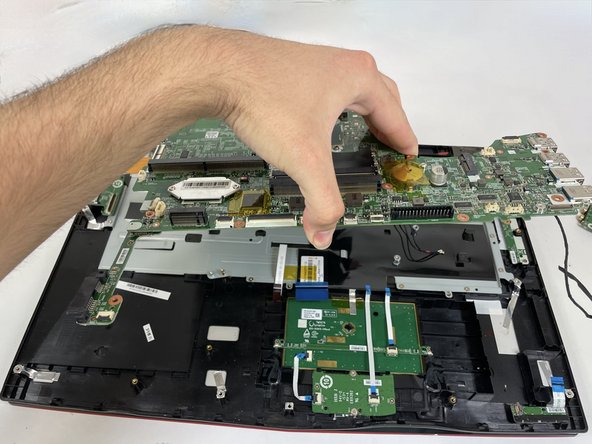
- The orange ribbon cable is attached to the underside of the motherboard so it will stay attached when removing the motherboard.
- To remove the motherboard, lift it vertically out of the chassis.