How to Fix a Solder Bridge
ID: 161034
Description: Solder bridges are an inevitable occurrence...
Steps:
- Set the soldering iron to 300 °C (575 °F) and wait for the iron to heat up to the desired temperature.
- Depending on specifications of the soldering iron, it should take between 25-80 seconds for soldering iron to reach desired temperature.
- The soldering iron tip will be very hot! Be careful when handling the soldering iron during operation.
- Different solder may have different melting points. Refer to any documentation provided with your solder to determine the recommended temperature.
- Avoid setting the soldering iron to very high temperatures and stay within your solder's specifications. Prolonged exposure to high temperatures can lead to component or board damage.
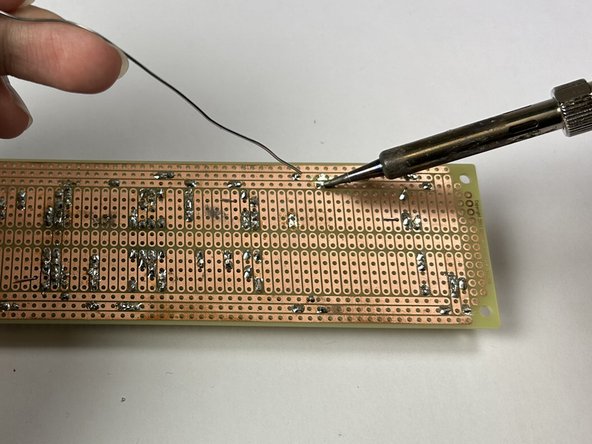
- Locate the solder bridge on the circuit board.
- A solder bridge typically bridges two separate contact points (rails).
- A multimeter can be used here to check for continuity (a short).
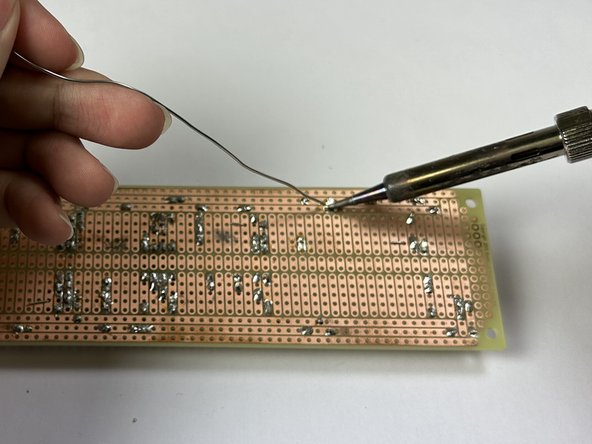
- Apply the solder wick to the affected area.
- With the solder wick on top of the solder bridge, heat the wick using the soldering iron by pressing on top of the affected area.
- The solder wick will be very hot! Avoiding touching the area of the wick near the soldering iron.
- Alternatively, use wire cutters to cut off about 2 cm (0.75") of braid. Use tweezers or needle nose pliers to place it as described above.
- Continue to apply pressure with the soldering iron to the solder bridge until the solder is melted and absorbed by the wick.
- A soldering flux can also be used here to aid in the desoldering process by reducing oxide films.
- Apply the soldering iron to the contact point.
- Once the contact point is hot, reapply the solder to the contact point.
- The repaired area will be very hot! Avoid touching the area being repaired.
- Continue applying the solder to the contact point until the pin is solidly attached and the rails are separate from each other.
- Step 7 verifies circuit continuity.
- The soldering iron tip will be very hot! Be careful when handling the soldering iron during its operation.
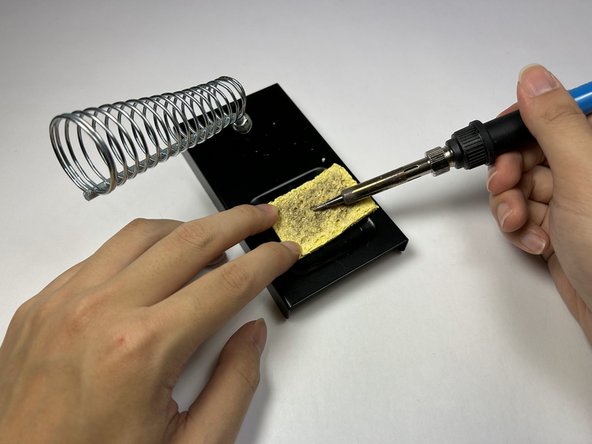
- Hold down the damp sponge.
- Use a damp sponge not a wet sponge so it won't burn. Also make sure the sponge is made from a cellulose material not a polymer. You don't want the sponge to melt and mess up your iron.
- While the soldering iron is hot, use a rubbing motion across the sponge to remove excess solder off the soldering iron tip.
- When you have cleaned the iron, melt a small amount of solder on it to "re-tin" the tip.
- Connect the red (positive) probe to the Voltage and Resistance Socket.
- Connect the black (negative) probe to the Common/Ground Socket.
- Set the multimeter knob for continuity testing. This is typically labeled with diode/audio symbols.
- As shown in the photo, the multimeter will read "OL" if the steps above have been followed properly.
- To ensure the functionality of the multimeter, touch the two probes together and an audible beeping sound should be emitted.
- Verify the circuit board does not have any current supplied to it prior to performing the next steps. If a current is present, permanent damage to the multimeter is possible!
- Connect the black probe to the circuit board rail where one end of the solder bridge was.
- Connect the red probe to the circuit board rail where the other end of the solder bridge was.
- If the fix is successful, the multimeter should read "OL" on the screen, indicating an open circuit. There should be no beep, which means the rails are no longer connected.
- If the fix was unsuccessful, the multimeter will give a numerical readout on the multimeter screen, and beep.