2016–2020 Honda Civic Tail Light Replacement
ID: 161138
Description: Not only is it illegal to operate your vehicle...
Steps:
- Unlock and open the trunk of the car.
- This will allow you to access the screws once it's open.
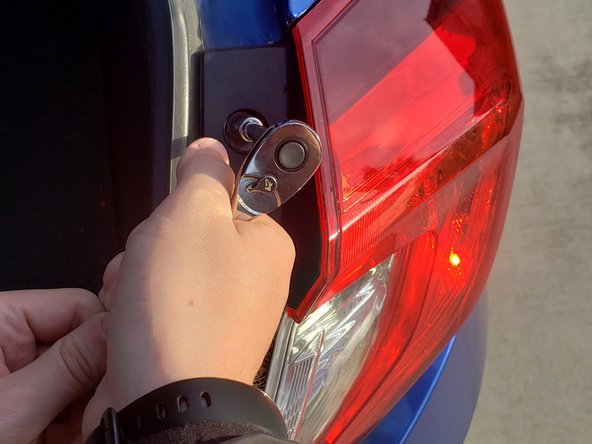
- On the exterior of the trunk, take notice of the bolts connected to the tail lights. You will have to work with these.
- A #8 socket tends to work for most Civics.
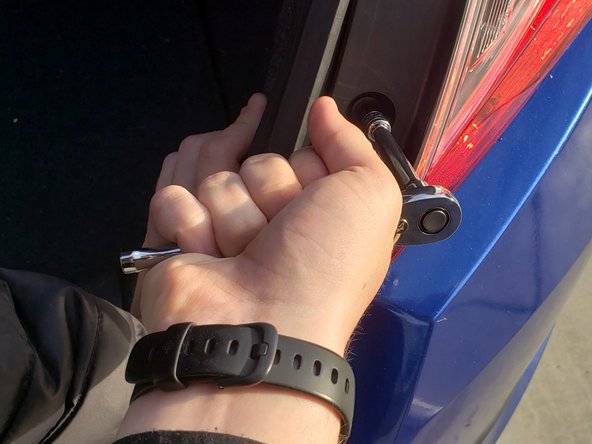
- Attach the #8 socket to the ratchet and loosen each of the bolts, twisting the ratchet in a counterclockwise direction.
- Use your hand to secure the tail light so it doesn't fall off once the bolts are loose.
- Once you have removed the screws, place them somewhere safe because you will be using them to reattach the tail light.
- If the screws are damaged, you can replace them with two new 8.0 mm Phillips screws.
- Pull the tail light out from the rear bumper.
- Since this could be a tight connection, do not be afraid to use some force or you may need to move it side to side to work it out of the socket.
- When pulling it out, be careful that you don't rip it out as it is connected to several wires.
- Once the tail light is removed, twist the light bulb connector counterclockwise to loosen and then pull it out of the socket.
- Put on gloves and pull the bulb out.
- Pull the bulb out with carefully as it can take some force to pull it out.
- For replacement, a 7740 size bulb is recommended.
- Replace the new the light bulb by pushing it back into the socket.
- It is important to use gloves when doing this as the oils on your hands and fingers will damage the bulb and contribute to a shorter life for the bulb.
- Reattach the tail light.
- This won’t require much force for it to stay attached.
- Use the #8 socket to replace the bolts that secure the tail light.
- Lightly tighten each bolt in the clockwise direction, alternating between each one in order to avoid one misalignment.