How to Install macOS Sonoma on Unsupported Macs
ID: 161410
Description: Keep your aging Mac from going obsolete by...
Steps:
- If you're currently running macOS Mojave, click this link to find the Mojave installer in the App Store. For Catalina, click here.
- For all earlier versions of macOS, launch the App Store on your Mac, and search for the macOS version you want (this option is only available when running macOS High Sierra and lower)
- Click Get or Download
- If you have previously downloaded this version of macOS using the current Apple ID account, you might find it in the "Purchased"tab.
- The installer is not directly available to Windows users. If you're using Windows, in order to get access to the installer, you'll need to borrow a macOS machine, go to a Apple Retail Store and download it there, or use a Hackintosh.
- After the downloading process is complete, close the App Store. The installation window should appear afterwards.
- [*red]Click the "Install macOS (whatever version you have downloaded)" menu at the top left of the screen, and select "Quit Install macOS (whatever version you have) ."
- Insert your USB drive into your Mac's USB port.
- Open Finder to find your USB or if your Finder preferences have been set, you can find it on the Desktop.
- Your USB drive will be completely erased in the following steps. Make any backups of your data beforehand.
- Launch Terminal.
- You can either use Spotlight or navigate to "Utilities" inside of Applications within Finder and double click Terminal.
- In Terminal, type one of the following commands, depending on your version of macOS. (The name of the version of macOS, is the one you want to install on the key and downloaded.)
- Instead of "/Volumes/MyVolume", type the name of your USB drive. Type everything else exactly as you see it (or better yet, copy and paste it from here).
- For El Capitan : sudo /Applications/Install\ OS\ X\ El\ Capitan.app/Contents/Resources/createinstallmedia --volume /Volumes/MyVolume --applicationpath /Applications/Install\ OS\ X\ El\ Capitan.app
- For Yosemite : sudo /Applications/Install\ OS\ X\ Yosemite.app/Contents/Resources/createinstallmedia --volume /Volumes/MyVolume --applicationpath /Applications/Install\ OS\ X\ Yosemite.app
- For Mavericks : sudo /Applications/Install\ OS\ X\ Mavericks.app/Contents/Resources/createinstallmedia --volume /Volumes/MyVolume --applicationpath /Applications/Install\ OS\ X\ Mavericks.app
- For Sierra : sudo /Applications/Install\ macOS\ Sierra.app/Contents/Resources/createinstallmedia --volume /Volumes/MyVolume --applicationpath /Applications/Install\ macOS\ Sierra.app
- Other versions, see the next step.
- For High Sierra : sudo /Applications/Install\ macOS\ High\ Sierra.app/Contents/Resources/createinstallmedia --volume /Volumes/MyVolume --applicationpath /Applications/Install\ macOS\ High\ Sierra.app
- For Mojave : sudo /Applications/Install\ macOS\ Mojave.app/Contents/Resources/createinstallmedia --volume /Volumes/MyVolume
- For Catalina: sudo /Applications/Install\ macOS\ Catalina.app/Contents/Resources/createinstallmedia --volume /Volumes/MyVolume
- For Big Sur: sudo /Applications/Install\ macOS\ Big\ Sur.app/Contents/Resources/createinstallmedia --volume /Volumes/MyVolume
- For Monterey : sudo /Applications/Install\ macOS\ Monterey.app/Contents/Resources/createinstallmedia --volume /Volumes/MyVolume
- For Ventura : sudo /Applications/Install\ macOS\ Ventura.app/Contents/Resources/createinstallmedia --volume /Volumes/MyVolume
- For Sonoma : sudo /Applications/Install\ macOS\ Sonoma.app/Contents/Resources/createinstallmedia --volume /Volumes/MyVolume
- For Sequoia : sudo /Applications/Install\ macOS\ Sequoia.app/Contents/Resources/createinstallmedia --volume /Volumes/MyVolume
- For Tahoe : sudo /Applications/Install\ macOS\ Tahoe.app/Contents/Resources/createinstallmedia --volume /Volumes/MyVolume
- If you see the error "Does not appear to be a valid OS installer application", delete and then re-download your macOC image.
- After correctly entering the command with the name of your USB drive, press the [return] key.
- Enter the macOS administrator password.
- Your password will not be displayed.
- Press [return].
- Check the name and path of your USB key. If it looks correct, press the [Y] key, then press [return].
- The bootable drive creation will begin. Please wait until the process completes.
- When Terminal indicates the process is "Done," the creation of your bootable drive has succeeded.
- To boot off the USB, first make sure the Mac is off and then press and hold the [option] key when you hear the chime/turn it on .
- If you cannot download the MacOS intaller of the version you want to install, you can do it using the OpenCore app after you install it. We will see how to do it after we installed OpenCore.
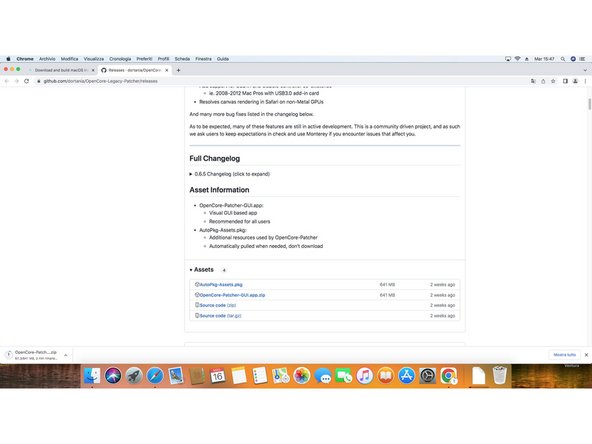
- Go to this link and check the last release of OpenCore Legacy Patcher. At the time of writing, it was version 0.6.5.
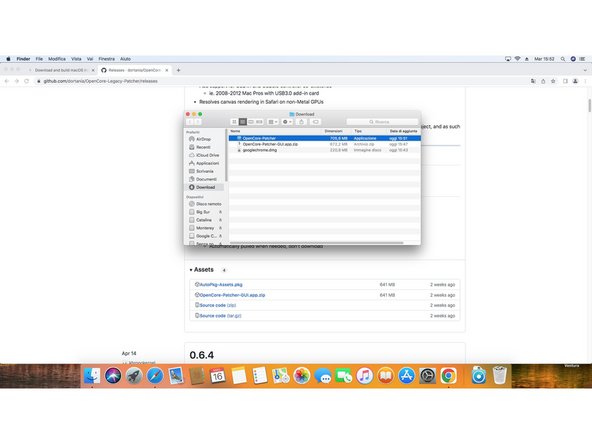
- Scroll down the page until you find the Assets section of the latest release. Open it and download the file named OpenCore-Patcher-GUI.app.zip.
- After the download ends, open the zip file to extract the OpenCore-Patcher app and open it.
- If you do not have downloaded the MacOS installer of the version you wanted earlier, now you can use OpenCore to do so.
- You can select Create macOS Installer to both download and create the USB installer for your selected version.
- You might get prompted to insert your Mac password to finish the download.
- If you choose to use OpenCore Patcher to create the USB installer, your drive will be formatted before it create the installer. If you do not want to format it, use the terminal command in Step 6.
- After you open the OpenCore-Patcher app, it will automatically recognize your Mac model and show it on the main menu window under the version of the patcher.
- In our example, it is an iMac 12,1.
- Check if your model is supported, and if everything works at this link.
- In our example, the iMac 12,1 is supported but GPU acceleration is still in beta at the time of writing.
- Insert the other USB flash drive in your Mac and select Build and Install OpenCore.
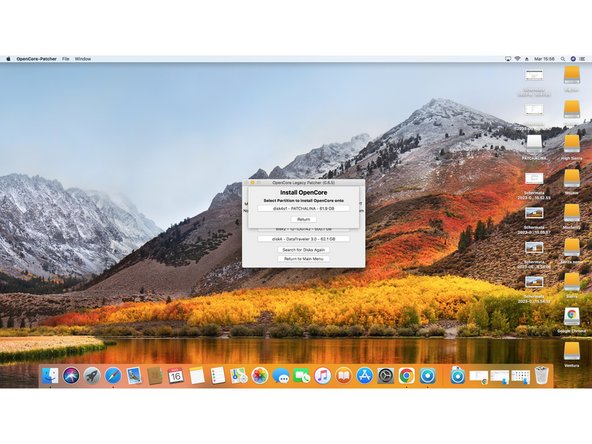
- After it finish to build your OpenCore configuration, select Install to Disk and then select the USB you just inserted.
- You will then get prompted to insert your Mac password to continue.
- After OpenCore finish the installation, you will get prompted to reboot.
- Before rebooting, be sure to have both the EFI USB and the MacOS installer USB inserted in your Mac.
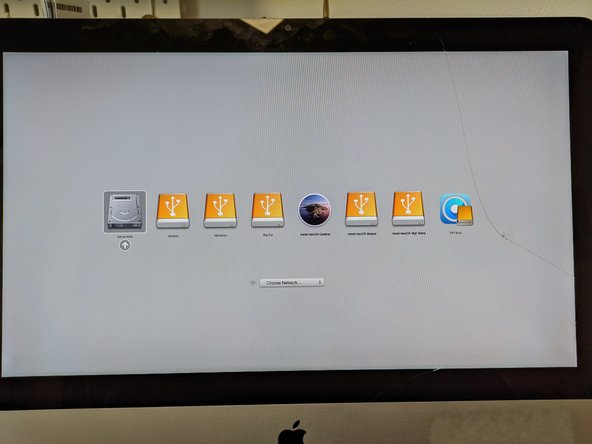
- While the Mac is rebooting, hold the option key to enter boot disk selection.
- You can reboot normally, then shut down your Mac and turn it back on while holding down the [option] key.
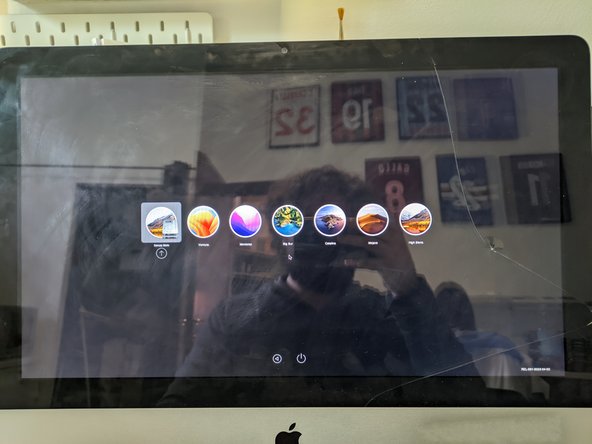
- After you enter the boot disk selection, select EFI Boot disk (it is the lask USB you created).
- As you can see, now your Mac does recognize the MacOS Sonoma Installer.
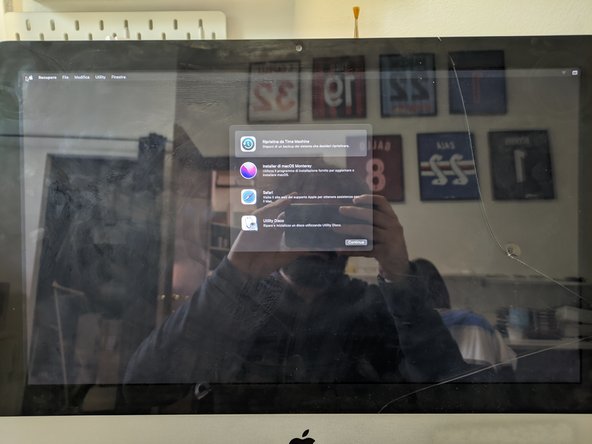
- Now select the MacOS Sonoma installer and follow the usual MacOS install procedure.
- In our example we are installing MacOS Monterey, but it works with Sonoma, Ventura and Big Sur too.
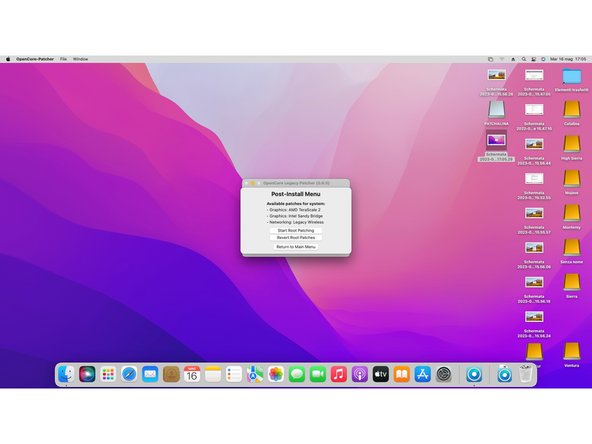
- After you finish to install MacOS, open again OpenCore Patcher and select Post Install Root Patch.
- Then, select Start Root Patching.
- OpenCore will ask you to relaunch as root. Select yes.
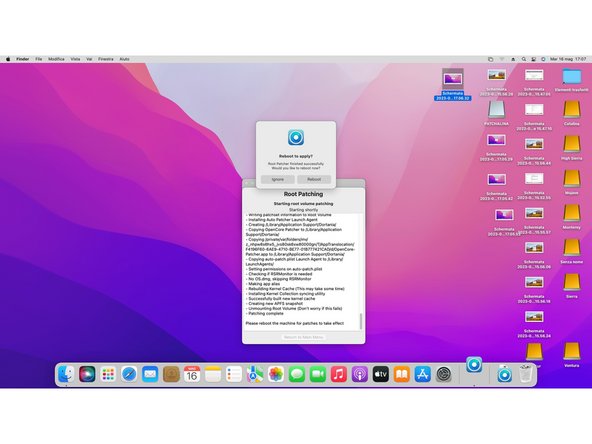
- Then OpenCore will start patching your MacOS installation to make it compatible with your Mac.
- After it finish to patch, it will ask you to reboot apply patches.
- Be sure you still have the second USB you created plugged in, or you won't be able to start your pc yet.
- While your Mac reboots, hold down the [option] key to enter again boot disk selection. From there, select again EFI Boot and your Mac will start normally.
- Now unplug all the USB drive that are still plugged in.
- After your Mac boots into MacOS, open one last time OpenCore and select Build and Install OpenCore.
- After it finish to build OpenCore, select Install to disk.
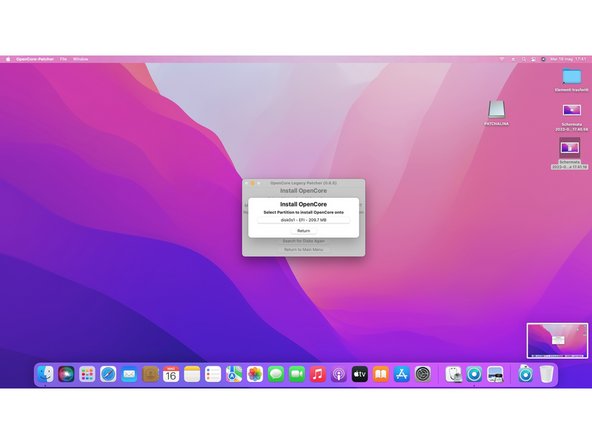
- This time select disk0 to install OpenCore to your Mac internal drive, then select the EFI partition.
- When it finish to install OpenCore, it will ask to reboot your Mac. While it reboots, hold down again the [option] key to enter one last time the boot disk selection.
- After you enter the disk boot selection, hold down the [option] key and select the EFI disk to make this the default option.
- Done! You succesfully installed Sonoma on your Mac!