Repairing a keyboard on a Minitel Alcatel Telic 1
ID: 163583
Description: Guide for repairing the keyboard on an Alcatel...
Steps:
- Photo 1: Insert a metal spudger (see iFixit tools) into the small slot on the upper part of the slightly open keyboard.
- Photo 2: Unclip the 2 tabs on each side by sliding the spudger.
- TIPS: The plastic is 40 years old! It is therefore much more brittle than modern plastic (even though its residual elasticity shows excellent original quality).
- TRICK: Work in a warm room (20°C minimum, 22°C is perfect) on a device that you have allowed to reach room temperature.
- Photo 1: insert the spudger into each small slot to unclip the bottom of the cover.
- Photo 2: the cover opens.
- Photo 3: another view of the opened cover. The 2 bubbles show the tabs that will need to be opened in the next step.
- Photo 1: 4 snap fits must be released to remove the keyboard's metal block (which cannot be disassembled).
- Photo 2: the 4 keys 3-6-9-# that were not working have been removed to see that the switch is an "80s style" model, which means heavy-duty mechanics.
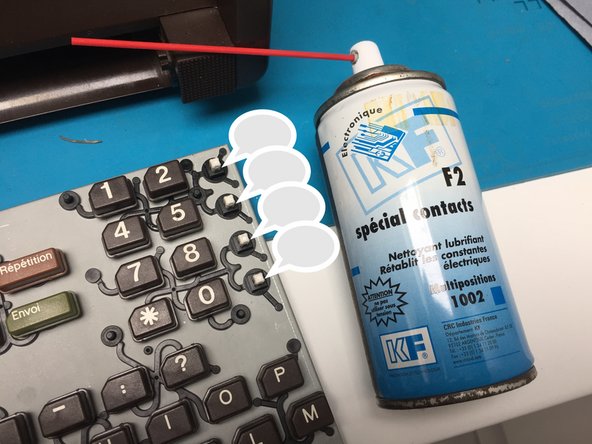
- Photo 3: a small spray of special electrical contact cleaner can help to fix the problem (in the case of water spilling into the keyboard).
- In my case, the keys still did not work, so the problem is elsewhere, see the next step...
- Photo 1: The copper traces are glued onto a transparent plastic film (bottom), and a second one covers the other side of the traces. With age, it peels off, the traces become exposed, and they break at the fold.
- If the copper strips are not accessible because the two films are still stuck together, you must separate them using a spudger.
- Photo 3: At a low temperature, by putting a drop of flux on the copper and just doing a touch-and-go, you can solder onto the copper without melting the plastic.
- Tip: verify that the keys work at each step of the reassembly (keyboard open just after soldering, covers reinstalled, and then the Minitel fully reassembled) to avoid missing another problem.