HP Chromebook 11A G6 EE Display Panel Hinges Replacement
ID: 165066
Description: The hinges of the HP Chromebook allow you to op...
Steps:
- Remove six 6.6 mm screws from the back case using a Phillips #1 screwdriver.
- Remove two 8.7 mm screws from the back case using a Phillips #1 screwdriver.
- Turn the computer over and open it as if you are going to use it.
- Use the iFixit opening tool to get between the keyboard bezel and the outer edge of the laptop.
- There are several clips on all sides that will need to be released. You'll hear and feel a pop as each clip is released.
- Move the opening tool or spudger around the perimeter until you unclipped the keyboard on all sides.
- This will require a little force. The only thing you don't want to do is push the spudger too deep under the keyboard. You could damage the internals if you do.
- Carefully lift the top of the keyboard up to access the ribbon cables connecting it to the device.
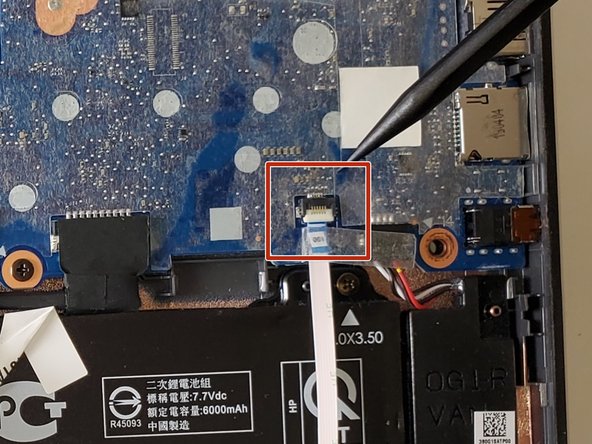
- Use the tip of a spudger or your fingernail to flip up the small locking flap on each connector. Then, pull the connector out.
- Remove the keyboard and set aside.
- Use a Phillips #1 screwdriver to remove the 2.5 mm screw connected to the wireless module.
- Gently peel back the tape and lift the wireless module out.
- Take careful note of the routing of the wires from the display panel to the wireless module.
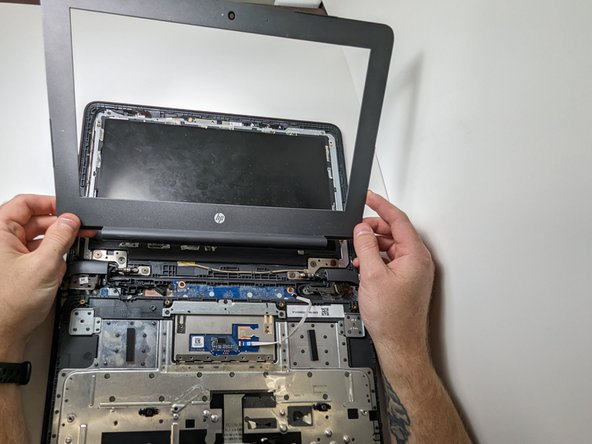
- Using your iFixit opening tool, ease it in between the frame of the top case, and lift it up.
- Slide your opening tool clockwise around the edge of the laptop, separating the front panel from the top case.
- Lay the laptop flat if possible.
- Carefully lift the frame and bring the top of the top cover towards you.
- There will be adhesive connecting the frame to the LCD display.
- Once the frame is about 90 degrees from the base, pull the bottom of the frame towards you, separating the frame from the top case.
- Use a Phillips #000 screwdriver to remove the five 2mm screws from the display panel bezel.
- Use a Phillips #1 screwdriver to remove the three 2.5 mm screws that secure each display panel hinge to the display enclosure.
- Lift the tops of the left and right hinges towards you, separating them from the top case.
- Use a Phillips #1 screwdriver to remove the two 2.5 mm screws that secure the hinge to the bottom case.
- Peel back the tape that secures the webcam to the left display panel hinge.
- Gently slide out the webcam connector.
- Separate the cable before removing the hinge to prevent pinching.
- Take careful note of the routing of the cables.
- Rotate the hinge away from you while applying slight pressure toward the middle of the device to slide it out of the encasement.
- Repeat this step for the right hinge.