Dell Latitude 7410 SSD Replacement
ID: 165072
Description: Use this guide to upgrade or replace the SSD in...
Steps:
- Allow your laptop's battery to drain below 25% before starting this repair—a charged battery may catch fire if damaged.
- Unplug all cables, fully shut down your laptop, and close the lid.
- Use a Phillips screwdriver to loosen the eight captive screws securing the back cover.
- Insert an opening pick between the right edge of the back cover and the frame, just below the middle right screw.
- Slide your pick along the right edge to release the clips securing the back cover.
- Insert your pick between the left edge of the back cover and the frame, next to the speaker cutout.
- Slide your pick along the left edge to release the clips.
- Insert your pick between the back cover and the right display-hinge to release the first clip along the back edge.
- Slide your pick toward the left hinge until the second clip releases.
- Insert your pick between the front edge of the back cover and the frame, just to the right of the bottom left screw.
- Slide your pick toward the right edge until the front edge releases from the frame.
- Remove the back cover.
- Grab the black pull tab on the head of the battery connector and pull straight up to disconnect it.
- Use your Phillips screwdriver to remove the 2.7 mm screw securing the SSD shield.
- Grab and remove the SSD shield.
- Use your Phillips screwdriver to remove the 3 mm screw securing the SSD.
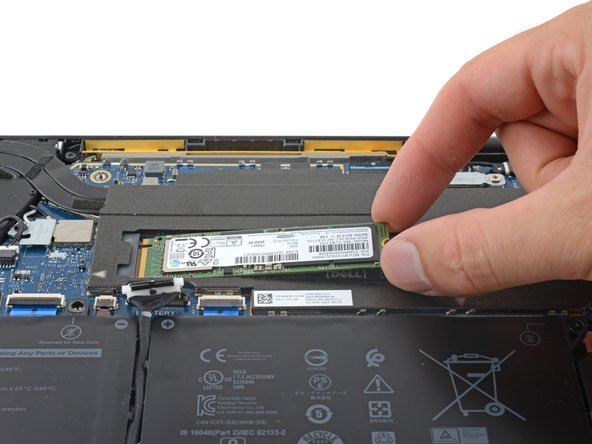
- The socket doesn't spring up the SSD like in some laptops—keep the SSD flat to the laptop when removing or inserting it to prevent damage to the socket.
- Grip the corners of the SSD closest to the screw cutout and pull it straight out of its socket and remove it.
- If the SSD feels stuck, slightly wiggle it side-to-side as you pull.