Polaroid I-2 Print Roller Replacement
ID: 165521
Description: Use this guide to replace a warped or stuck...
Steps:
- If you have any film left, take some photos and remove the cartridge! Disassembly will expose the film and damage it.
- Before you begin:
- Power down and unplug your camera.
- Put on the lens cap to avoid scratching your lens during disassembly.
- In the following steps, "left" and "right" are written from the perspective of using the camera—or when the lens is facing away from you.
- Use the latch on the left side of the camera to open the film door.
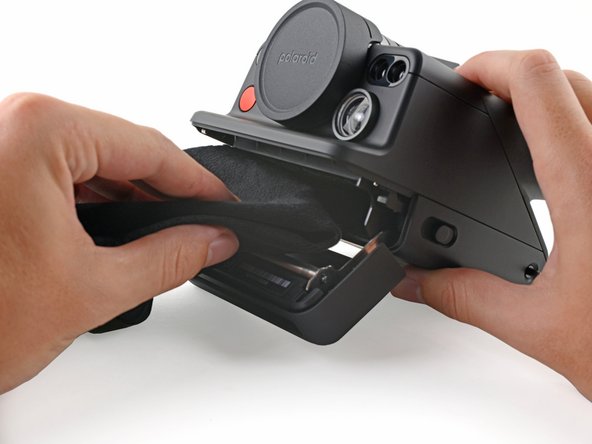
- Fold a piece of cloth or napkin (or the included bag) into a small square.
- Insert the cloth into the film compartment far enough to block the film door from closing during disassembly.
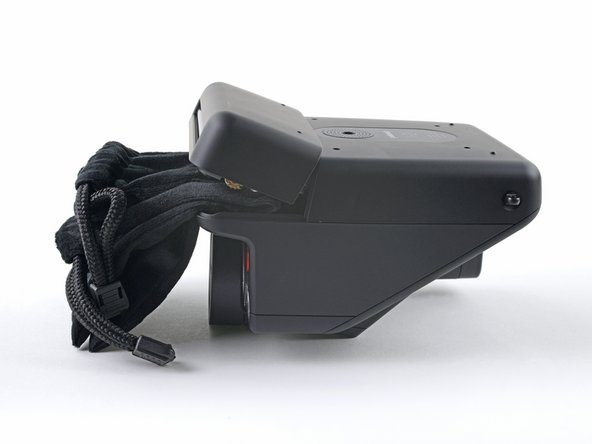
- Flip the camera over, making sure the cloth stays lodged in the film compartment.
- Use a Phillips screwdriver to remove the four 3.9 mm-long screws securing the bottom cover.
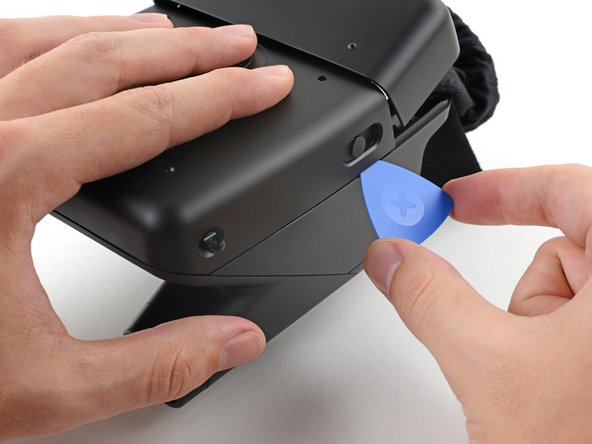
- Insert the tip of an opening pick under the top left corner of the bottom cover, near the slider button.
- Tilt the pick up and push to position the pick between the bottom and front covers.
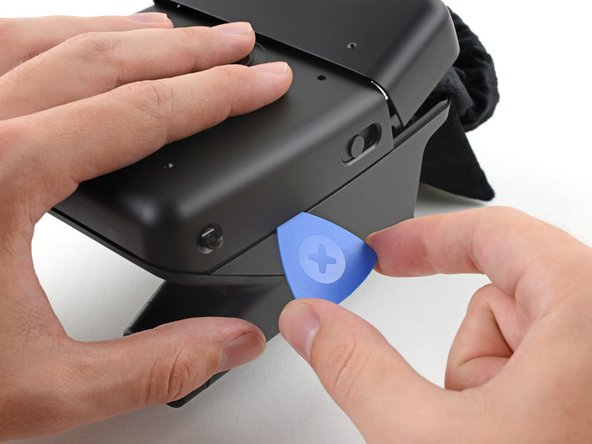
- Slide the opening pick toward the rear of the camera to release the clips along the left edge.
- Leave the opening pick at the bottom left corner to prevent the clips from resecuring.
- Insert the tip of a second opening pick under the top right corner of the bottom cover.
- Tilt the pick up and push to position the pick between the bottom and front covers.
- Slide the opening pick toward the rear of the camera to release the clips along the right edge.
- At this point, the bottom cover clips should be released. If not, slide an opening pick along the perimeter of the back cover to release any remaining clips.
- Tilt the back of the bottom cover upward and pull it away from the camera, making sure to thread the film door lever from its recess.
- Remove the back cover.
- During reassembly, insert the film door lever into its recess before aligning the bottom cover and pressing it into place to secure its clips.
- Insert the flat end of a spudger between the film door's left hinge and the frame.
- Twist the spudger to separate the rubber hinge grommet from its peg in the frame.
- Pull the film door towards the front of the camera to completely disconnect its left hinge.
- Tilt the left edge of the film door up to separate the left hinge's rubber grommet.
- Remove the film door.
- At this point, you can remove the cloth blocker from under the print roller.
- During reassembly, hook the left hinge on its post and push the right hinge over its post until it snaps into place.
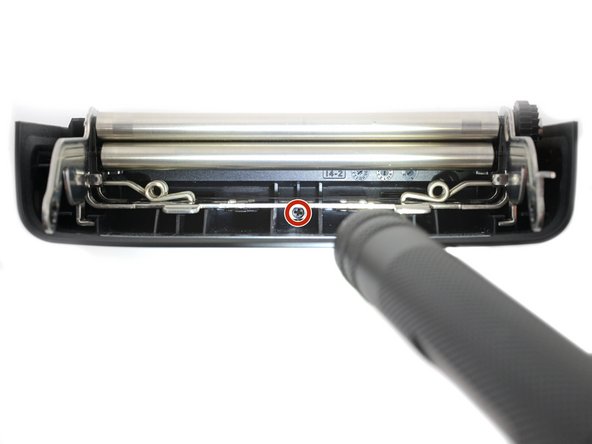
- Use a Phillips screwdriver to remove the 3.9 mm-long screw securing the print roller.
- The screw is hidden and might require a flashlight to see properly.
- There are two plastic tabs that secure the print roller.
- Use the tip of a spudger to depress both the plastic tabs until their hooks release from the print roller.
- You'll hear an audible "click."
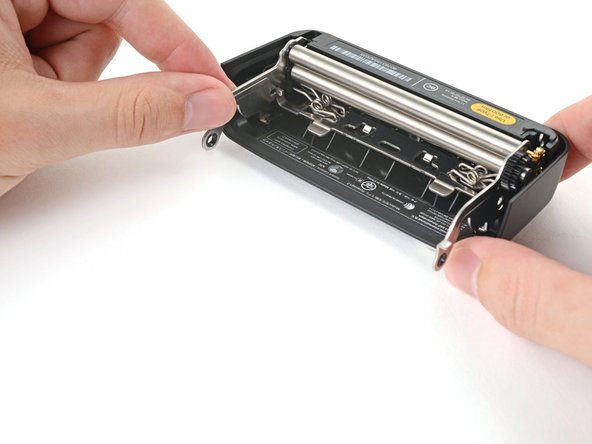
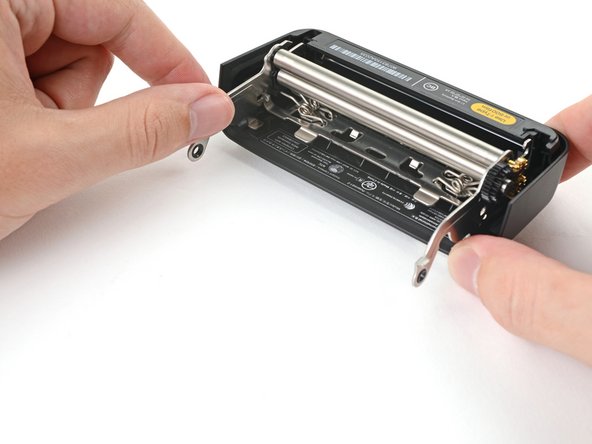
- Grab the print roller by one of its arms and pull it straight out of its plastic housing.
- Pull straight away from the housing to avoid bending or warping the metal.
- If you're having trouble, make sure the clips are released. You may have to hold the clips down while pulling.
- The print roller is a sensitive component. Be extremely careful during reassembly to not bend or warp the metal.
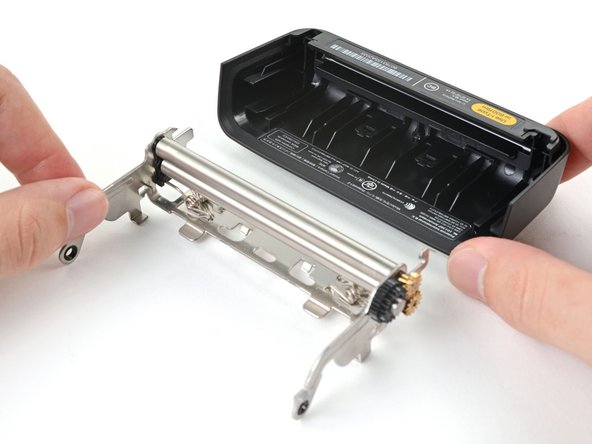
- During reassembly, note the following to properly reinsert the print roller into its plastic housing:
- There are two metal L-shaped rails at the bottom of the print roller that have to slide under cutouts in the plastic housing.
- There are two metal hooks at the top of the print roller that have to fit under the top corners of the plastic housing.
- Insert the print roller at a downward angle to fit the hooks in first before sliding the rails into place.
- Push the print roller into its plastic housing until you hear the plastic tabs click back into place.