Shark AI Ultra AV2511AE Vacuum Brush Motor Replacement
ID: 167313
Description: This guide for Shark AI Ultra AV2511AE is going...
Steps:
- Orient the device upside-down
- Remove two 15 mm screws using a Phillips #1 screwdriver.
- Remove the battery cover.
- Using the two paper tabs on each side of the battery, slide it up and out of the robot.
- Using an opening tool, disconnect the wire connector from the robot.
- Remove the battery.
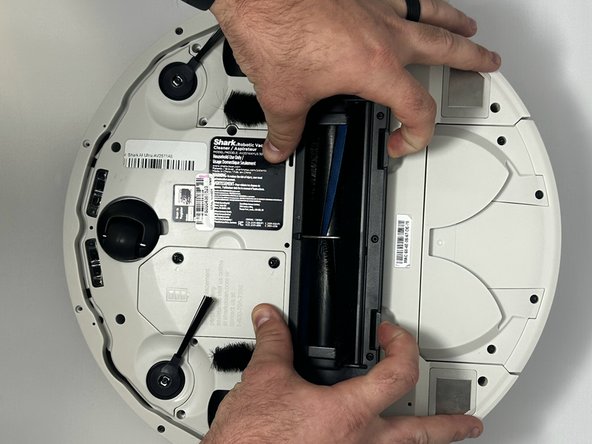
- Remove the debris container.
- Remove the main brush cover from the vacuum to expose the roller.
- To remove the main brush, grab the non-orange side and simply lift up and out of orange connector.
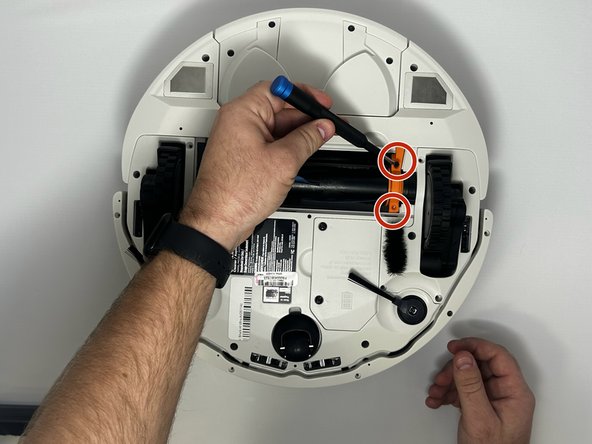
- Remove two 8mm screws using the TR9 screwdriver on orange piece.
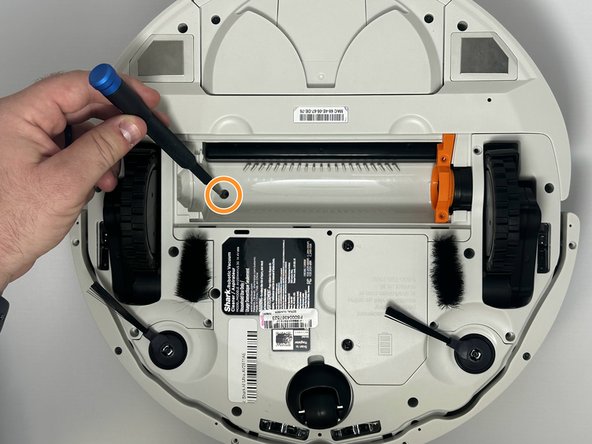
- Remove the one 12mm screw that is located inside the main brush.
- Screws may have some Loctite residue. Remove all screws with caution as to not strip the heads.
- Using the TR15 Screwdriver, remove the five 11mm screws surrounding the drive wheel.
- Gently pull the wheel assembly out.
- Make sure to pull lightly on the wheel assembly to ensure wires do not rip apart.
- Repeat for other drive wheel.
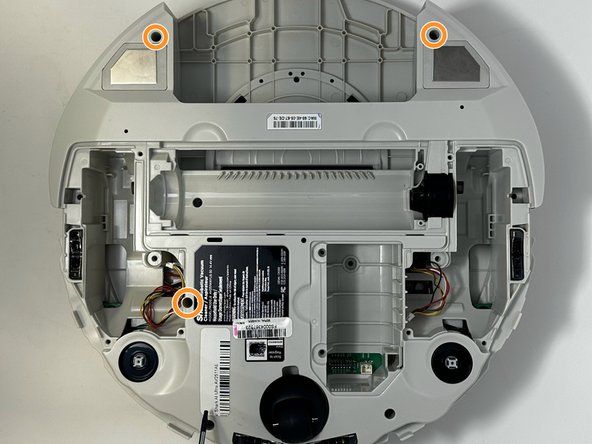
- Remove the two 12mm screws on either side of the swivel wheel using the TR15 screwdriver.
- Remove the other three 12mm screws that surround the base.
- Remove six 8mm screws using the TR9 screwdriver.
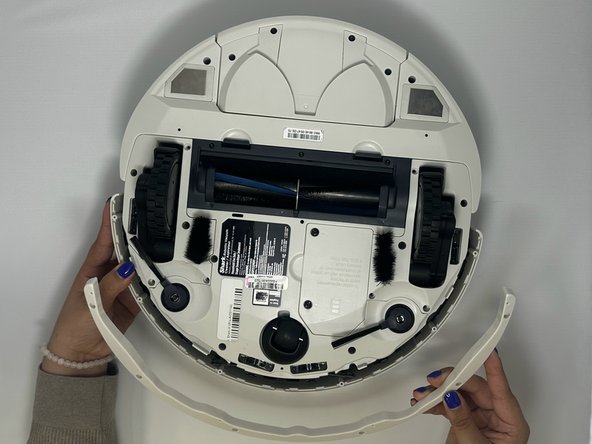
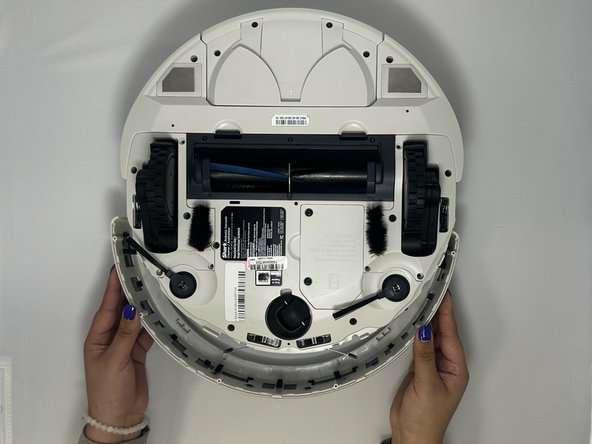
- Separate the bottom of the bumper from the top by simply pulling them apart or using the spudger.
- Remove both pieces of the bumper from the vacuum.
- Orient the device to be right side up.
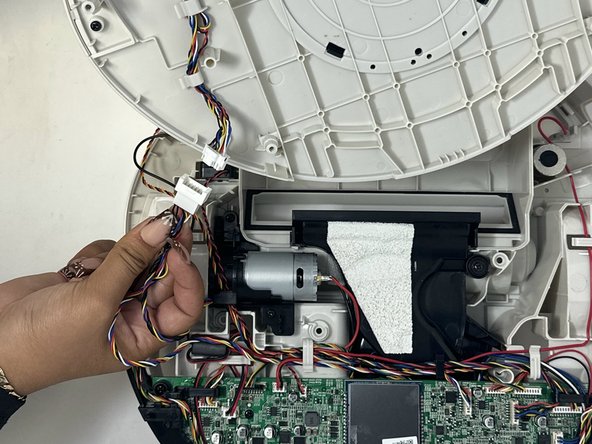
- Remove the top of the vacuum and separate the power cable.
- Carefully pull up the top to not rip any wires out.
- Remove the wires that are hooked above the motor.
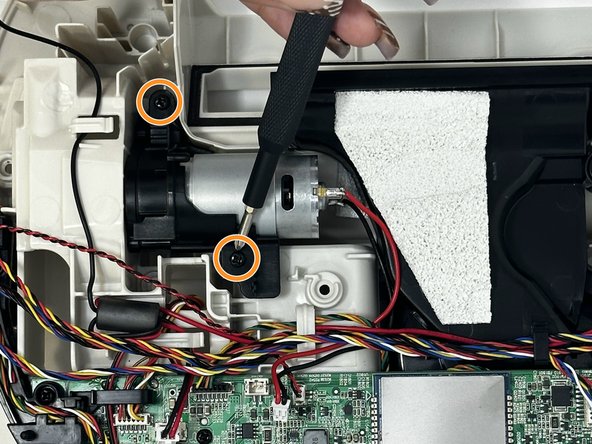
- Remove the two 8mm screws that are holding the motor to the vacuum using the Phillips #1 screwdriver.
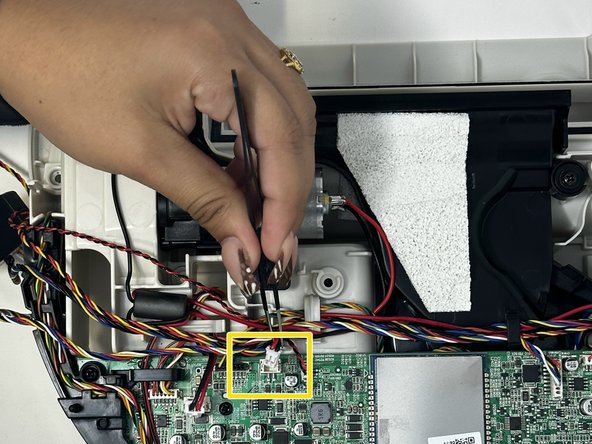
- Using tweezers, separate the power wire from the motherboard.
- Remove the motor from the vacuum.
- The wire might be under other wires. Careful when removing to not tear or dislodge other wires.
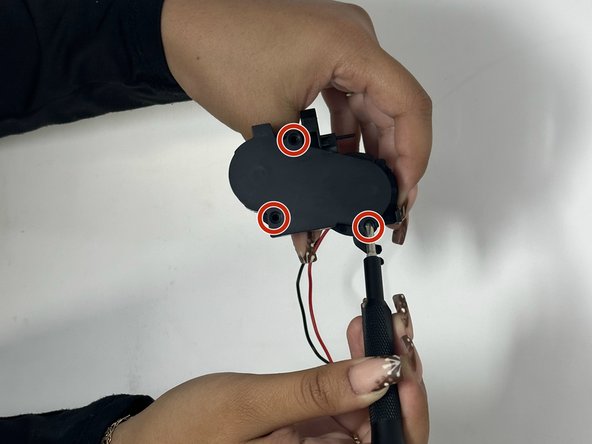
- Remove the three 8mm screw using the Phillips #1 screwdriver.
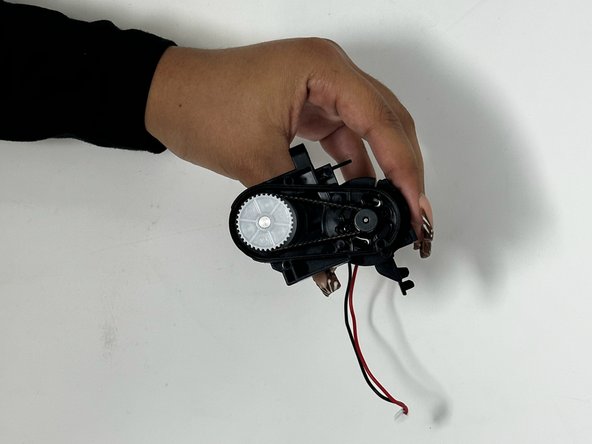
- Separate the cover from the gearbox.
- Remove the belt from the gears using pliers.
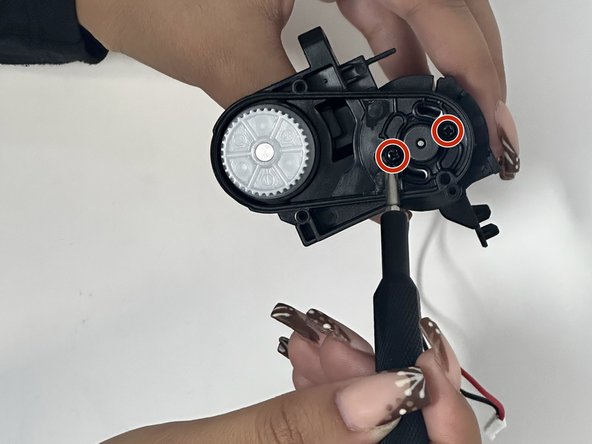
- Remove the two 5mm screws using the Phillips #1 screwdriver.
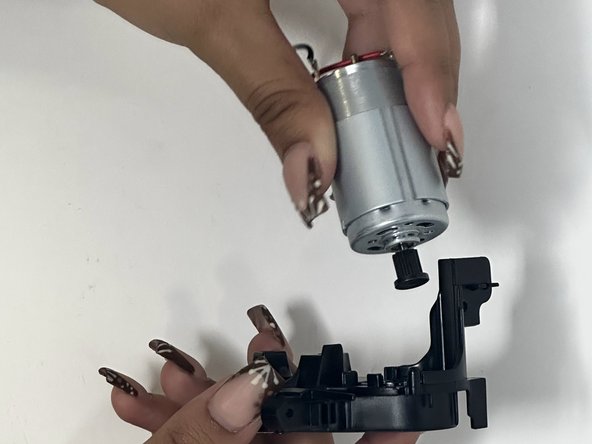
- If holding vertically, the motor will fall out once the screws are removed.
- Separate the motor from the gearbox.