ASUS Q536F Hard Drive Replacement
ID: 167823
Description: When replacing a hard drive in a laptop, it's...
Steps:
- Remove ten 2 mm screws using a Phillips #0 screwdriver.
- Remove the screw in the center using a T4 Torx screwdriver.
- Use an iFixit opening tool to pry open the back panel.
- It's normal to hear some cracking, but proceed with caution.
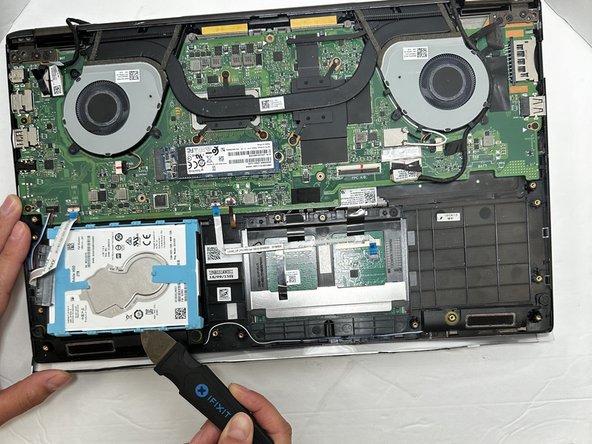
- Disconnect the white ribbon cable from the connection lever using a Jimmy.
- Using the Jimmy, lift the hard drive out of its slot.


