HP Chromebook x360 14c-ca0053 Fan Replacement
ID: 167919
Description: This guide outlines how to remove the fan of an...
Steps:
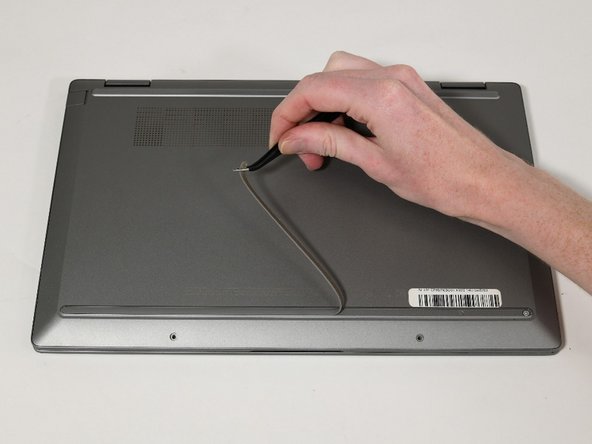
- Use tweezers to apply light pressure on the outer sides of the 2 small screw covers located near the bottom of the device.
- Rotate the covers until they pop up out of the screw socket enough to remove them with tweezers.
- Use a Phillips #1 screwdriver to remove the two 3.5 mm screws.
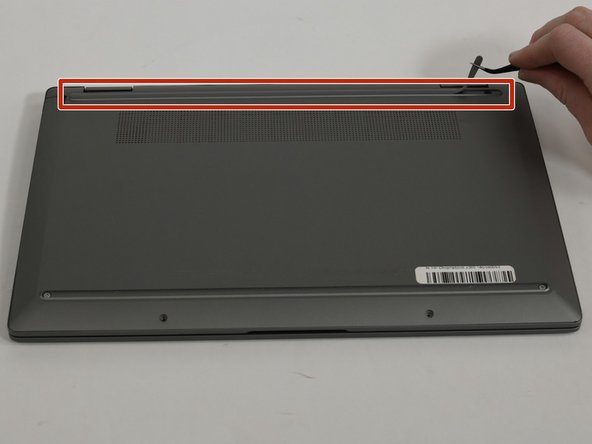
- Use tweezers to peel back the feet on the top and bottom of the Chromebook to reveal four additional screws.
- Use a Phillips #1 screwdriver to remove the 4 7 mm screws located at each corner of the device under the grips.
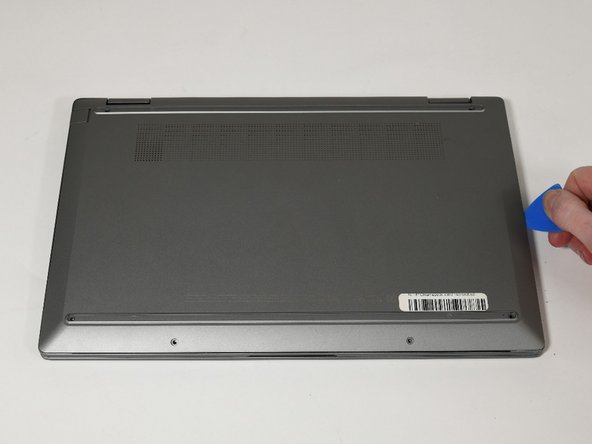
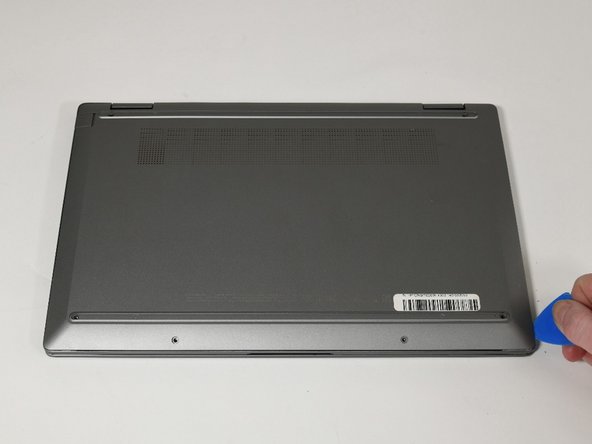
- Insert an opening pick between lower case and chassis.
- Separate the lower case from the frame by sliding the opening pick along the perimeter until the case releases.
- Lift the lower case up and off.
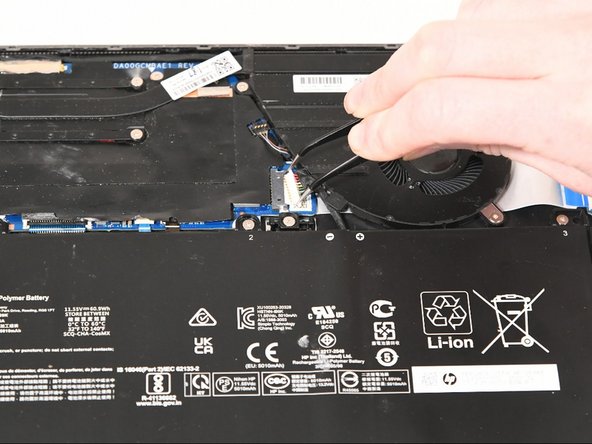
- Open the tweezers wide enough to fit on each side of motherboard battery connection.
- Pull the connector directly out of its socket.
- Use a Phillips #0 screwdriver to remove the five 3 mm screws that secure the battery.
- These screws are labeled 1-5.
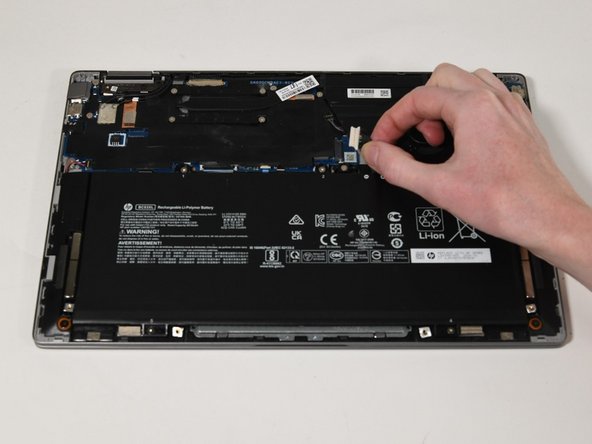
- Lift the battery up and out.
- Be careful as to not puncture or damage the battery.
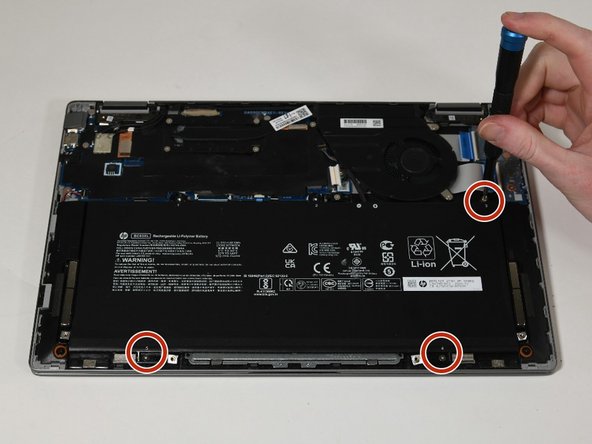
- Use a Phillips #0 screwdriver to remove the four 3 mm screws that secure the heatsink.
- Remove the heat sink.
- Add thermal paste to the new heat sink before replacement.
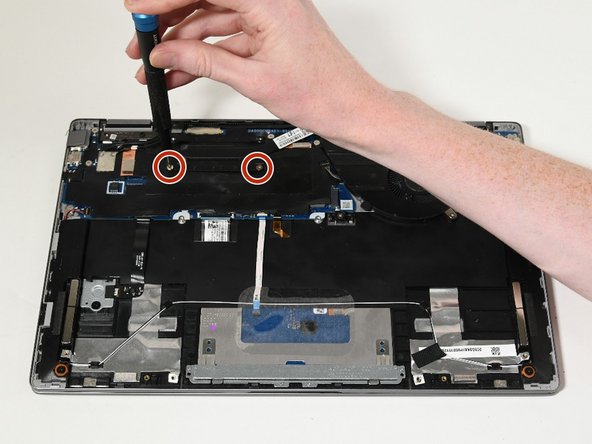
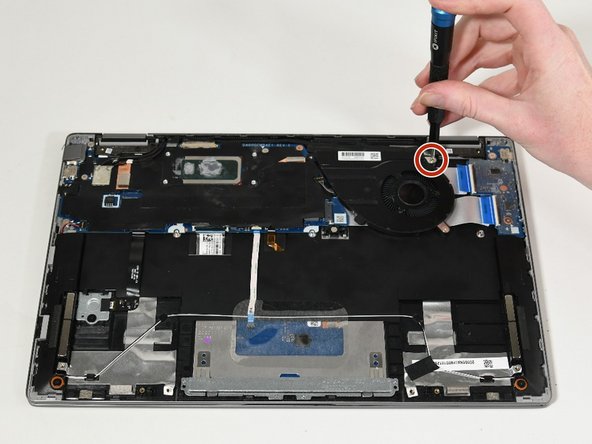
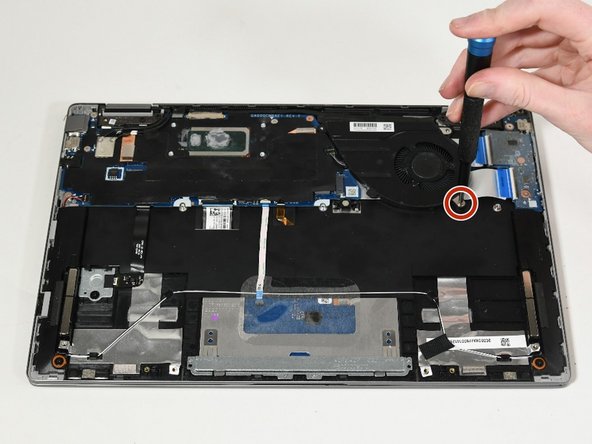
- Use a Phillips #0 screwdriver to remove the three 3 mm screws that secure the fan.
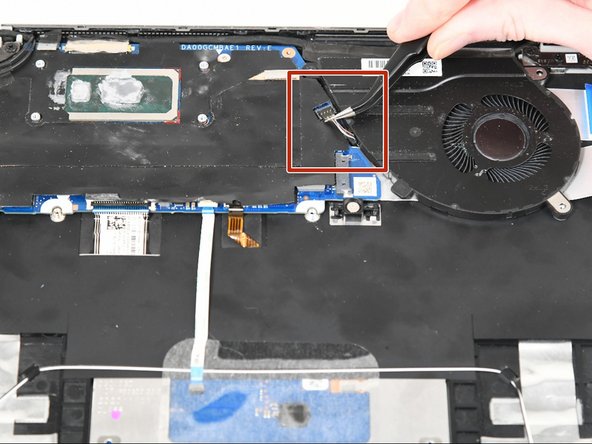
- Place the tweezers gently underneath the fan's motherboard connection and lift up to disconnect it.
- Lift the fan up and out of the chassis.