HP OMEN 16 Series Hard Drive Replacement
ID: 167954
Description: What is this guide for? This guide is for repla...
Steps:
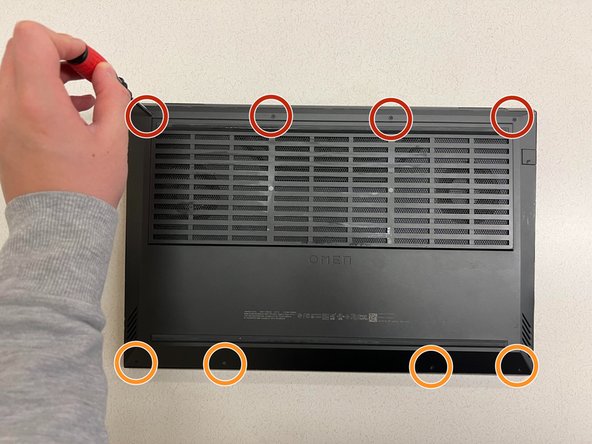
- Remove the four 8 mm screws from the back panel of the laptop using a Phillips #1 screwdriver.
- Remove the four 5 mm screws from the back panel of the laptop using a Phillips #1 screwdriver.
- Slide a small plastic card between the crevice of the back panel of the laptop and the laptop itself.
- Turn the card clockwise until you have a wide gap between the back panel and the laptop. Repeat this step all around the laptop to remove the back panel.
- DO NOT insert the card too deep into the laptop, or you may damage or break the components inside the computer. Like the picture, you only need to insert a small corner of the card into the laptop.
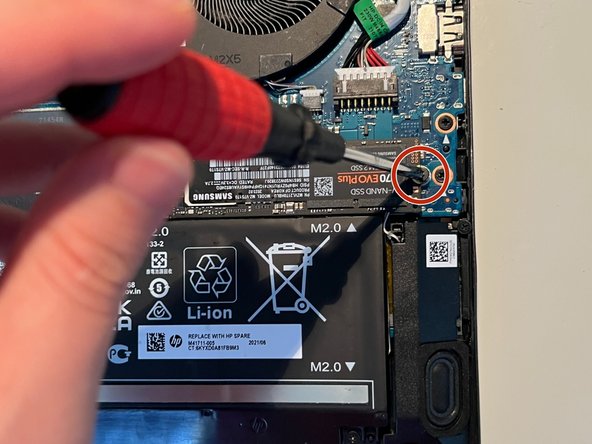
- Locate the hard drive on the right.
- Remove the screw fastening the hard drive in place with a Phillips #1 screwdriver.
- The SSD will pop up at a 25 or 35-degree angle.
- Take the SSD out slowly at an angle. You may need to slightly wiggle the SSD out.
- Insert the new SSD into the slot at an angle without applying much pressure.
- Re-screw the new SSD in with the Phillips #1 screwdriver.
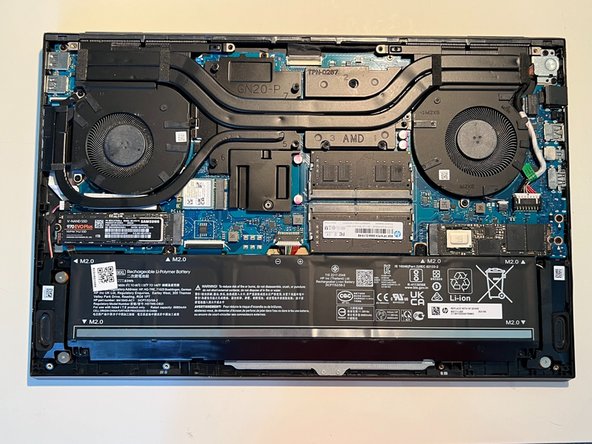
- Locate the spare hard drive slot on the left side of the laptop.
- Remove the screw from the spare hard drive slot, and set it carefully aside for later.
- Obtain your new hard drive and insert the hard drive at around a 25 to 35-degree angle, as shown in the image.
- Again, insert the hard drive carefully, and do not apply much pressure.
- Screw the hard drive securely to the hard drive slot using the screw that was set aside in step 5.
- Obtain the back panel and push the panel back onto the laptop.
- Make sure that the panel is on the laptop completely; this means that you should push down firmly on multiple places so that the cover is securely on the laptop.
- Re-screw in the four 8 mm screws with the Phillips #1 screwdriver.
- Re-screw in the four 5 mm screws with the Phillips #1 screwdriver.