Gigabyte GeForce RTX 2070 Super Thermal Pads and Paste Replacement
ID: 167996
Description: Follow the steps below to thoroughly clean your...
Steps:
- Using the #1 Philips screwdriver, remove the two screws below the fan shroud
- Turn the video card to face the display ports
- Remove the four screws using a #0 Philips screwdriver
- Using a #0 Philips screwdriver, remove the two screws holding the fan shroud to the heat sink, then flip the card over and remove the identicaltwo screws from the other side of the card
- Disconnect the two fan connectors from the video card
- Separate the fan shroud from the video card
- Flip the card over so the back plate is facing up
- Using a #0 Philips screwdriver, remove the four screws with springs from the back plate
- Using a #0 Philips screwdriver, remove the three remaining screws from the back plate
- Flip the card back over and carefully remove the heat sink from the card
- Using a #0 Philips screwdriver, remove the three screws from the front of the card
- Carefully remove the back plate from the card
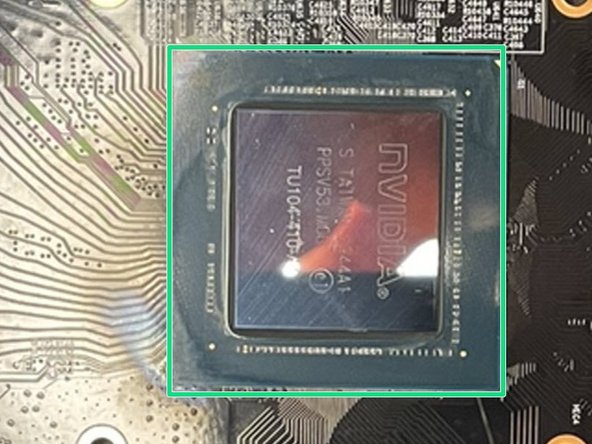
- Using 90% or higher isopropyl alcohol and cotton swabs, carefully remove all old thermal paste from the heat sink and CPU
- Be sure to completely remove any remnants of the old thermal paste
- Using a high quality thermal paste, such as Thermalright TF thermal paste, carefully apply a small amount to the video card
- Use a thin spreader, or credit card-like tool, spread the thermal paste evenly over the card, ensuring no excess paste leaks over the edge
- Heating the thermal paste in warm water may help it spread more evenly
- Remove the old thermal pads and clean the VRAM chips with 90% isopropyl alcohol
- Using the 0.5 mm thermal pad, place one strip, measured at 6 cm x 1.5 cm along the top VRAM
- Using the 0.5 mm thermal pad, place two strips, measured at 3 cm x 1.5 cm along the VRAM on either side of the CPU
- Remove the old thermal pads and clean the heat sink with 90% isopropyl alcohol
- Using the 1.0 mm thermal pad, place three strips, measured at 9 cm x 1.3 cm, along the heat sink as outlined in red
- Using the 2.0 mm thermal pad, place one strip, measured at 9 cm x 1.3 cm, along the heat sink as outlined in green
- Remove the old thermal pads and clean the back plate with 90% isopropyl alcohol
- Using the 2.5 mm thermal pad, place one strip, measured at 5 cm x 1 cm on the back plate as outlined in red
- Using the 2.5 mm thermal pad, place one strip, measured at 3.5 cm x 1.5 cm on the back plate as outlined in green
- Using the 2.5 mm thermal pad, place one strip, measured at 6.5 cm x 1.5 cm on the back plate as outlined in blue
- Follow all steps in reverse order to reassemble the video card once cleaned and thermal paste and all thermal pads are replaced


