Dell G15-5511 Gaming RAM Replacement
ID: 168149
Description: This guide provided detailed instructions on...
Steps:
- For your safety, discharge the battery below 25% and power down your device before disassembly.
- Use a Phillips #1 screwdriver to remove the four 6.8 mm-long screws that secure the cover.
- Use a Phillips #1 screwdriver to loosen the four captive screws.
- Insert an opening pick between the bottom-left corner of the back cover and the chassis.
- Pry up to release the clips securing the back cover.
- You'll hear a click whenever a clip is released.
- Insert your opening pick again between the bottom-right corner of the back cover and the chassis.
- Pry up to release the remaining clips securing the back cover.
- Grip the front of the back cover and lift it away from the laptop.
- Pull the back cover towards you to disconnect the clips along the top of the back cover.
- Remove the back cover.
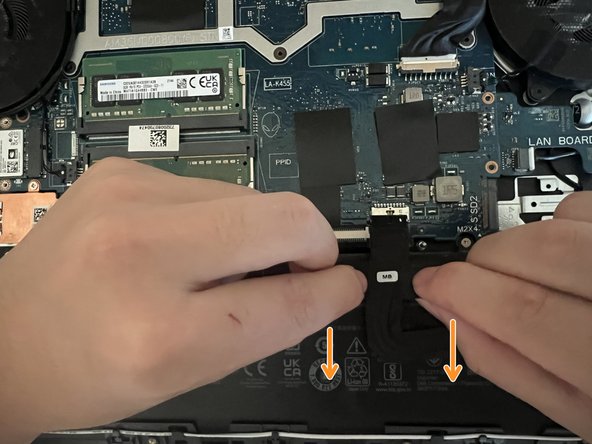
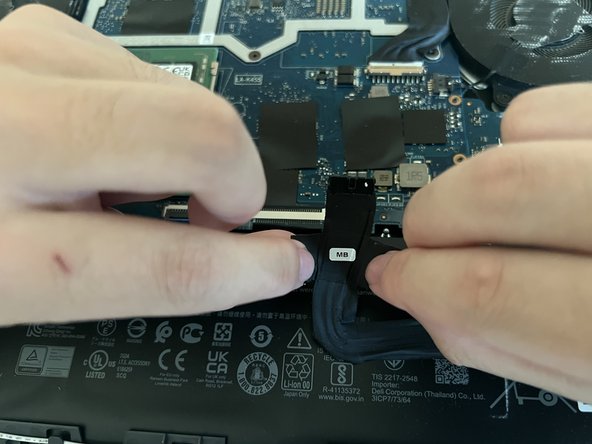
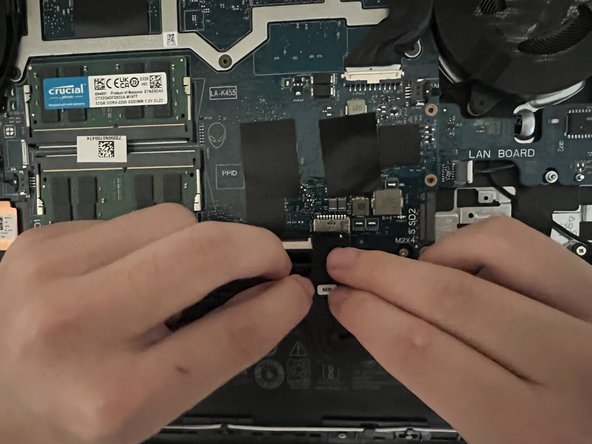
- Locate the component in the circle area, the battery connector on the motherboard.
- Carefully grasp the connector by its side and pull it away from the mother board.
- Do not apply excessive force since it could damage the connector or the socket.
- Locate the two RAM slots highlighted by the red rectangles.
- Locate the metal retaining clip outward, as highlighted by the red rectangles.
- Carefully grasp the metal retain clips and pull them away from the RAM slot.
- Once the clips are released, carefully pull the module out of the slot.
- When installing the new RAM, align the notches on the RAM module with the gap in the slot.
- Push down the RAM until the metal retaining clip snaps into place, retaining the RAM.
- If you have a second RAM that you want to be replaced, simply repeat the Step 2 and Step 3.
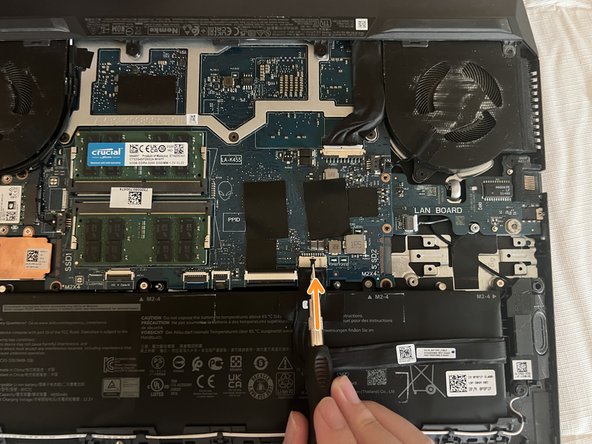
- Reconnect the Battery to the motherboard.
- Using a screwdriver to secure the battery connector, carefully push forward the top part of the battery connector.