Repair Guide: Fixing Broken Side Rails and a Misaligned Drawer in a Beko Freezer
ID: 169325
Description:
Steps:
- Fixing the side support or guide for the freezer drawer, which has broken over time from regular use and the weight of the drawer, causing it to sag when pulled out.
- 1. Unplug the fridge to work with the door open. Otherwise, the door alarm will go off.
- View of the drawer sagging on the right side, at risk of breaking.
- Remove the drawer and check the condition of the side guide or support, as they often break at the ends due to the weight and regular use.
- Empty the drawer. To keep the food from thawing, you can place it in the space where the drawer was, since it won’t be able to be reinserted until the next day, after 24 hours.
- While working with the door open for about 20 to 30 minutes, it's a good idea to cover the food to keep it cold.
- 3. Inspect the affected area, remove any loose debris, and trim any broken plastic.
- Tools to be used: electrical tape and scissors.
- 4. Apply electrical tape, preferably white, to avoid it sticking too much with the adhesive later and becoming hard to remove.
- The electrical tape is applied around the outline of the guide or support to fill in the gap.
- The area to be filled with adhesive is prepared
- 5. Two-part epoxy adhesive. I use the cheap kind you can find at any local dollar store since it dries semi-transparent. If you find a better one, feel free to use it. It dries in about 10 minutes.
- We extract both components of the glue on a cardboard or similar and mix it.
- Many times, I also use milk cartons as a base. They work great as a base for glue.
- 6 Now we will fill the gap with enough glue pressuring so that it is inserted well, but remember don't minimize the glue you can always cut that little extra.
- Applying and once the glue is smoothed we let it dry for about 10 minutes, but it won't be at its harness after 12 hours or more of applying be careful since it will be in a freezer in less than 10 degrees so it's best to leave for 24 hours as a precaution and get best results. (Remember that cold glue set takes longer to set)
- 7 After we close the fridge door and reconnect the fridge to its power source but remember we leave it like this after 24 hours to continue my guide. It's best to be able to continue the procedure since the adhesive solidifies more slowly with the cold temperature.
- 8 The next day, remove the insulating tape.
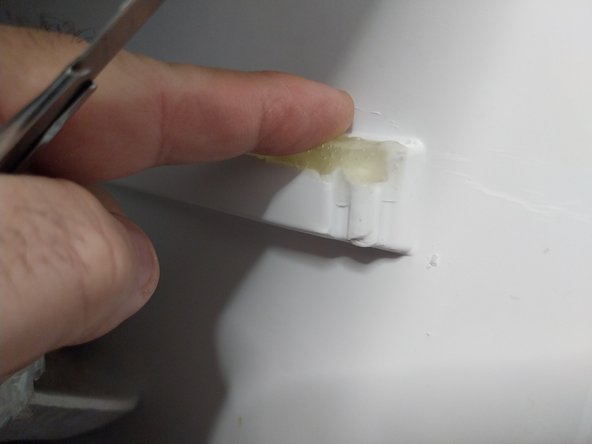
- 9 Now, we check with our fingers for abrupt areas, sharp areas, and raised areas in the glue. Many times, we will find these defects on the side we removed the insulating tape from.
- 10 Smoothened, we touch up imperfections such as peaks and protrusions in the glue with a cutter.
- 11 A light touch of Vaseline so when the drawer slides, it slides with ease on the repaired area.
- 12. Replacing and placing the food on the fixed drawer to ensure it is good and holding up with the weight on the drawer and guide to verify durability and proper sliding.