Corsair Harpoon RGB Wireless Battery Replacement
ID: 169407
Description: If your Corsair Harpoon RGB Wireless Mouse...
Steps:
- Flip the mouse upside down.
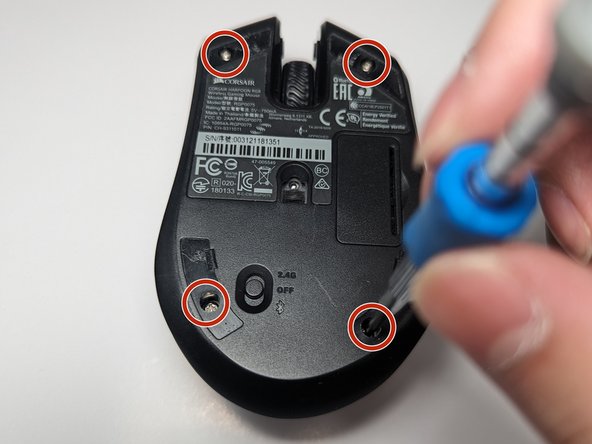
- Use a spudger to help pry the 4 mouse feet from the bottom of the mouse.
- Start at the small grooves at the edge of each mouse foot.
- Be careful when removing the mouse feet so you don't tear them, as you will need them for reassembly.
- Use a Phillips #0 screwdriver to remove the four 9 mm-long screws under the feet.
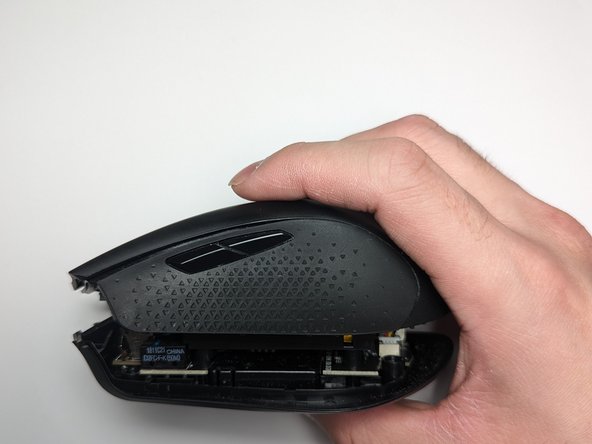
- Use a spudger to pry along the seam between top and bottom of the mouse.
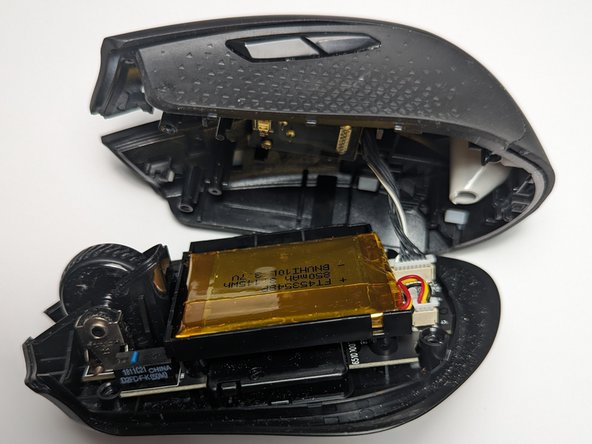
- Gently separate the top and bottom case until you can see the internals of the mouse.
- Do not fully remove the top cover as it is connected by a cable and will damage the mouse.
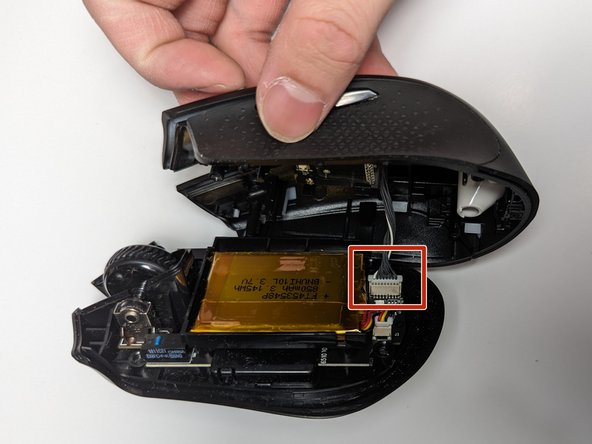
- Use the point of a spudger to push on alternating sides of the connector to "walk" it out of its socket and remove the cable attaching the top and bottom of the mouse.
- Use the point of a spudger or opening pick to push on alternating sides of the battery connector to "walk" it out of its socket and remove the battery cable.
- Use a spudger and wedge it between the battery and the mouse.
- Work the spudger left and right to slowly lift the adhesive.
- Do not poke the spudger into the battery.
- Once it is loose, lift and remove the battery.
- Place the new battery into the tray with the battery plug near the port.
- Make sure the battery is secured by pressing on the corners of the battery.
- Use your fingers to carefully plug the battery connector to its connection point.
- Take the top of the mouse and plug the connector to the bottom of the mouse
- Join the two parts of the mouse together.
- Make sure the mouse fits together with no gaps.
- Flip the mouse over and use a Phillips #0 screwdriver to secure the four 9 mm-long screws back in place.
- Do not overtighten the screws.
- Replace the four mouse feet that cover the screws.