Installing older versions of macOS Guide #4 Continued
ID: 169605
Description: If you're running a non-metal Mac, chances are...
Steps:
- First, you need to determine which graphics you do have on your Mac.
- If your Mac supports macOS Catalina natively, then your Mac more than likely has metal graphics, and you do not need this guide.
- If your Mac supports macOS High Sierra or OS X El Capitan natively, you have OpenGL graphics.
- If your Mac only supports Mac OS X Lion, then you do not have OpenGL graphics, and therefore you should focus on running OS X El Capitan on your machine using OpenCore and other patchers (coming in a later guide...).
- Using Guide #3, you probably already have OpenCore installed by this point. But, if you have not, go back and check Guides #1-#3.
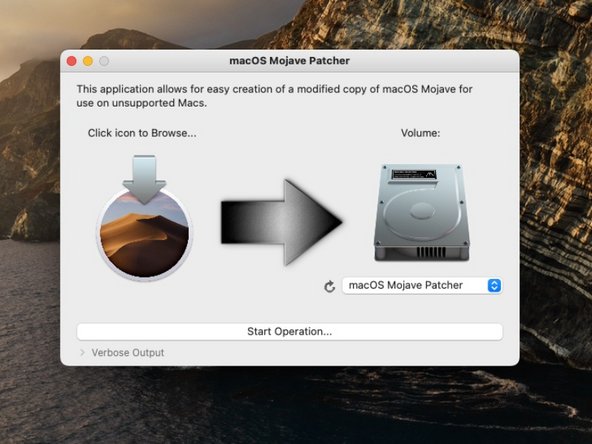
- Now, download the macOS Mojave patcher by DosDude:
- macOS Mojave Patcher
- Or if you are installing macOS Catalina (not recommended)
- macOS Catalina Patcher
- The only reason I do not recommend macOS Catalina is because most non-metal Macs do not have Continuity Support. Therefore, you will lose several wireless features like AirDrop and AirPlay while running macOS Catalina (because macOS Catalina requires newer hardware to run these features)
- Create a patched USB Installer using the application.
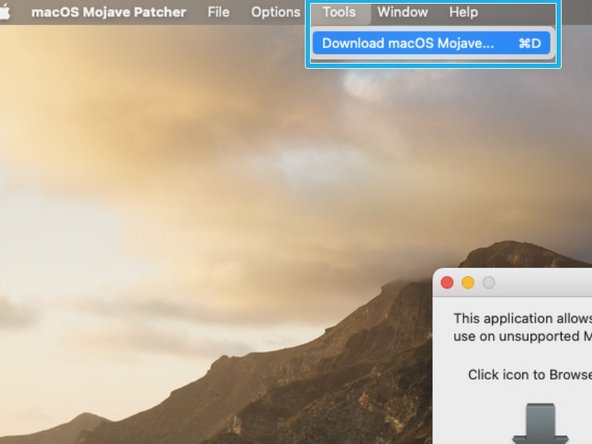
- If you do not have a copy of macOS Mojave, you can download a copy directly from the application.
- If you need more information on how to use this application, check out this guide by iFixit:
- How to install macOS Mojave on Unsupported Macs
- Once the USB drive is created, quit the app and install OpenCore onto the USB Drive.
- If you have already installed OpenCore directly onto your Mac, you can skip this step.
- Now reboot the Mac and choose EFI Boot, NOT THE USB DRIVE YOU JUST CREATED.
- The USB Drive you just created can be used to boot your Mac and install macOS Mojave. But, OpenCore is much more stable, and we want OpenCore to boot the Mac rather than the DosDude patcher.
- Once in the OCLP Boot Menu, this time choose your the USB Drive you just created, now that OpenCore has booted.
- Quick tip, if you unchecked "Show Boot Picker" while installing OpenCore, simply hold the "esc" key while starting.
- You can now install macOS.
- If you want to preform a clean installation, format the Mac's internal drive with Disk Utility.
- Please note that you cannot erase all partitions if OpenCore is installed on your Mac. For example, if you erase "Macintosh HD," the EFI partition will be left untouched and OpenCore will be fine. However, if you erase "Apple SSD," that will erase Macintosh HD, Recovery HD, and EFI. Your Mac cannot boot if the EFI is erased.
- Once installation begins, press "cmd+L" to activate the log. (This simply prevents the Mac from restarting automatically once the installation is complete.)
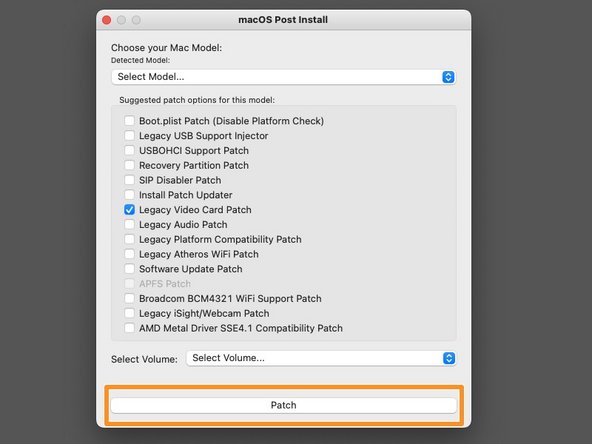
- Once the installation does complete, open macOS Post Install
- Instead of applying all patches available, OpenCore patches most of these on its own, and therefore you do not need to apply more.
- Choose your Mac model and apply only the "Legacy Video Card" patch.
- Click patch and reboot the Mac.