The Teardown of All Major Components of Acer Aspire A515-47
ID: 169699
Description: This is the Teardown of all Important Componets...
Steps:
- Alright,so,first things first,unscrew all the Screws from the Case
- Then,use a prying tool to open the Case
- Alright,after you pried open the case,put it somewhere where it wont bother you
- If you hear a poping sound,dont worry,its normal.
- Good,you took out the case.Now,go to the SSD
- Do you see that screw that holds down the SSD? Yea,unscrew that screw and put it somewhere where you wont lose it.You are gonna need it at assembly
- Now,just pull gently on the SSD and you are done
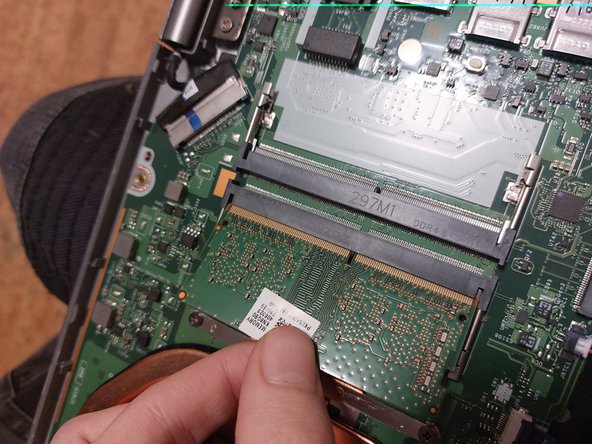
- Alright,so,the RAM is hold by the two metal pieces that are marked by me.You just have to pull outwards the metal
- Then,you just take the RAM out Slowly
- At Assembly,you just have to push down the RAM.If you hear the sound of metal locking,its fine.Just make sure you push it slowly
- First,Unscrew all three screws that hold the Heatsink.
- Put the Screws in a place where you wont lose them.You are going to need them at assambly
- After you took out the screws,lift the heatsink up a bit and just take it out.Its very easy
- Sorry for the bad image
- First,unscrew the Screws of the fans
- Put the Screws somewhere where you wont lose them.You are going to need them
- Then,just pull the fans gently and you are done
- Dont pull out the fans too hard.They are connected to some wires,and if you pull the fans too hard,the wires will break,breaking your laptop in the process
- Well,here is very simple.All you have to do is to unscrew the screw and put it somewhere where you wont lose it
- Then,just pull it out gently
- First,remove the Screw that holds the USB Port and lift up the Ribbon Connector and take out the ribbon gently
- Very important that you lift up the Ribbon Connector and also very important to take out the ribbon.If you dont do this,you may break the ribbon,and the ribbon is very important.It may be the Keyboard Input
- Now,just lift the port part.Its very easy to do that.The speaker is connected to the USB Port
- At Assembly,it will be harder to put the ribbon back.Dont force it,it will be placed correctly if you try.You will know when its places correctly when it got all the way in
- First,Remove the Screws and lift up the Ribbon Connnectors.Then,lift the black tape a bit
- Then,take out the Ribbons
- Just as I said at the last step,its very important that you lift up the Ribbon Connectors and take out the Ribbons,otherwise,the Ribbons may break
- Now,you can lift up the battery,but not completly