Framework Laptop 16" Webcam Module Replacement
ID: 169749
Description: Use this guide to replace the webcam, aka " lap...
Steps:
- Unplug all cables and fully shut down your laptop.
- If your repair requires a spudger, a T5 Torx, or a Phillips screwdriver, you can use the included Framework screwdriver. Whichever works best for you!
- The bezel is secured with magnets!
- Slide your fingernail under the inside edge of either bottom corner of the bezel.
- Pull the bezel away from the screen to release the first few magnets.
- Lift the bezel around the perimeter of the screen until all of its magnets are released.
- Remove the bezel.
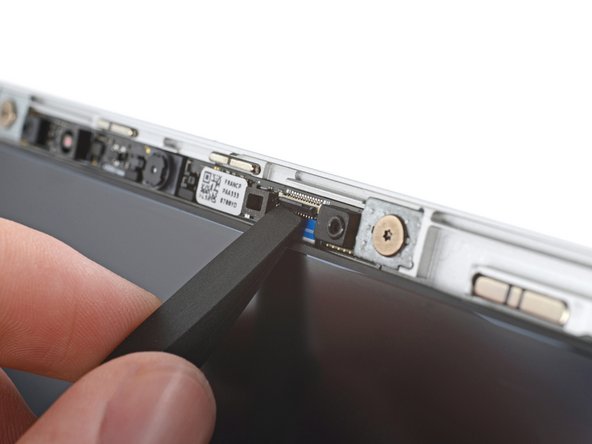
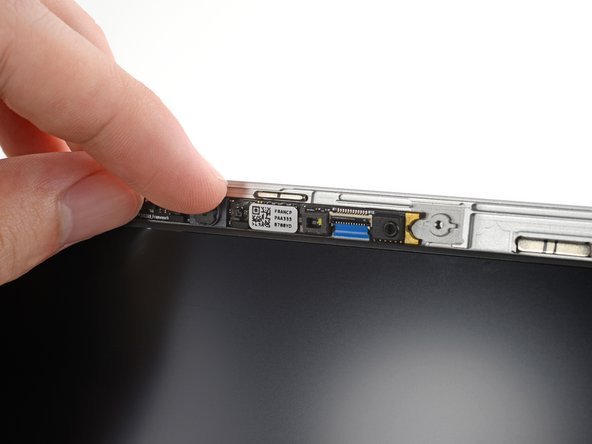
- Use the flat end of a spudger, or a clean fingernail, to lift up the locking tab on the webcam module ZIF connector.
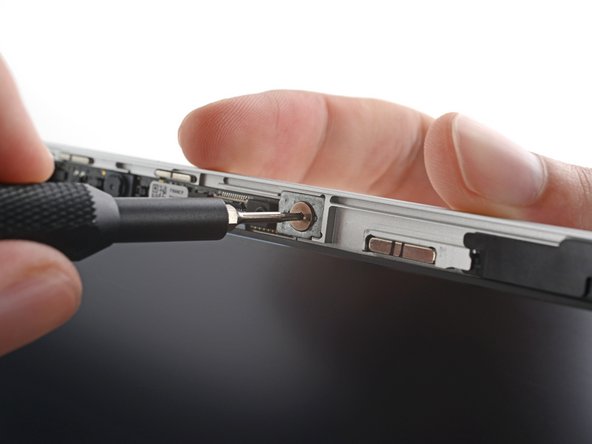
- Use a T5 Torx screwdriver to remove the two 2 mm‑long screws securing the webcam module.
- The screws thread through metal brackets. If they come off with the screws, you can skip the next step.
- During reassembly, support the screen frame with your other hand as you reinsert screws to prevent the laptop from accidentally tipping over.
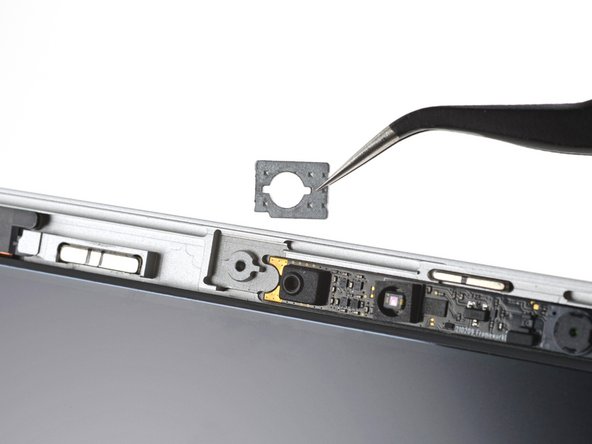
- Use tweezers, or your fingers, to remove the two metal brackets on both ends of the webcam module.
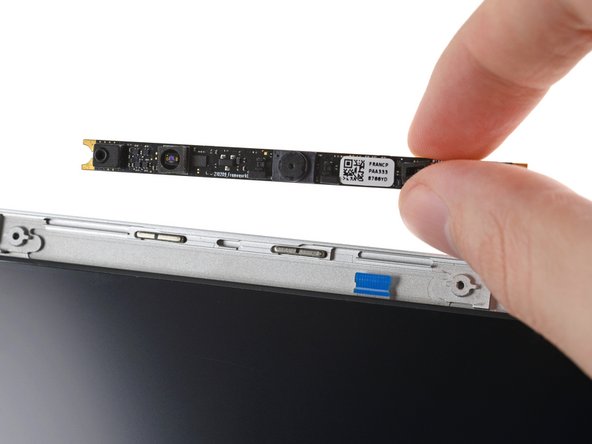
- Use tweezers to lift the right side of the webcam module until the cable slides out of the ZIF connector.
- Remove the webcam module.
- Reconnecting the webcam module is a little tricky. If you're having difficulty, you can reposition the display to give the webcam cable more slack.
- During reassembly, follow these instructions to reinstall a new webcam module:
- Use tweezers to gently bend the webcam cable away from the screen frame.
- Use your other hand to align the webcam module over the cable and lower it into place.
- Make sure the webcam module sits level with the display before flipping down the cable locking tab and continuing reassembly.