Asus Q525U CMOS Battery Replacement
ID: 170603
Description: If your Asus Q252U (model BI7T9) BIOS passwords...
Steps:
- Begin by powering off the device and flipping the device over.
- Carefully remove the two longer 9.5 mm screws on the corners with a Phillips #1 screwdriver.
- Remove the eight 7.5 mm Phillips #1 screws on the back of the device.
- Use an opening pick to separate the back cover from the device.
- For easiest removal, begin by prying at one of the front corners and sliding the tool under the cover in a counter-clockwise motion (to the left) toward the laptop hinge.
- Once the cover has been separated from the device, carefully lift the back cover off the device (begin by lifting from the front of the cover first).
- The back cover should be easily removable, allowing full access to all of the internal components.
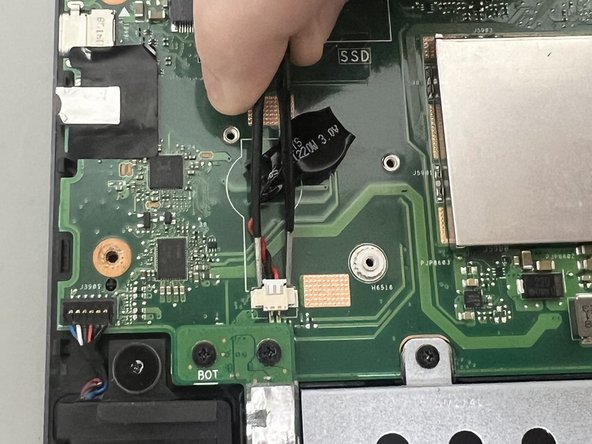
- Use the point of a spudger to push on alternating sides of the CMOS connector to "walk" it out of its socket.
- It may take a lot of alternating before the connector comes out. Be patient, and don't pull on the cables.
- To reconnect the cable, align the connector and use a spudger or clean fingernail to push it fully into the socket.
- Don't push on the cables themselves, or you may damage the connector.
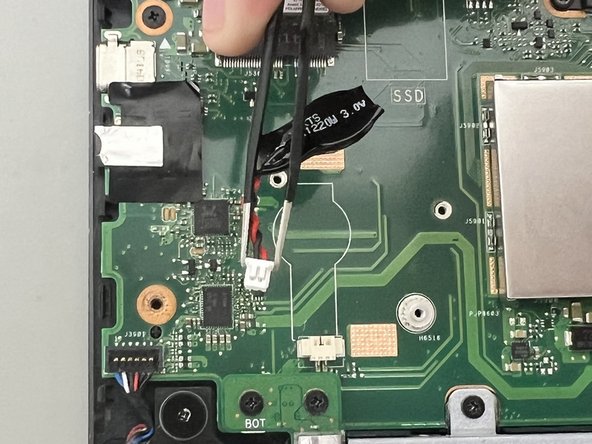
- Pull out the CMOS battery cable by the tab using tweezers.
- Remove the CMOS battery.