Back Cover Removal (Pro)
ID: 170795
Description: This guide shows how to remove the back cover...
Steps:
- Firmly press a SIM eject tool, bit, or straightened paper clip into the SIM card tray hole on the left edge of your phone until the tray ejects.
- Remove the SIM card tray.
- During reassembly, use the tray's markings to orient and reinsert it properly.
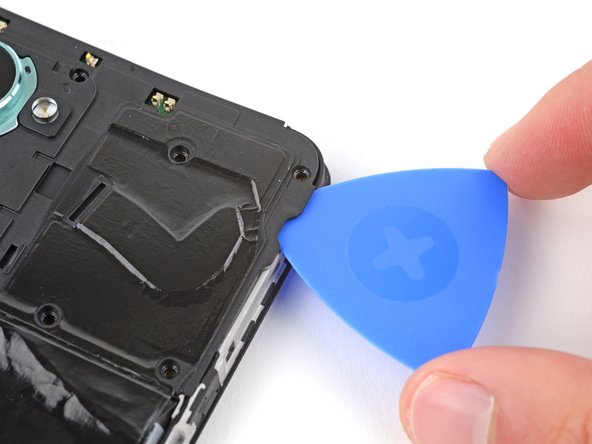
- Insert the tip of an opening pick between the back cover and frame, at the SIM card tray cutout.
- Position the opening pick straight down and slide it along the left edge to begin unclipping the back cover.
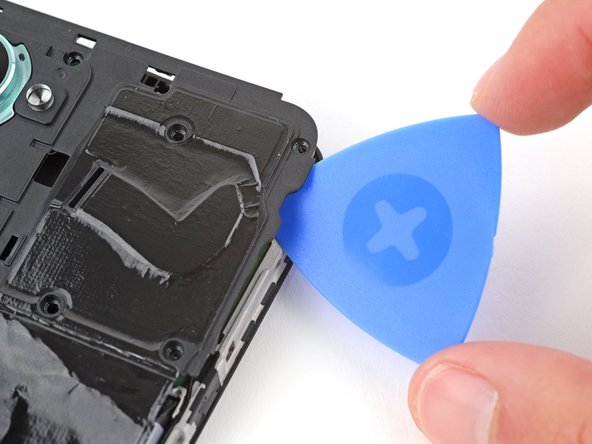
- Continue sliding the pick around the perimeter of your phone until the back cover is fully unclipped.
- The corners can be tricky to unclip and may take some force. If you're having trouble, try prying up with the pick.
- Don't try to fully remove the cover yet, as a delicate cable still connects it to your phone.
- Carefully flip your phone over so the back cover is facing up.
- Lift the back cover off the frame and flip it over the left edge of your phone, laying the cover flat on your work surface.
- Be very careful not to strain the back cover's delicate cable.
- During reassembly, place the back cover onto the frame and firmly squeeze around the perimeter to reengage all the clips.
- Be very careful not to puncture the battery with your screwdriver.
- Use a Phillips screwdriver to remove the nine 3.6 mm‑long screws securing the motherboard cover.
- The screw near the center of the top edge is covered by a sticker. Pierce through it with your screwdriver, or use tweezers to remove it.
- Insert an opening pick between the right edge of the motherboard cover and frame.
- Twist the pick to fully unclip the cover.
- Remove the motherboard shield and its connected graphite sheet.
- During reassembly, set the motherboard shield into place and press down firmly around the perimeter to reengage the clips.
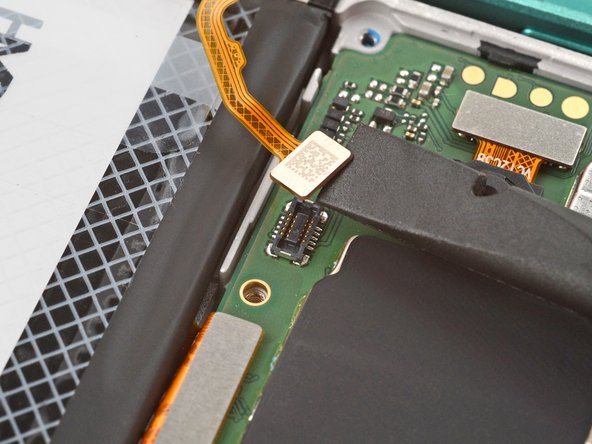
- Use the flat end of a spudger to pry up and disconnect the battery press connector from the bottom edge of the motherboard.
- To reconnect these type of connectors, align the connector over its socket and press down with your fingertip—first at one side, then the other—until it clicks into place. Don't try to force the connector into place, or you may permanently damage it.
- Use the flat end of a spudger to pry up and disconnect the back cover press connector from the bottom edge of the motherboard.
- Remove the back cover.