Cricut Explore Air 2 Roller Bar Motor Replacement
ID: 171074
Description: If you need to replace the roller bar motor,...
Steps:
- With the Cricut open, access the two internal screws on the front left side.
- Use the Phillips #1 screwdriver to remove the top 10.82 mm screw and the bottom 9.1 mm screw.
- Rotate the Cricut so the bottom is facing upwards.
- Identify the two screws with pads.
- Using the Phillips #2 screwdriver, remove both 42.77 mm screws.
- Rotate the Cricut back to its upright position.
- Gently lift the cover on the left side of the machine to reveal the parts underneath.
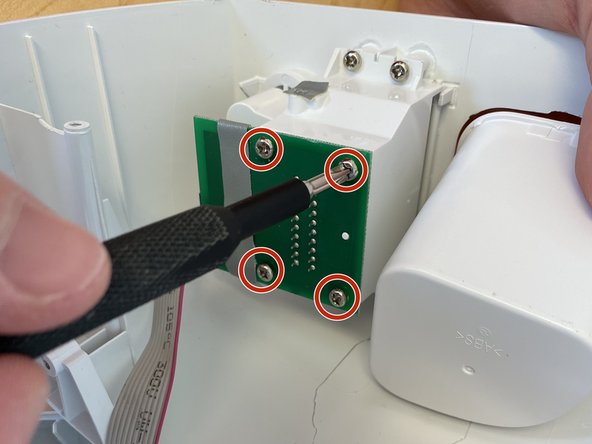
- Locate the circuit board on the cover just removed.
- Use the Phillips #1 screwdriver to unscrew each of the four 10 mm screws.
- Gently unplug the connector, removing the circuit board.
- Gently unplug the connector located on the roller bar motor.
- Locate the three screws securing the plate holding the roller bar motor to the Cricut.
- Use the Phillips #1 screwdriver to remove each of the three 5 mm screws.
- Remove the motor from the interior of the Cricut.
- Gently remove the white gear from the roller bar motor.
- Locate the two screws holding the roller bar motor to the mounting plate.
- Use the Phillips #1 screwdriver to remove the two 2 mm screws.
- Remove the motor from the plate.