Logitech G Pro X Superlight Scroll Wheel Board Replacement
ID: 171098
Description: Use this guide to replace the scroll wheel...
Steps:
- Slide your mouse's power switch down so it's in the OFF position.
- A red indicator should be visible beneath the switch.
- Unplug all cables from your mouse.
- Flip the mouse over so the feet are facing up.
- Throughout your repair, it may be helpful to lay your mouse on a soft cloth to stabilize it and prevent damage while you work.
- The feet are secured to the bottom of the mouse with strong adhesive. In order to cleanly remove them, the adhesive needs to be thoroughly heated.
- Heat an iOpener and lay it on the mouse feet for one minute to heat the adhesive.
- Alternatively, you can use a hair dryer on the Low heat setting to soften the adhesive.
- If you're using a hair dryer, only heat the feet a few seconds at a time or you may warp the plastic shell.
- The feet have two layers—a rubberized one and an adhesive pad underneath.
- If you're reusing the feet, be very careful not to separate the two layers or damage the feet.
- Carefully slide the point of a spudger under the circular foot, making sure it goes under both the foot and its adhesive pad.
- The foot recesses have a small notch that makes it easier to slide your spudger under.
- Gently slide the spudger farther under the foot and lift until you can grab it with your fingers.
- Peel up and remove the foot.
- If the rubber layer separated from its adhesive pad, use the same process to remove the pad.
- Repeat the last three steps to remove the remaining feet.
- If you're just removing the feet to open the mouse, you don't need to remove the circular one around the bottom sensor.
- To install a new foot:
- If any of the feet got damaged during removal or separated from their adhesive pads, replace them.
- Use a spudger to carefully scrape up and remove any remaining adhesive bits.
- Use isopropyl alcohol and a microfiber cloth to thoroughly clean all adhesive residue from the foot recesses. Allow the surface to completely dry.
- Remove the feet from their backing and firmly press them into place.
- Use a Phillips screwdriver to remove the six 4.5 mm‑long screws securing the bottom shell.
- Don't try to fully separate the shells yet, as two cables still connect them.
- Gently pull the top and bottom shells apart.
- Set your mouse down with the bottom shell on the workspace and the top shell flipped over the right edge.
- Use an object such as a small box or stack of books to prop up the top shell so you can access the cables without straining them.
- Use the point of a spudger to lift the locking flap on the top shell ZIF connector.
- Use tweezers to gently pull the cable straight out of its socket.
- During reassembly, insert the cable into its socket up to the white line before flipping down the locking flap.
- Flip the top shell onto the mouse and let it rest so it's partially hanging over the left side, giving you access to the battery connector on the right edge.
- Insert each arm of a pair of angled tweezers into the top of the cutouts on the right edge of the battery connector—the tweezers should curve upward.
- Gently press the tweezers in and up to push the connector out of its socket enough that you can get a firm grip with your tweezers.
- You may need to repeat this multiple times before the connector starts to come out.
- Use tweezers to grip the battery connector and pull it straight up and out of its socket.
- During reassembly, push down on the edges of the connector with the flat end of a spudger until it's fully seated in the socket.
- Remove the top shell from the bottom shell.
- The battery is secured to the top shell with mild adhesive. Heating the adhesive will soften it and make it easier to separate.
- Use an iOpener or hair dryer to heat the battery.
- If you're using a hair dryer, remember to have it on the Low setting and only apply heat a few seconds at a time.
- Be very careful not to puncture or crease the battery during this step, as it can leak chemicals or catch fire.
- With one hand, firmly secure the top shell.
- With your free hand, insert the flat end of a spudger between the top edge of the battery and the shell.
- Carefully slide the spudger under the battery and pry it up to separate the adhesive.
- Remove the battery.
- During reassembly:
- Never install a deformed or damaged battery, as doing so is a potential safety hazard. Replace it with a new battery.
- If the battery adhesive is still sticky, you can reuse it. Otherwise, remove all the old battery adhesive.
- If your new battery has adhesive pre-installed, remove the plastic liner to expose the adhesive. Otherwise, apply strips of thin, double-sided tape to the battery well (not directly to the battery) where the old adhesive was.
- Make sure the cable is on the side nearest its connector and firmly press the battery into place.
- Use a Phillips screwdriver to remove the four 3.5 mm‑long screws securing the left and right click buttons.
- Use your fingers to remove the left and right click buttons.
- When reinserting the buttons, make sure the screw holes go over their posts on the bottom of the top shell.
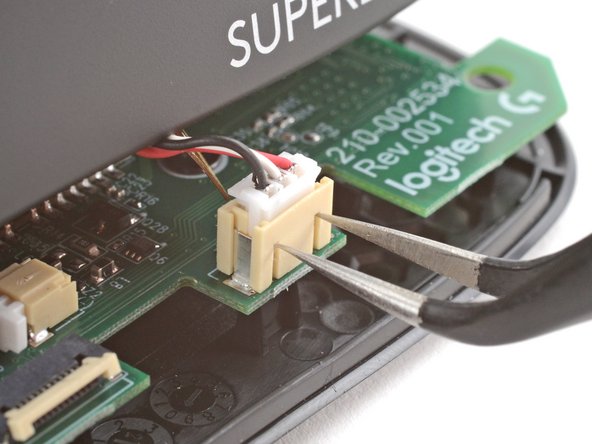
- Use the point of a spudger to push on alternating sides of the plastic latch on the scroll wheel board connector.
- You should feel the latch pop into the unlocked position. Don't push too far, or the latch may come completely off the connector.
- Use tweezers to gently pull the cable straight out of its socket.
- The cable should come out easily. If you feel any resistance, push the latch out a little more and try again.
- A small spring holds the right side of the scroll wheel in place. Be careful during this step, as the spring will eject with very little force.
- Use tweezers to lift the longer edge of the spring out of its groove and remove the spring.
- Installing the spring during reassembly is very tricky and will most likely take multiple attempts—be patient and work slowly. To install the spring, perform the following:
- Place the circular part of the spring onto its post so the longer end is closer to the scroll wheel mounting peg.
- Guide the short end of the spring into its slot near the rear of the scroll wheel.
- Lift the long end of the spring over and into its groove, so it's sitting on top of the scroll wheel mounting peg.
- Use a Phillips screwdriver to remove the four 3.4 mm‑long screws securing the scroll wheel board assembly.
- Use your fingers to lift the scroll wheel board assembly straight up and remove it.
- During reassembly, use the alignment pegs on the shell to help orient the board.
- Firmly secure the board with one hand, and use your free hand to gently pull the scroll wheel straight out of its socket.
- You're left with the scroll wheel board.