How to Repair a Patio Solar Light
ID: 171103
Description: Has your solar patio light stopped working?...
Steps:
- Disassemble the circuit box using a Phillips screwdriver.
- Using a multimeter, put the black wire in the COM port, and the red wire into the far right port. Set the switch to 20 volts DC.
- Remove battery from the port.
- Check both ends of the battery with the multimeter.
- The red prong touches the negative side, and the black prong touches the positive side of the battery.
- Ensure that the multimeter screen shows a number that matches or is greater than the voltage of the battery. If not, replace the battery.
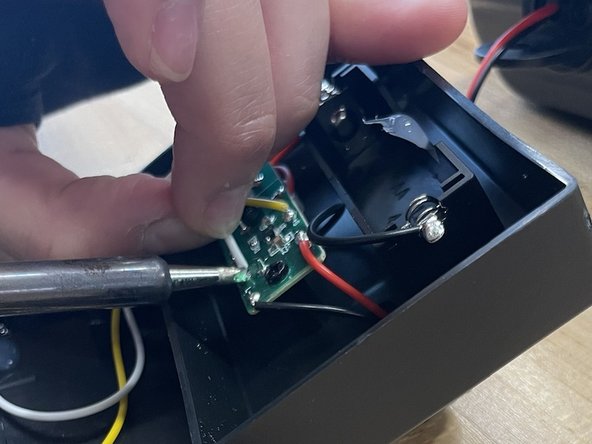
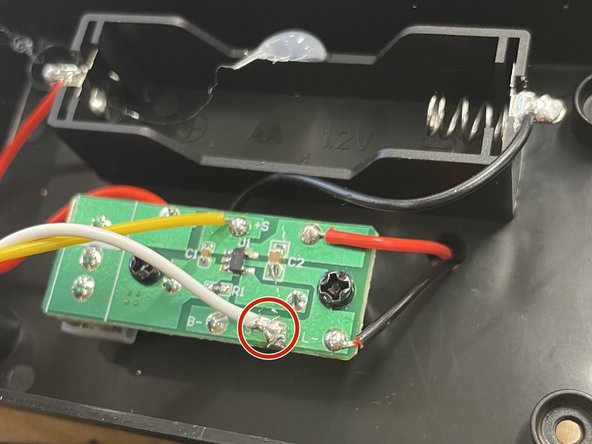
- Check the circuit board for detached, or loosely connected wires.
- Use a soldering iron at 400 Celsius to melt your soldering wire. Gather a droplet on the tip of the soldering iron, and use the drop to reattach the disconnected wire back onto the circuit board.
- CAUTION: Don't handle metal parts of the soldering iron without proper gloves and protection.
- Turn your solar light back on before reassembling to test if it’s working properly.
- When the light turns on, reassemble your solar light.