Cricut Explore Air 2 Roller Bar Replacement
ID: 171895
Description: If you need to replace the roller bar, use this...
Steps:
- On both the left and right sides of the Cricut, locate the two internal screws.
- Use a Phillips #1 screwdriver bit to unscrew the top 10.8 mm screw and the lower 9.1 mm screw on each side, four screws in total.
- Rotate the Cricut so the bottom faces upwards.
- Locate the four screws, two on the left and two on the right, with pads attached.
- Using a Phillips #2 screwdriver, remove all four of the screws and their pads.
- Rotate the Cricut back to an upright position.
- Gently lift the left and right sides of the Cricut's plastic shell off.
- On the right side of the Cricut, locate the circuit board screwed in to the cover just removed.
- Locate the four screws securing the circuit board to the shell.
- Use a Phillips #1 screwdriver to unscrew each of the four 10 mm screws.
- Gently unplug the connector from the circuit board, freeing the right side of the plastic shell completely.
- On both the left and right sides of the back plastic panel.
- Using a Phillips #2 screwdriver, unscrew each of the four 5mm screws.
- Wedge a plastic pryer tool next to the left side of the back panel.
- Gently pry the left side of the back door from the rest of the machine.
- Repeat with the right side of the back door to completely remove the back panel.
- On both the left and right sides, locate the screws securing the top door's hinge.
- Use a Phillips #1 screwdriver to remove the two 6.5 mm screws on each side, four in total.
- Gently lift the lid off of the Cricut.
- Locate the screws on the corners of the metal interior plate on both the left and right sides.
- Unscrew the two the 8 mm screws on each side, four in total.
- Gently lean the metal interior and all that comes with it backwards, exposing the bottom plastic shell of the Cricut.
- Locate the screws securing the front door hinge to the bottom plate of the Cricut.
- Unscrew each of the four 5 mm screws on each side, 8 in total.
- Gently remove the front door from the bottom plate of the Cricut.
- Locate the spring on the left side of the Cricut's metal interior frame.
- Gently remove the spring by disconnecting the hooks on either side.
- Repeat on the right side.
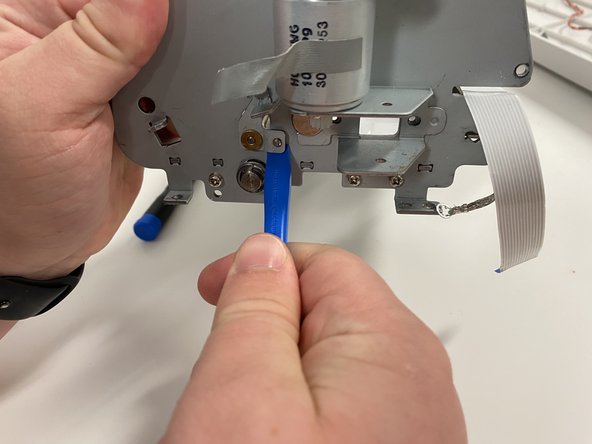
- Identify the metal piece holding the roller bar in place.
- Wedge a prying tool underneath the metal to free the interior from this piece of the frame.
- Repeat on the right side.
- Gently push the metal frame, skewing it to free the roller bar.
- Do not push too hard or too quick, as you risk breaking the frame.
- Repeat on the right side to fully free the roller bar.