Lenovo ThinkPad P1 Gen 7 SSD Replacement
ID: 173480
Description: Follow this guide to remove, replace, or...
Steps:
- Shut down your laptop (don't just put it in sleep mode) and disconnect all cables.
- Flip the laptop upside-down, and rotate it so the screen hinge faces towards you.
- Use a Phillips screwdriver to loosen the six captive screws securing the base cover.
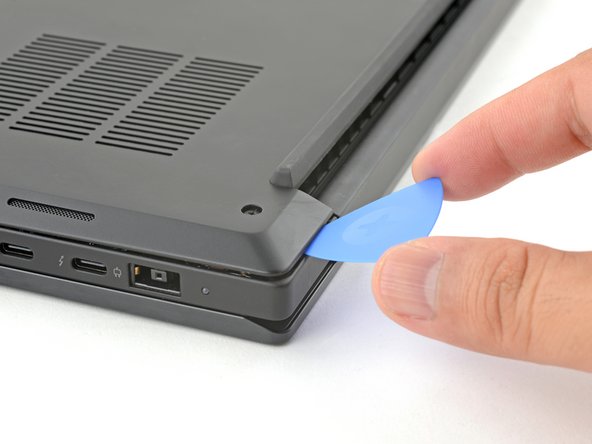
- Press the tip of an opening pick into the seam between the base cover and the bottom-left corner of the frame (near the screen hinge).
- It can be tricky to get the pick into the seam for the first time. Angle the pick vertically and press down with firm pressure.
- Pivot the pick down and slide it around the corner to release the clips.
- Slide the opening pick along the left edge to release the clips securing the cover.
- Press the tip of an opening pick into the seam between the base cover and the bottom-right corner of the frame (near the screen hinge).
- Pivot the pick down and slide it around the corner to release the clips.
- Slide the opening pick along the right edge to release the clips securing the cover.
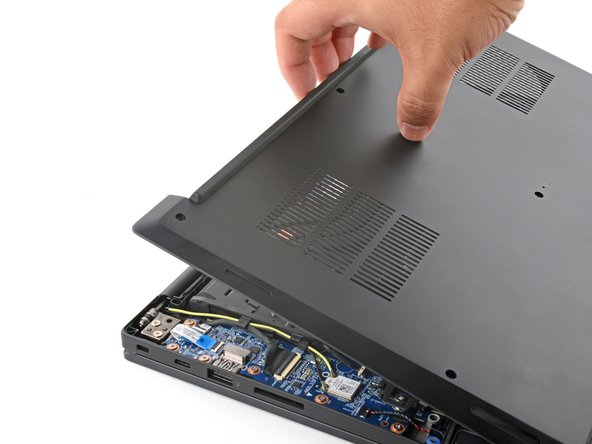
- Grasp the base cover along the screen hinge edge and pull up to loosen the cover.
- Lift and remove the base cover.
- Because of the battery connector's design, the only way to disconnect the battery is by physically removing it.
- Use a Phillips screwdriver to loosen the six captive screws securing the battery.
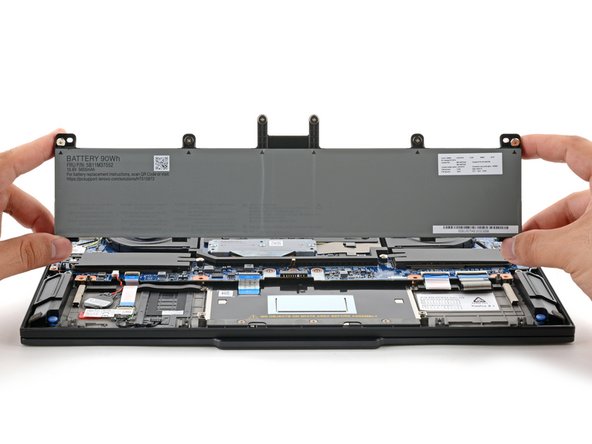
- Grasp the top edge of the battery and lift to disconnect it.
- You may feel a little resistance from the battery connector as it disconnects—that's normal.
- Lift and remove the battery.
- Depending on the model, your laptop may have two SSD slots. The replacement procedure is the same for both of them.
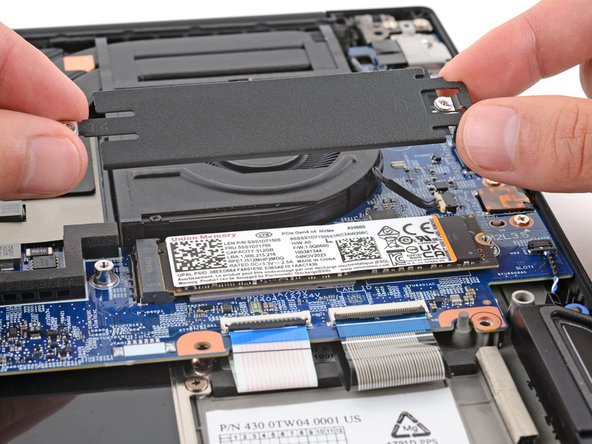
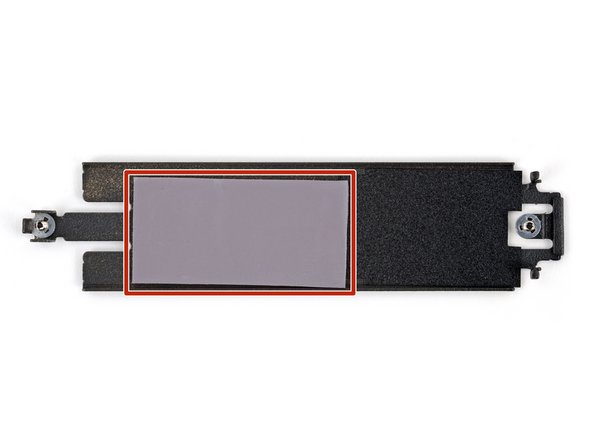
- Use a Phillips screwdriver to loosen the two captive screws securing the SSD cover.
- Lift and remove the SSD cover.
- You may feel slight resistance, as there's a thin thermal pad between the top of the SSD and the cover.
- During reassembly:
- Make sure the bottom of the cover has a thermal pad. If the pad remained intact on top of the old SSD, carefully transfer it to the cover.
- If you're replacing the pad, make sure the new one is the same thickness as the old pad.
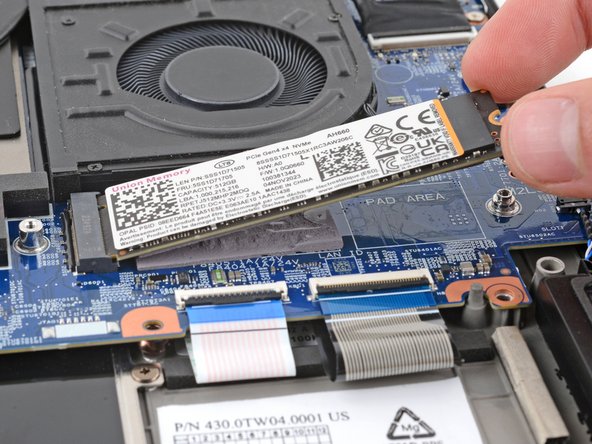
- Two thermal pads bond the bottom of the SSD to the motherboard. Depending on their age and condition, it may take some force to separate the SSD from the pads.
- Grip the SSD by its edges near the screw notch and lift to separate it from the thermal pads underneath—it should pop up at a slight angle.
- Lift with gradual force. If the SSD detaches from the pads unexpectedly, you may pull up too hard and damage the socket.
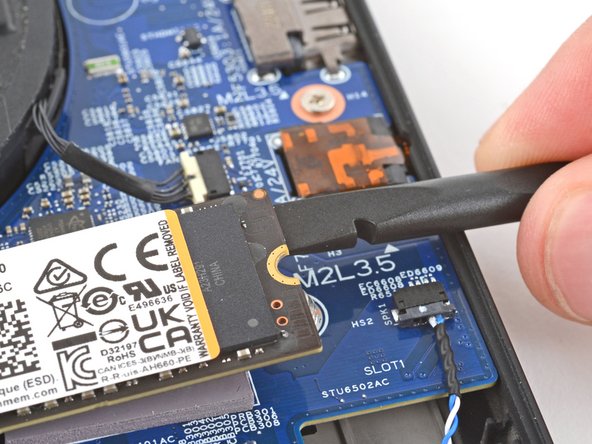
- If the SSD isn't budging, try using the flat end of a spudger to pry up the edge of the SSD with the screw notch.
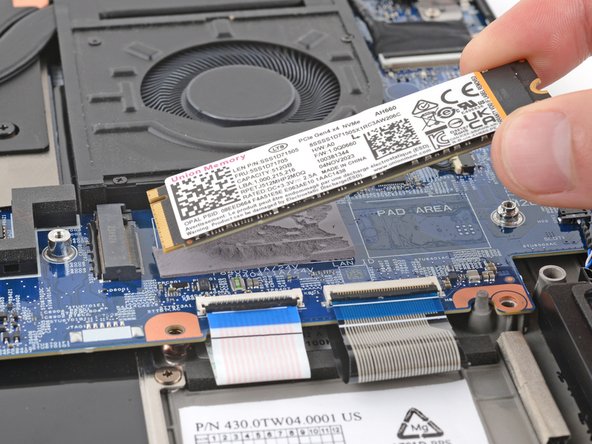
- Grip the SSD by its edges near the screw notch and pull it straight out of its socket.
- Check the condition of the two thermal pads under the SSD and replace them if they're damaged. If a pad remained intact on the bottom of the old SSD, carefully transfer it to its spot on the board.
- If you're changing the type of SSD (single-sided or double-sided), you'll need to change the pads so they're the proper thickness.
- To replace a damaged pad:
- Make sure your new pad is the correct thickness and size. Pad thickness depends on the type of your replacement SSD—2.25 mm for a single-sided SSD and 0.8 mm for a double-sided SSD.
- Use a spudger or your fingers to carefully remove all of the old pad from the motherboard.
- Be very careful not to damage any of the small surface-mounted components on the board.
- Use highly-concentrated (more than 90%) isopropyl alcohol and a lint-free cloth (or coffee filters) to clean up any thermal pad residue.
- Carefully put the new pad onto the board, making sure it goes into the rectangle marked PAD AREA.