Anker Vertical Mouse 2.4Ghz (A7852M or TM137G) scroll wheel Repair
ID: 173727
Description: Over time, the mouse can become very prone to...
Steps:
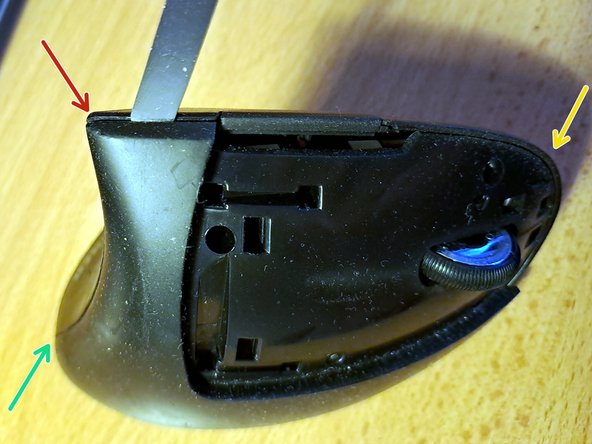
- The plastic cover of the click buttons must be removed to access the underlying screws.
- First, pull open the back of the cover with an opening tool a spludger in the direction of the red arrow.
- Then, slide the cover forward in the direction of the green arrow to release it from the body of the mouse.
- The white wheel located in the picture by the red circle is the scrolling sensor. It's easy to reach for cleaning but the same design makes it easy for dust to interfere with it's functioning.
- Use a dust blower or any compressed air to blow eventual dust trapped in the sensor.
- Test the scrolling functionality. If scrolling has recovered, you are done with the repair, otherwise attempt multiple times to blow the dust away, in case no positive change can be noticed, continue to the next step.
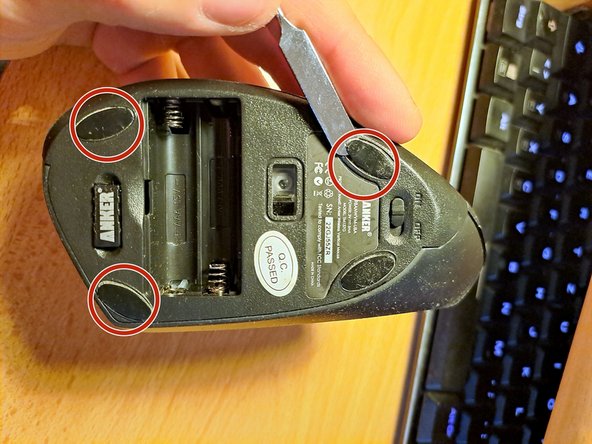
- To access the three screws at the bottom of the mouse, use a metal spudger to remove the pads. These pads, which are made of anti-friction plastic, are indicated by red circles in the picture.
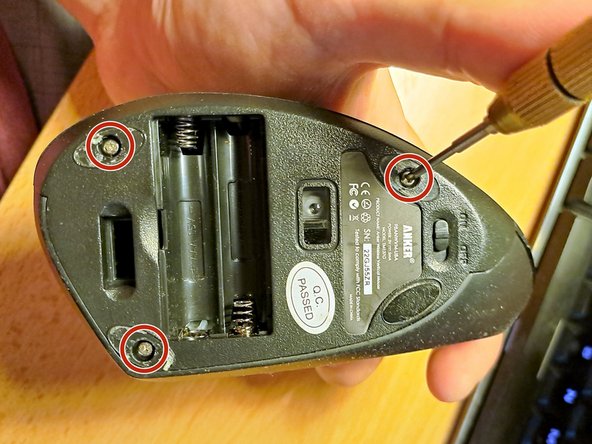
- Use a Phillips #00 to remove the 3 screws shown by the red circles in the picture.
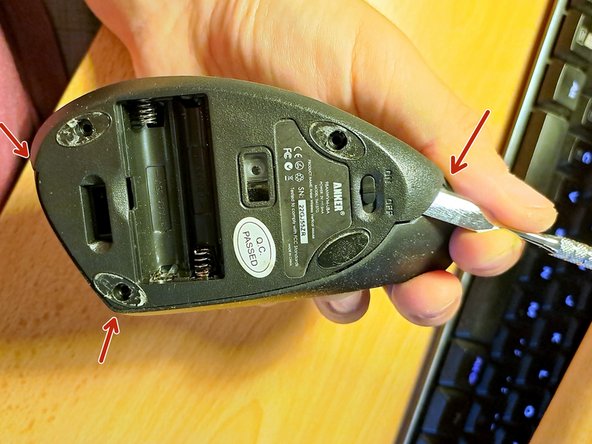
- Using a plastic opening tool or spudger, start at the front of the mouse to separate the bottom from the upper body.
- To disconnect the upper body from the mainboard, firmly pull the crimp header with your fingers in the direction of the red arrows. Avoid pulling the wires too hard to prevent them from being removed from the crimp header.
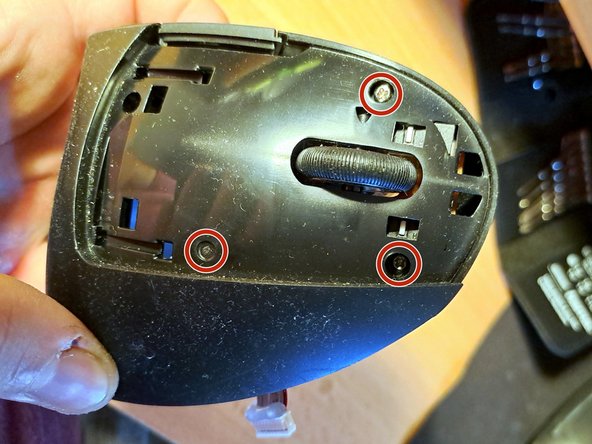
- Use a Phillips #00 to remove the 3 screws shown by the red circles in the picture.
- To separate the upper body in two, use a plastic opening tool or spudger.
- Start at the top-rear of the mouse (red arrow) and move to the bottom-rear (green arrow).
- Finally, move along the edge to the front (yellow arrow)
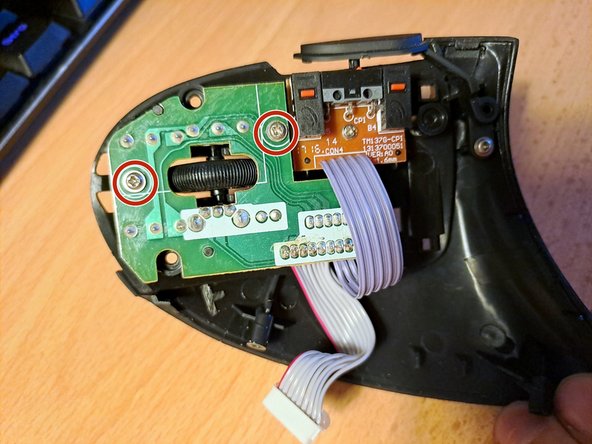
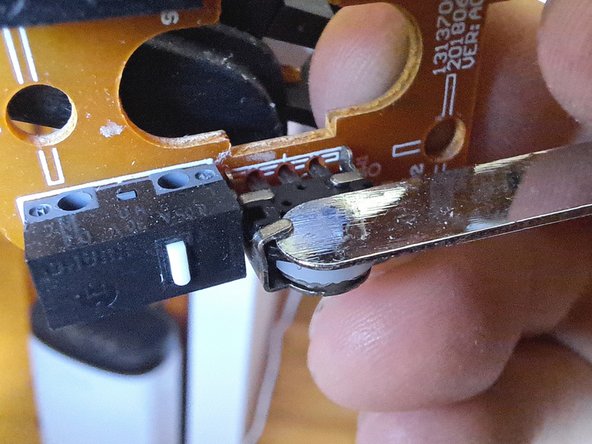
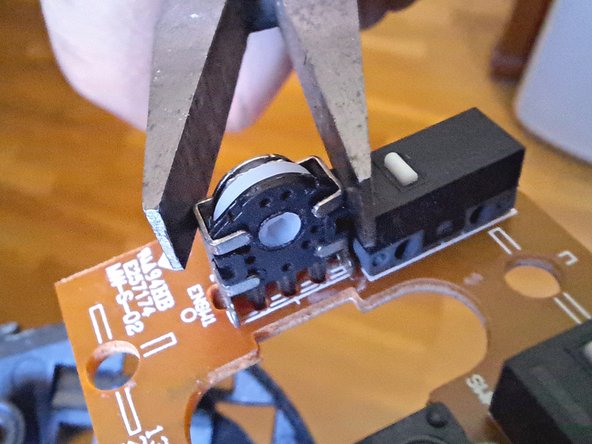
- To free the board holding the scroll wheel, the left, right, and middle click buttons, use a Phillips #00 to remove the 2 screws shown by the red circles in the picture.
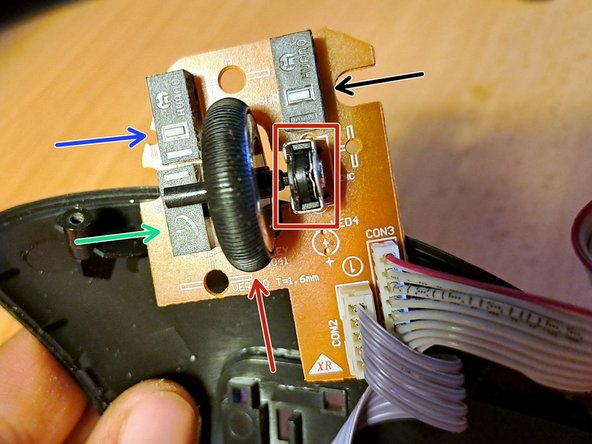
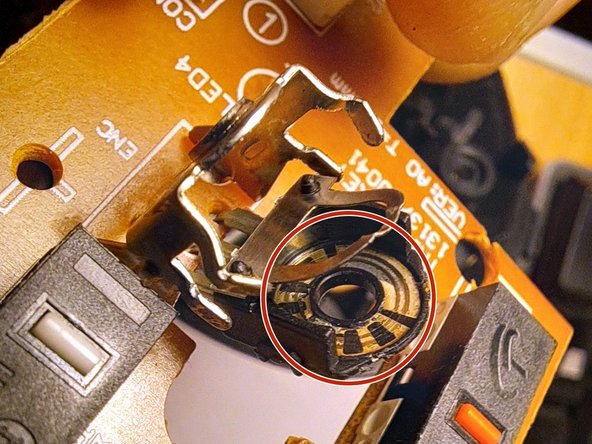
- The red box frames the encoder identified on the pcb as enc, this sensor records the scrolling movements of the wheel. The red Arrow points to the scroll wheel. Inspects this two components, search for any sign of loose connections, dust, or particles in the encoder, signs of corrosion.
- The rest of the arrows point to: green -> middle click button; blue -> left click button; black -> right click button.
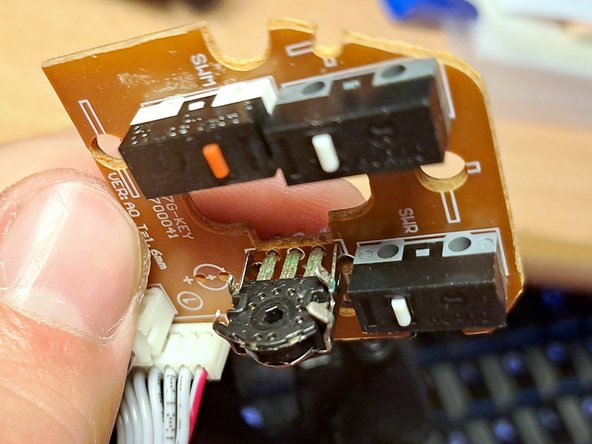
- Now that the encoder is accessible from any direction, use a dust blower, any compressed air and a brush to blow eventual dust trapped in the sensor from different angles.
- Reconnect the ribbon cables and insert back the batteries, turn on the mouse and test the scroll functionality.
- If the scrolling behaves as expected, remove the batteries and assemble back the mouse.
- Otherwise, in case the functionality of the scroll wheel is not recovered, proceed to the next step, the deep cleaning of the encoder sensor.
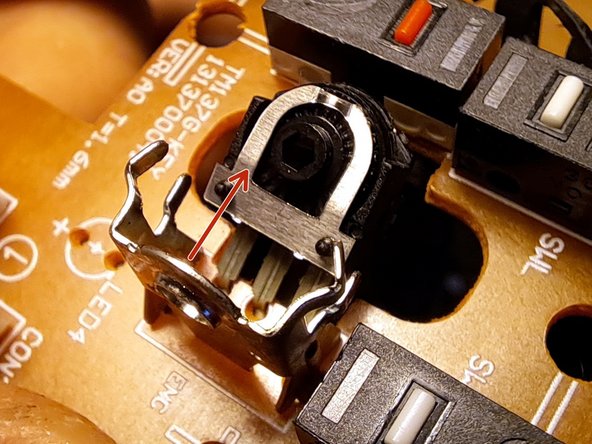
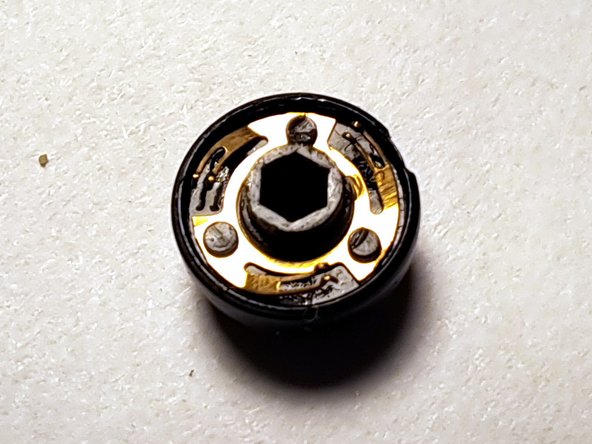
- To refurbish the encoder it must firs be disassembled into its constituent components: metal casing, clips, turntable and the board.
- Use a spudger to bend open the brackets of the casing enclosing the board.
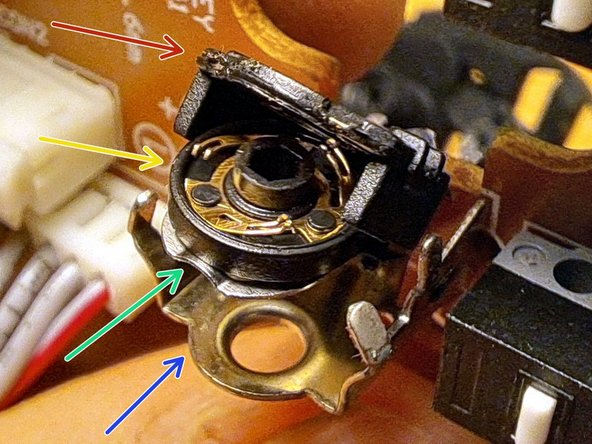
- Use the splunger and your fingers to band the board in the direction of the arrow. This step is needed to gain access to the internal components: clips, turntable and the electric contacts on the board.
- Use precision pliers or the tip of your finger to remove the turntable, marked in the picture by the yellow arrow.
- Use a cotton-swab and some isopropyl alcohol to clean the metal contacts on the turntable from dirt or corrosion. If needed use a brush or a pointy tool to remove stacked particles.
- Use a cotton-swab and some isopropyl alcohol to clean the metal contacts on the board of the encoder as framed by the red circle in the picture.
- Rearrange the constituent components in the correct order and direction.
- Using a pair of precision pliers band the metal casing brackets around the components of the encoder to secure them in the correct position.
- Reassemble the components to the state shown at the point 11 and test the mouse functionalities, especially the scrolling wheel.
- If the functionality is restored, reassemble the mouse.
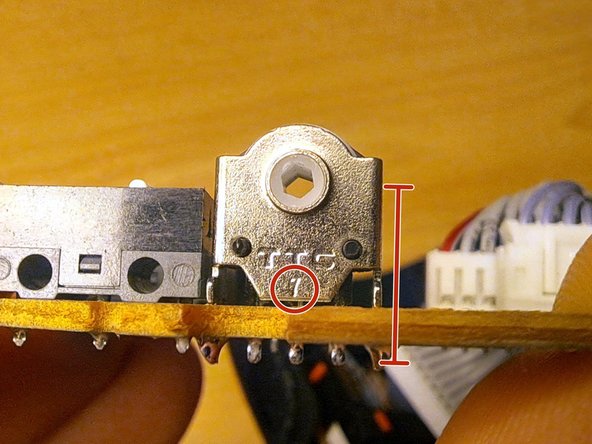
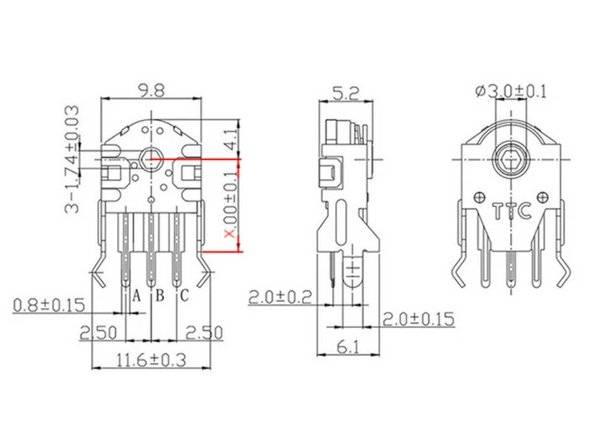
- The TTC Mouse Wheel Encoder a rotary encoder is designed to provide precise and reliable scrolling functionality for a variety of computer mice and input devices.
- The Anker vertical mouse features a 7mm TCC mouse wheel encoder. The size if the encoder can be read on the sensor, as shown by the red circle in the picture. Alternatively, the height can be measured as shown by the red line.
- In depth explanation about how a scroll encoder works
- On the internet a new encoder for replacement can be easily found for purchase as 7mm TCC mouse wheel encoder
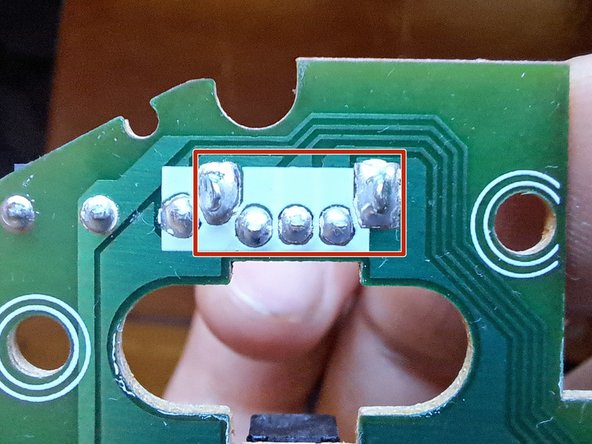
- The red box shows the pins of the encoder to desolder.
- Use a soldering iron and some solder wick or a desoldering pump to desolder all 4 pins.
- Solder the newly purchased encoder and test the functionality.