Soehnle kitchen scales repair
ID: 174361
Description: I found no information about how to repair the...
Steps:
- First, remove the batteries – better safe than sorry.
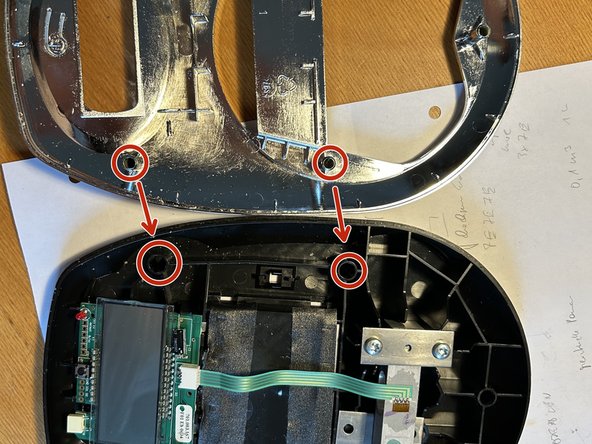
- Remove the two Torx screws. You will then hear a metal plate rattling inside. You will see this again later. But it might be a good idea to carefully turn the housing from this point onwards.
- Carefully remove the round weighing pan. It is a tight fit, but do not use force! You may need to jiggle it a little, but do not tilt it.
- The silver upper part is only fixed in place with long pins, so use gentle force to remove it. You may need to use plastic tools to help you along the edges.
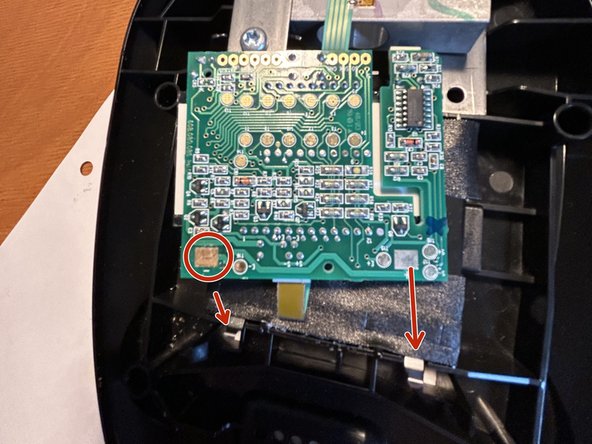
- The circuit board is also just clamped in place. There are two retaining brackets on the right and left. Pull these slightly apart and flip the circuit board upwards. Be careful, as the sensor cable is still attached.
- You will then see the gold contact with a small crack in the bottom left corner. This comes from the spring contact of the battery compartment (left).
- Troubleshooting: a) Bend the contact so that it rubs in a different place. b) Apply a little solder to it. None of this is the most sustainable, long-term solution, but it should work for the time being.
- Cause of the fault? You probably must press the button hard to turn the scale on and off. This can cause the circuit board to rub against the spring contact. Why did this only happen on the left? That's a question for Soehnle's quality management department. But they're probably already annoyed about how long the scale lasted. (20 years?)
- Carefully fold the circuit board back over and snap it into place. Make sure that the gold surfaces are positioned on the spring contacts of the battery compartment.
- Reattach the silver upper part of the housing and press both halves together firmly.
- Position the metal bracket so that it meets the plate holder. The two large holes in the lower part of the housing should serve as a guide for the screws.
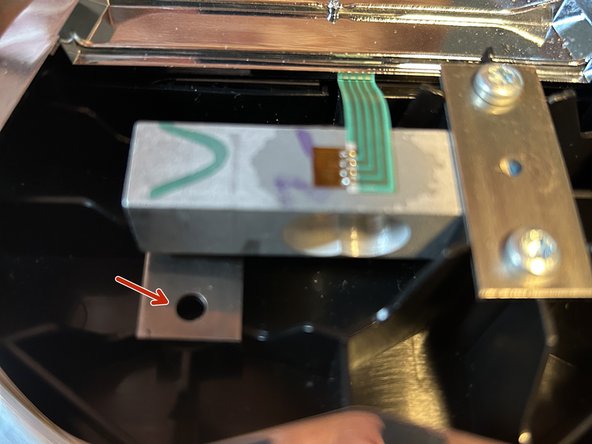
- Carefully press the weighing plate back over the sensor so that the holder hits the two holes on the right-hand side. Move the metal bracket as little as possible when doing so.
- Position the metal bracket on the underside of the device so that the holes are positioned exactly over the threaded holes of the weighing pan.
- Tighten both screws alternately. Caution: this is plastic, so if you tighten it to much, it will come loose! But nothing should wobble either. It is a measuring device, after all.
- Reinsert the batteries. Turn it over and switch it on. Hopefully, it will work again.