How to Open and Clean a PlayStation 5
ID: 174398
Description: Use this guide to open up and clean dust and...
Steps:
- If your PlayStation 5 is in its vertical orientation, flip it upside down so the stand is facing up.
- If your PlayStation 5 is in its horizontal orientation, skip to Step 6.
- Work on a flat surface to prevent your PlayStation from falling over.
- Use a coin or a flathead screwdriver to remove the 26.5 mm-long stand screw.
- Lift straight up to remove the stand.
- Insert the screw into the cubby on the bottom of the stand.
- Use a pair of tweezers or your fingernail to remove the cap from the cubby.
- Use your finger to press the cap into the screw hole.
- Twist the stand counterclockwise to close the cubby.
- If your PlayStation 5 is in its horizontal orientation, rest it on its face with the charging port facing up.
- Lift the stand straight up to remove it.
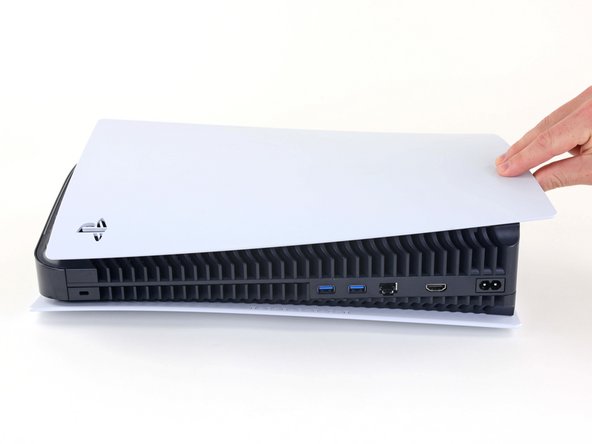
- Flip the device over so that the USB and ethernet ports are on the left side from your perspective.
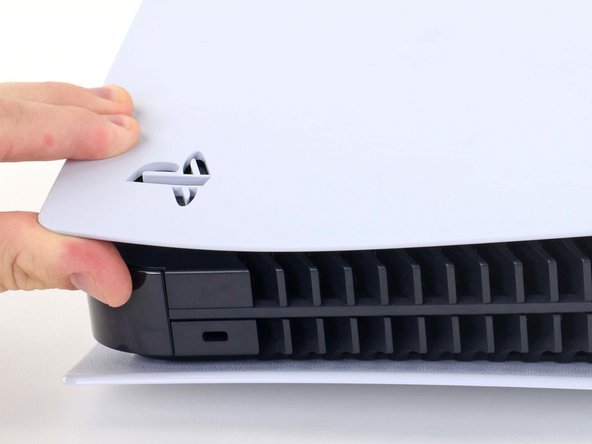
- Lift up the corner of the faceplate to unclip it from the case.
- While lifting up the corner, slide the faceplate towards the bottom of the device.
- Remove the right faceplate.
- Insert the flat end of a spudger underneath the grille and into the gap above the fan.
- Lift up with the spudger to pry the grille away from the case.
- Lift the grille away from the case to remove it.
- Use a T9 Torx Security driver to remove the four screws securing the fan shroud to the case:
- Two 23.3 mm-long screws
- One 11.4 mm-long screw
- One 31 mm-long screw
- Throughout this repair, keep track of each screw and make sure it goes back exactly where it came from to avoid damaging your console.
- Lift the fan shroud straight up to remove it.
- Insert the flat end of a spudger beneath the black wire cover and into the gap above the fan wires.
- Pry only on the wire cover, not on the fan wires themselves.
- Use the spudger to peel up the wire cover until you can grip it with your fingers.
- Use your fingers to peel off the wire cover.
- Use your fingers to grip the edges of the fan cable connector, and pull up to disconnect it from the motherboard.
- Always pull cables by their connectors and not the wires themselves.
- Lift the fan up and out of the case to remove it.
- Over time, dust will build up inside the fan and on the fan blades.
- Use a pair of tweezers to grab loose hairs and dust clumps off of the fan.
- Use a small dust blower or light compressed air to blow remaining dust off of the fan.
- Use a finger to keep the fan blades steady—it makes them easier to clean.
- If there's a layer of grime on the fan blades, use soapy water or isopropyl alcohol on a cotton swab to wipe them off.
- Lift up the corner of the faceplate with the PlayStation logo to unclip it from the case.
- While lifting up the corner, slide the faceplate towards the bottom of the device.
- Remove the left faceplate.
- Use a clean rag or microfiber cloth to wipe the insides of the faceplates clean.
- With both faceplates off, now's the time to clean everything underneath that's normally hidden.
- Two dust ports underneath the left faceplate can catch dust over time. Use a narrow vacuum attachment to clean out the ports.
- Depending on how dirty your console is, you might need to use a soft bristle brush to dislodge more dust and grime.
- Using an anti-static brush or a new toothbrush, clean any dust out of hard to reach areas and off of the rear vents.
- Use a dust blower to blow any loose dust out of the console and a cloth to wipe the vents clean.
- Use a dust blower, brush, and a cloth to clean the inside of the fan cavity while the fan's removed.
- The PS5 draws air through the heatsink fins, and they may clog with dust and debris over time.
- If you can see dust buildup in the heatsink, use a dust blower to blow it clean.
- Remember: use this time to clean any other dirty internal surfaces before you seal your console back up. Happy gaming!