Xbox 360 Racing Wheel - Fix variable resistance pot
ID: 174501
Description: This guide is for Xbox 360 Wireless Racing...
Steps:
- Remove 8 screws from the base (two are covered by the sticker), using a TX10 security screwdriver (i.e. with the security hole at the top)
- Remove the additional 8 screws from the back of the wheel assembly, again, using the TX10 security screwdriver.
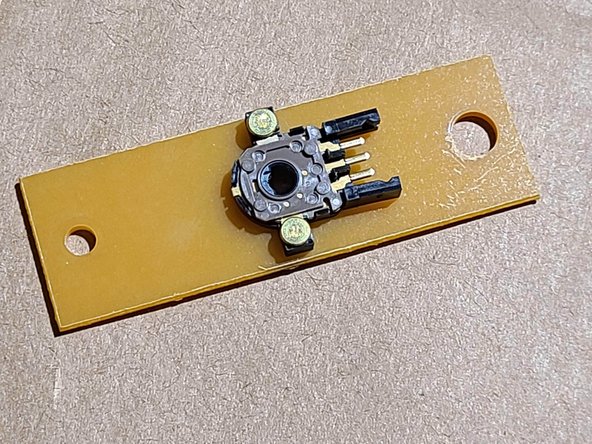
- Identify the small beige panel with the pot on it. Place the steering wheel in the middle position and note the pot orientation (flat area of white guide will be towards to left.
- Disconnect the plug.
- Using a TX10 screwdriver, remove the panel, and place it on your workbench.
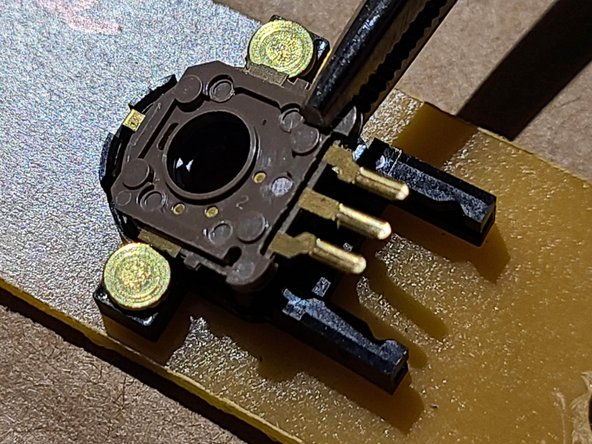
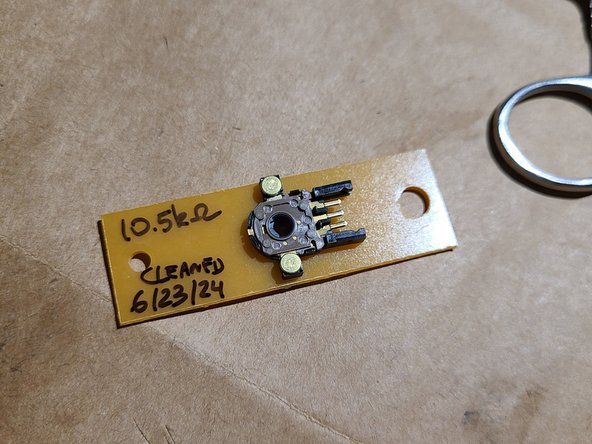
- Potentiometer is a 10 k-ohm, and it is difficult to find a replacement, but it might simply need to be cleaned.
- Note that the rivets may impede the cover from coming up, so use the side that has the most clearance from the rivet. Then using two jewelers screwdrivers, carefully lift at one corner while carefully bending the tab on that side. Twist just enough to allow the cover of the pot to get past the tab.
- Once the pot is clear of the tab, use a small pair of pliers to gently extract the top portion of the pot.
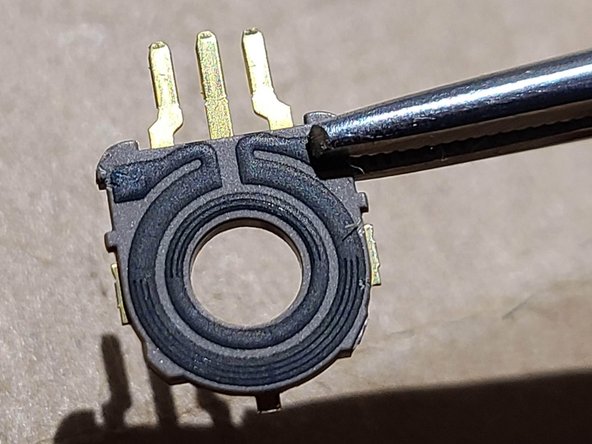
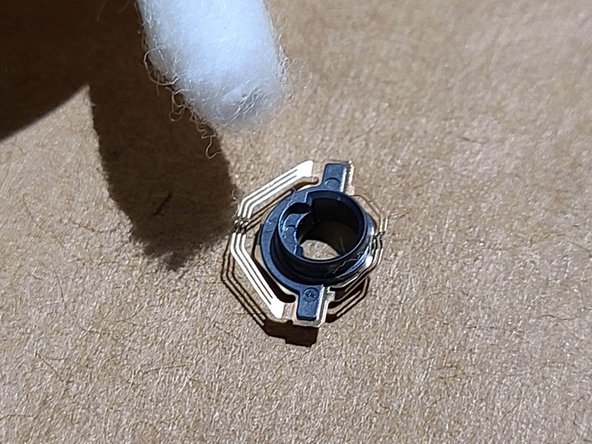
- Place the cover of the pot upside-down on your workbench
- Using a cotton swab moistened with alcohol, gently clean the pot top cover traces. Notice the grey residue on the swab.
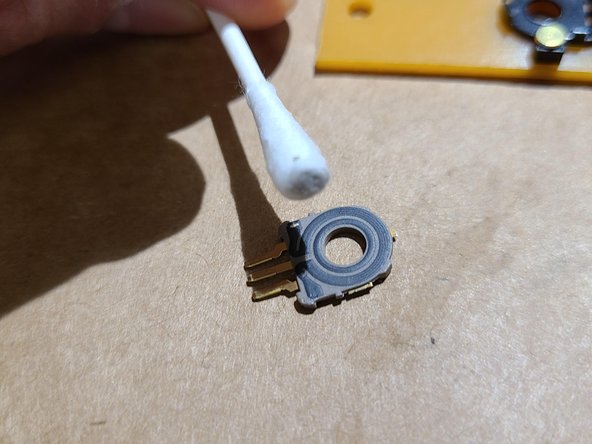
- Remove the wiper from the pot body. Note: the wiper is extremely small and thin, so be extremely gentle.
- Once on the workbench, use a clean swab moistened with alcohol, and lightly clean the wiper contacts, applying very little pressure so as not to change the shape of the wipers.
- Using a screwdriver down the middle of the board for alignment, drop the wiper back into the body of the pot.
- Align the pot cover into the grooves at the back (the side opposite from the connector), the gently press down until it clicks into the tabs. Note that the metal extensions of the pot cover interfered with the rivets slightly, and a screwdriver was used to get past the rivets.
- Re-install the pot board with the 2 TX10 screws.
- Reconnect the connector.
- Re-assemble the bottom cover and base.