Lenovo ThinkPad T16 Gen 3 Screen Bezel Replacement
ID: 174588
Description: Follow this guide to replace the screen bezel...
Steps:
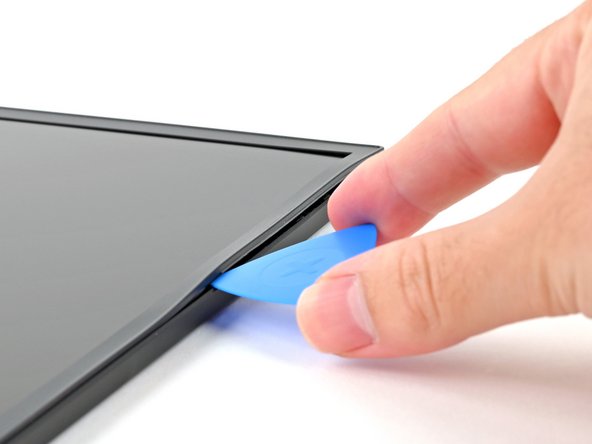
- Insert the tip of an opening pick at a downward angle between the bezel and screen assembly, near the top right corner.
- Lower the pick so it's flat with the screen and the tip is under the screen bezel.
- Don't insert your pick further than the tip, as you might damage the display.
- If your bezel doesn't have clips, this guide can still be helpful, but it is recommended to take extra caution since the adhesive-only bezels are extremely fragile and designed to be consumed, not reused.
- Slide your opening pick down the right edge to unfasten the bezel clips.
- Re-insert your opening pick near the top right corner.
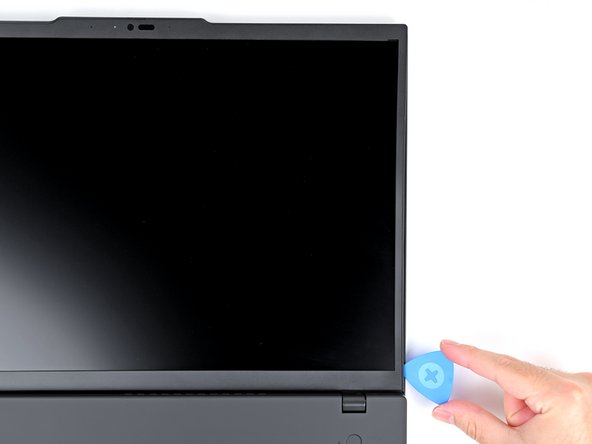
- Slide your opening pick around the top right corner to unfasten the frame clips, stopping before you hit the webcam.
- Remove the opening pick.
- Re-insert your pick to the left of the webcam and slide it towards the top left corner and down the left edge to unfasten the remaining clips.
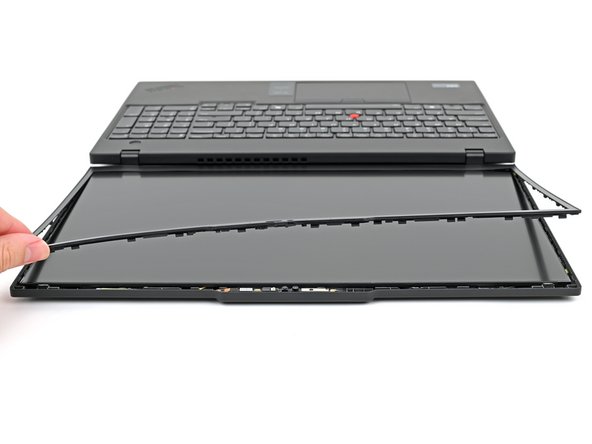
- Gently lift the bezel on the right, top, and left sides to ensure all the clips are fully unfastened.
- The bottom edge of the bezel is held in place with strong adhesive and clips.
- Ensure you're separating the bottom edge of the bezel from the protective film and not the protective film from the screen. If the film starts to peel up, gently press it back into place before you continue peeling up the bezel.
- Use your fingers to slowly peel the bottom edge of the bezel from the protective film on the display.
- If you're having a hard time separating the adhesive, use your opening pick to slice through the adhesive, being very careful not to cut the film. If it is still difficult, use an iOpener or hair dryer to lightly heat the bottom edge of the bezel.
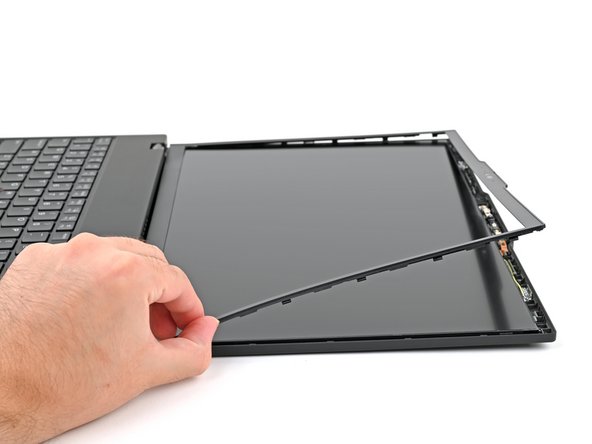
- Once the adhesive is completely separated, lift the bottom edge of the bezel straight up to unfasten its clips.
- Remove the bezel.
- To re-install this bezel or install a new one, you'll need replacement adhesive. If your replacement does not include adhesive, use thin, double-sided tape. Use the 5mm strips for the bottom, and the 1mm strips around the top and sides. Remove all residue from the original adhesive before replacing.