Microsoft Surface Laptop 7 (13.8-inch) SSD Replacement
ID: 174592
Description: Follow this guide to replace or upgrade the SSD...
Steps:
- Before starting this repair, allow your laptop's battery to drain below 25%. A charged battery may catch fire if damaged.
- Unplug all cables and fully shut down your laptop.
- Close your laptop and lay it down so the rubber feet are facing up.
- Gently slide one arm of your angled tweezers into the recess near the upper right edge of one of the feet.
- You can also use the point of a spudger. However, you're more likely to damage the foot, if you're reusing it.
- Use your tweezers to pry up and remove the foot.
- The feet may eject very quickly—be careful not to lose them.
- Repeat the process to remove the remaining feet.
- To install a foot, align the pegs on the bottom with their cutouts in the frame and press the foot into place.
- Throughout this repair, keep track of each screw and make sure it goes back exactly where it came from.
- While the Surface Laptop 7 uses Torx Plus screws, standard Torx bits work. Make sure to apply constant, downward force to prevent stripping.
- Use a Torx Plus 5IP screwdriver to remove the four 4.5 mm‑long screws (with washers) securing the lower case.
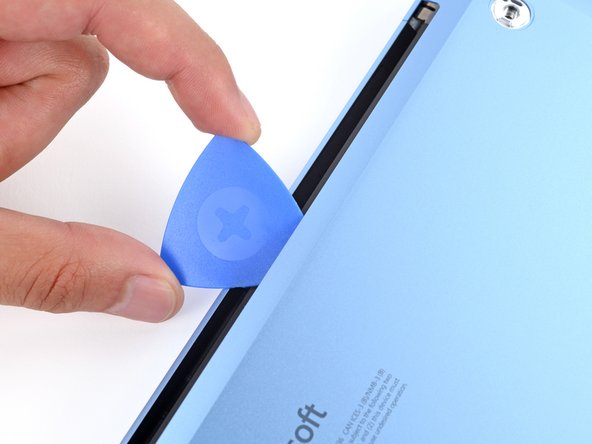
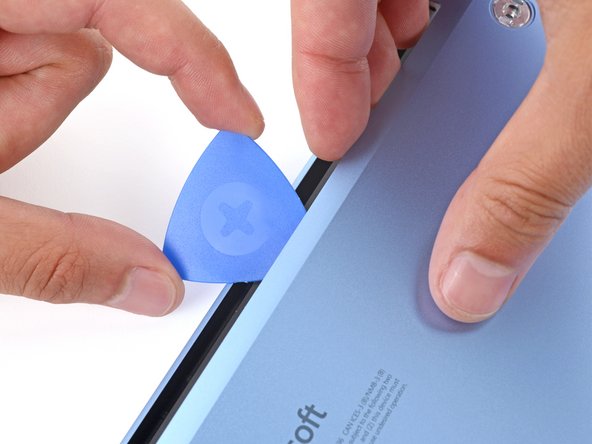
- Insert the tip of an opening pick under the top edge of the lower case, about an inch (2.5 cm) to the left or right of the Microsoft logo.
- Don't insert the pick near the outer edges or you'll damage the antenna bar.
- Twist the pick to lift the lower case enough that you can grip it with your hand.
- Lift the lower case and remove it.
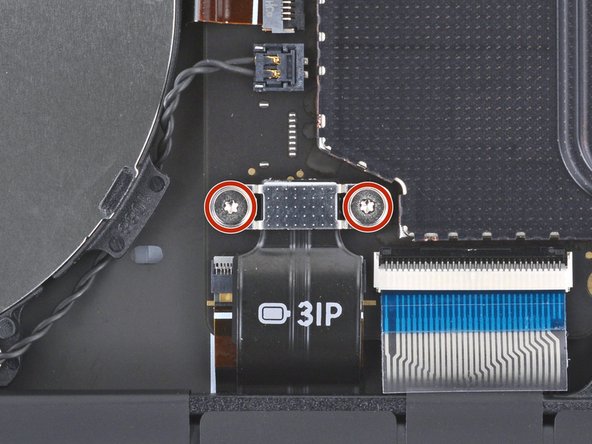
- Use a Torx Plus 3IP screwdriver to remove the two 2.3 mm‑long screws securing the battery connector cover.
- Use tweezers or your fingers to remove the battery connector cover.
- Insert the flat end of a spudger under the top edge of the battery press connector and pry up to disconnect it.
- To reconnect a press connector, align it over the socket and gently press down on one side until it clicks into place, then press down on the other side. It may take a few tries to align the connector—don't try to force it into place.
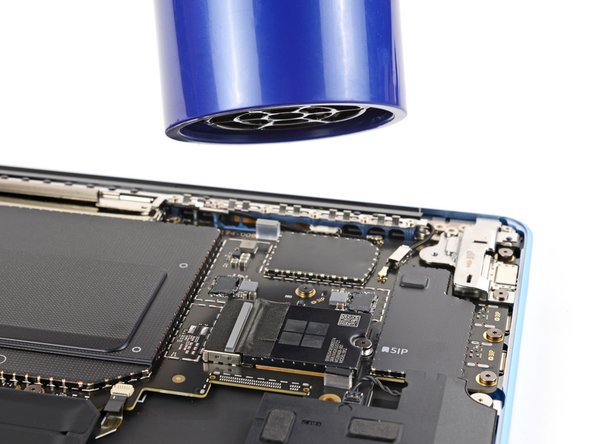
- Heat an iOpener and lay it on the SSD for one minute to heat the tape on its left edge.
- Alternatively, you can use a hair dryer to lightly heat the tape.
- Carefully insert the point of a spudger under the SSD tape and lift until you can grip the tape with your fingers.
- Be careful not to tear the tape, since you'll reuse it during reassembly.
- Use your fingers to gently peel the tape from the SSD.
- You don't need to fully remove the tape, it just needs to be off the SSD.
- Use a Torx Plus 5IP screwdriver to remove the 2.9 mm‑long screw securing the SSD.
- With the screw removed, the SSD may pop up at a slight angle.
- During reassembly, gently hold the SSD down while installing its screw.
- Grip the SSD by its edges near the screw notch and pull it straight out of its socket.
- During reassembly, make sure the tape is completely out of the way and insert the SSD at a slight downward angle into its socket.
- The SSD is notched so you can only insert it in the correct orientation.