Pine64 PineTab 2 Touch & Front Glass Replacement
ID: 175687
Description: This guide shows you how to replace a broken...
Steps:
- Shut your device off
- Remove the SD-Card
- Use the opening tool to lift the panel from the back cover
- The panel is clipped to the frame so you should feel the clips release
- Sliding the opening tool sideways after opening the first clips helps opening others
- You will need to open clips on all 4 sides
- Lift the panel out of the back and put it on a soft surface with the glass down without stretching the flex cable connecting the back and the mainboard
- The element forming the three buttons will probably fall out at this point. Put it aside but remember to put it back into the back cover before closing the device
- The wifi antenna is glued to the frame
- Carefully peel it of without tearing it apart
- It is sticky enough to hold again later without extra glue
- Unscrew the speaker (mounted at the top with metal surfaces)
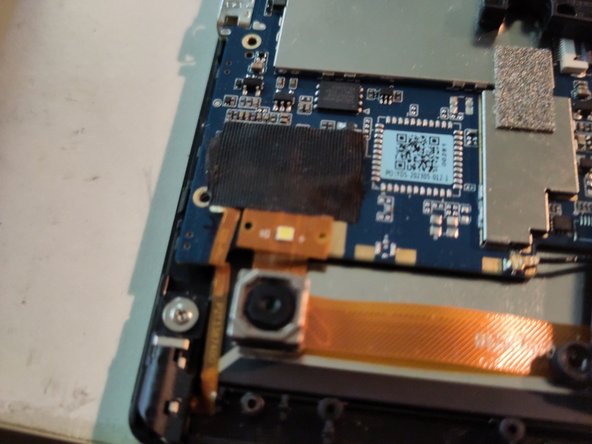
- Lift the front camera out of its hole. It has no screws or clips
- Move those parts inwards so they rest on the back of the LCD
- Unscrew and lift aside the black plastic that holds the back camera in place
- The camera itself can remain
- Remove the washer screw holding the headphone jack in place (next to the camera)
- Carefully lift the round sensor from its position in the frame
- Remove the speaker cables from their trenches in the black support element, it may be covered by tape
- Unscrew the element and put it aside
- Remove the flat cable connecting the touch from the mainboard by flipping up the black latch holding it in place
- Remove the screws holding the mainboard
- Lift it up carefully to access the LCD clips underneath
- Unclip the LCD panel from the front glass panel by carefully wedging an opening pick between the panel and the clips holding it in place
- You can now swap the front glass and touch unit
- The replacement unit has a protective foil on the inside. You need to remove that before installing the new glass
- The foil started to leave residue on the glass so i used a hair dryer to weaken the glue